Integrating with D2L Brightspace
Janison Insights can be integrated with the D2L Brightspace LMS. The following setup steps need to be completed in each system to configure the integration.
Brightspace setup
Register an LTI tool
The first step in Brightspace is to register Janison Insights as an LTI tool.
Tip
The data shown in the images below provides an example of what to enter into Brightspace. When configuring Brightspace to integrate with Janison Insights, you will need to enter the correct details for your organisation.
- Log into Brightspace as an Administrator.
- Select the Admin Menu and then choose Manage Extensibility under the Organization Related heading.

- Select LTI Advantage.

- Select Register Tool.

- The Register a Tool screen displays. Complete the following steps:
- Enter a name for the tool in the Name field.
- Enter a description of the tool in the Description field (optional).
- Enter the URL of the site you are integrating with in the Domain field.
- Enter the URL of the site you are integrating with, appended with auth/OpenIdConnectAuthorize, in the Redirect URLs field.

- If needed, you can add further redirect URLs by selecting Add Redirect URL.

- Enter the URL of the site you are integrating with, appended with auth/OpenIdConnectLogIn in the OpenId Connect Login URL field.
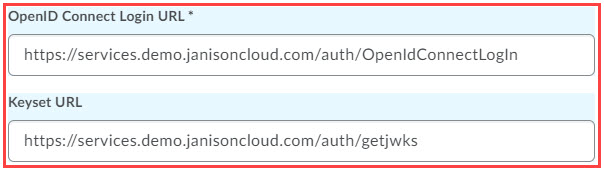
- Enter the key from Janison Insights in the Keyset URL field.
- This value can be found in Janison Insights, under Settings > External LTI Platform Settings > View my Public Key.

- This value can be found in Janison Insights, under Settings > External LTI Platform Settings > View my Public Key.
- Select the checkboxes for all three Extensions.

- Select the Send Institution checkbox (optional).
- When this is checked, the Institution Role mapping from the IMS Configuration is included in the launch. Users Context Role will be included, unless the security setting at the deployment is set to ‘anonymous’.

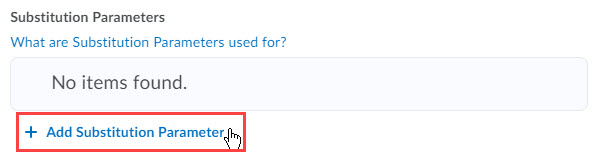
- Select Add Substitution Parameter (optional).
- Substitution parameters allow specific values to be dynamically substituted for custom parameters requested by a third-party tool.
- This data is used to support features of third-party tools.
- Substitution parameters automatically cascade from the Registration and/or Deployment to the Link, parameters that have been inherited will appear in grey text and not be editable.
- If an identical substitution parameter is created at a lower level, it will supersede parameters created at the the higher level.
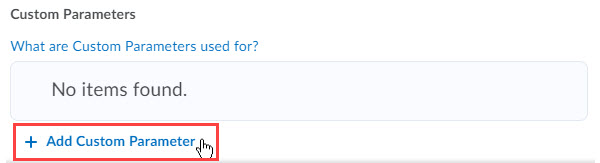
- Select Add Custom Parameters (optional).
- Custom parameters are exactly the same as substitution parameters, however, the parameters can be variable instead of constant, based on the needs of an individual third-party tool.
- Similar to substitution parameters, custom parameters automatically cascade from the Registration and/or Deployment to the Link and if inherited will be in grey text and not editable.
- If an identical custom parameter is created at a lower level, it will supersede parameters created at the the higher level.
- Select Register.

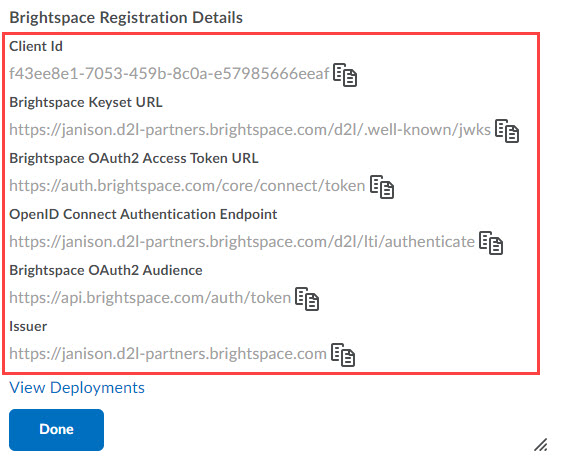
- On successful registration, the Brightspace Registration Details screen displays with a series of six values.
Important
Copy each value by selecting the Copy icon next to it. Save these values, as you will need to enter them into Janison Insights later in the integration setup.
Deploy tool registration
After successfully registering Janison Insights as an LTI tool, the next step is to deploy the tool to make it available to courses within Brightspace.
- Navigate to the Deploy Tool screen by using one of the following methods:
- If you are still on the Brightspace Registration Details screen, select View Deployments.

- Navigate via the menu:
- Select the Admin Menu and then choose External Learning Tools under the Organization Related heading.
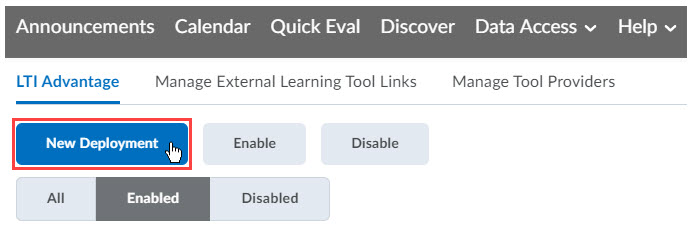
- Select LTI Advantage.

- Select New Deployment.
- Select the Admin Menu and then choose External Learning Tools under the Organization Related heading.
- If you are still on the Brightspace Registration Details screen, select View Deployments.
- The Deploy Tools screen displays. Complete the following steps:
- Select the name of the Janison Insights tool you registered in the previous step from the Tool drop-down field.
- Enter a name for the tool in the Name field.
- Enter a description for the tool in the Description field (optional).
- Leave all three Extensions checkboxes selected.

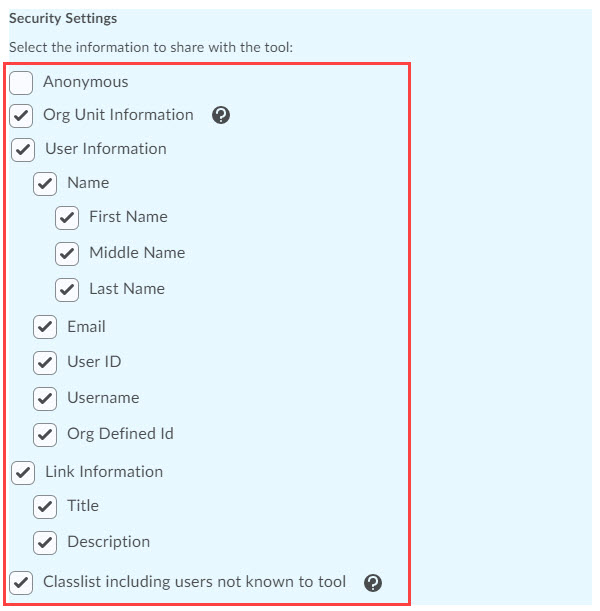
- Under Security, select the checkboxes for the options as required.
Tip
These options control the information shared with the Janison Insights tool. Generally your settings will be the same as shown below.
- Select Add Org Units.
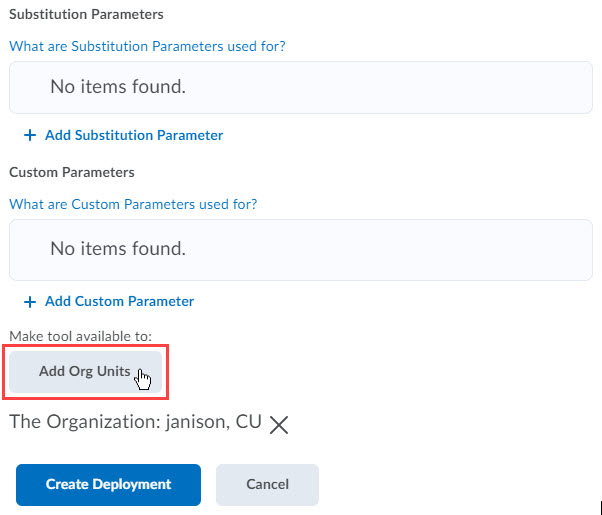
- The Add Org Units screen displays.
- Select Choose Org Unit Type (optional) and change the filtering option as required.
- Select the checkbox next to each course you want to be able to use the Janison Insights tool once it has been deployed.
- Select Add.

- The Add Org Unit screen closes and the selected courses are listed on the Deploy Tool screen under Make tool available to:.
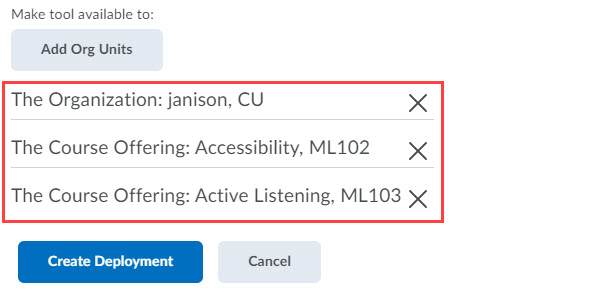
- When you are happy with all the settings on this screen, select Create Deployment .

- The Brightspace Deployment Details screen displays.
Copy the Deployment Id value by selecting the Copy icon next to it. Save this value, as you will need to enter it into Janison Insights later in the integration setup.

Create LTI links
The next step is to create the links users can use to run the newly deployed Janison Insights learning tool.
- Navigate to the Links screen by using one of the following methods:
- If you are still on the Brightspace Deployment Details screen, select View Links at the bottom of the screen.

- Navigate via the menu:
- Select the Admin Menu and then choose External Learning Tools under the Organization Related heading.
- Select LTI Advantage.
- In the list, select the Deployment Name of the Janison Insights tool you deployed in the previous step. You can use the search function if the list is long.
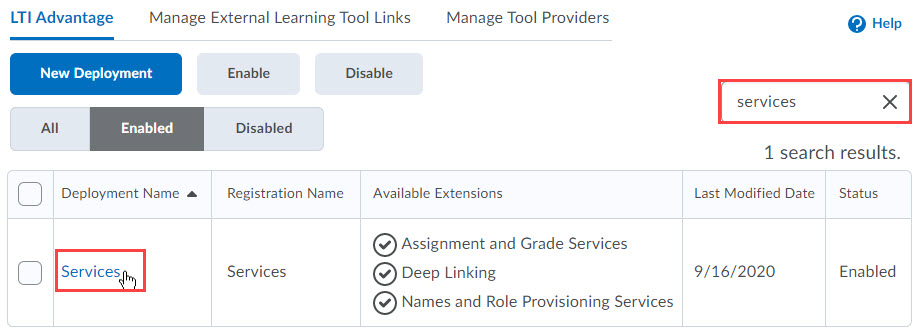
- The Brightspace Deployment Details screen displays. Select View Links at the bottom of the screen.
- Select the Admin Menu and then choose External Learning Tools under the Organization Related heading.
- If you are still on the Brightspace Deployment Details screen, select View Links at the bottom of the screen.
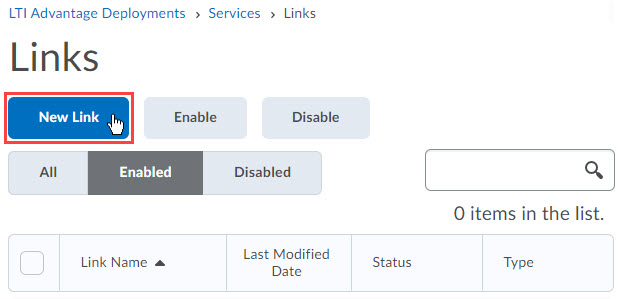
- The Links screen displays. Select New Link.
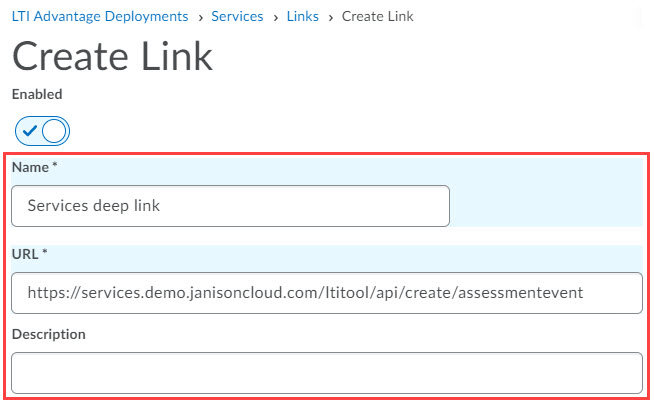
- The Create Link screen displays. Complete the following steps:
- Enter a name for the link in the Name field.
- Enter a URL in the URLfield.
Tip
This is the URL that will be hit after authentication. In the following example, we are hitting a deep link URL from the Janison Insights LTI API.
- Enter a description for the link in the Description field (optional).
- Select link type in the Type drop-down field. Generally you will choose Deep Linking Quicklink.

- Enter a values in the Width and the Height fields to set the size of the link.

- Select Save and Close.

- Repeat these steps for each link you need to create for your users.
Verify IMS mappings
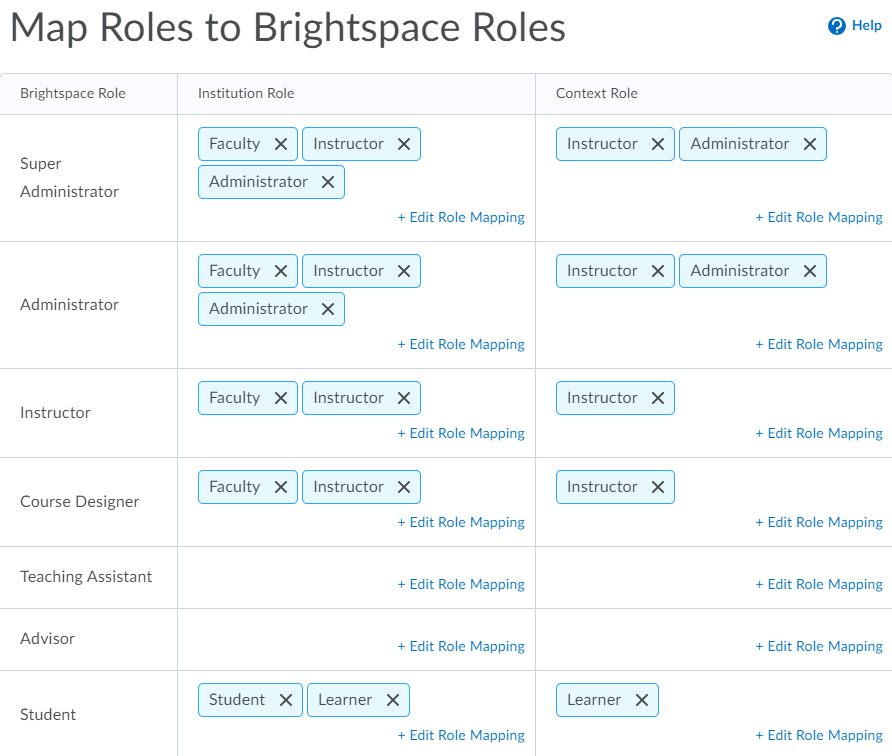
IMS mappings allow custom roles in learning systems to be mapped to the IMS definition of standard role types. Defining these will ensure Janison Insights recognises the Brightspace users and their roles.
- Select the Admin Menu and then choose IMS Configuration under the Organization Related heading.
- On the Roles tab, ensure the roles are mapped as shown in the image below.
You have now completed all Brightspace setup steps. Next, follow the Janison Insights setup steps below.
Janison Insights setup
Once you have completed the Brightspace setup steps, use the following steps to configure the integration on the Janison Insights side.
Add a client
Next you will need to add the Brightspace client to Janison Insights and enter the external platform settings.
Tip
For this step, you will need the six Brightspace Registration Details values you copied and saved when setting up the integration in Brightspace. Refer to the Register an LTI tool step in Brightspace setup above for more details.
- In Janison Insights, navigate to Settings > LTI Platform Settings.
- The External LTI Platform Settings screen displays. Select Add Client.
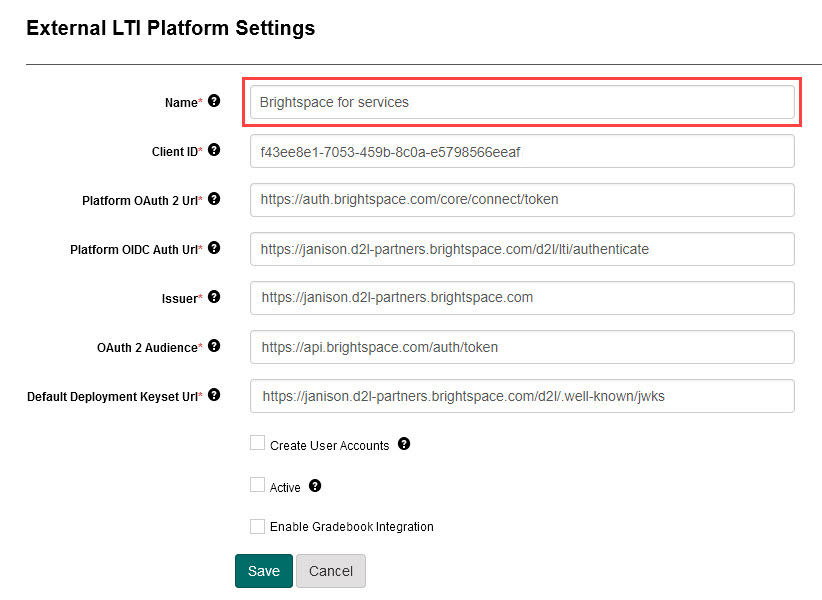
- The External LTI Platform Settings screen with editable form displays. Complete the following steps:
- Enter a name of your choice in the Name field.
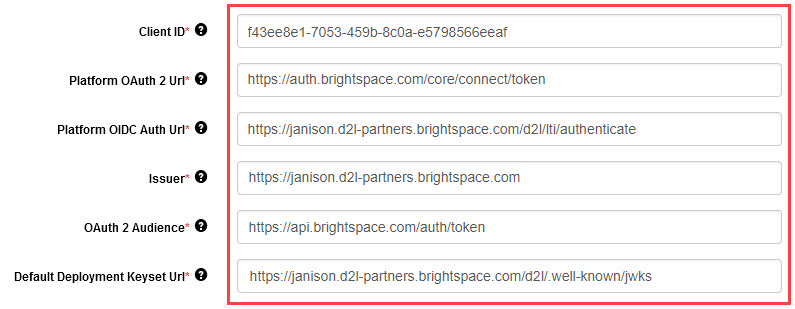
- Paste the values you copied from Brightspace into the fields:
- Client Id value the Client ID field.
- Brightspace OAuth2 Access Token URL value into the Platform OAuth 2 Url field. This is the URL from Brightspace that is used to get an OAuth token to access services such as grades and assignments.
- OpenID Connect Authentication Endpoint value into the Platform OIDC Auth Url field. This is the URL to the open id connection endpoint in Brightspace where the token will be generated.
- Issuer value into the Issuer field. This is the url used to identify the issuer platform and is used for Janison Insights to check the request has come from a known Issuer.
- Brightspace OAuth2 Audience value into the OAuth 2 Audience field. This is required for Janison Insights to use access tokens and services with Brightspace.
- Brightspace Keyset URL value into the Default Deployment Keyset Url field. This is the endpoint used to get the JSON Web Keys from Brightspace and verify Brightspace’s authentication response.
- Select the Create User Accounts checkbox. This allows a new user account to be created when an unknown user ID is passed to Janison Insights from Brightspace.
- Select the Active checkbox. This permits Janison Insights to connect to Brightspace.
- Select the Enable Gradebook Integration checkbox. This allows scores to be sent between the systems.

- Select Save.

- Enter a name of your choice in the Name field.
Authorise tool deployments
Next the Brightspace deployments must be authorised for use in Janison Insights.
Each deployment relates to a specific deployment plugin type and must have a default main role that is applied to provision sandbox access to the system. The role determines what the user logged in with this role can see by default.
Tip
For this step, you will need the the Deployment Id value you copied and saved when setting up the integration in Brightspace. Refer to the Deploy tool registration step in Brightspace setup above for more details.
- While still on the External LTI Platform Settings editable screen, select the Edit icon next to the Tool Deployments expandable section.

Then complete the following steps:
- Select the Administrator, Instructor or Learner option from the LTI Role Key Value drop-down field.

- Paste the Deployment Id value you copied from Brightspace into the Deployment Id field.
- The Deployment Keyset URL field is automatically populated by Janison Insights, using the value you pasted in when adding the client to the system in the Add a client step.
- Select a Janison Insights role for this tool deployment from the Default Main Role drop-down field.
- Select a scope for the Janison Insights role from the Scope of this Role drop-down field.
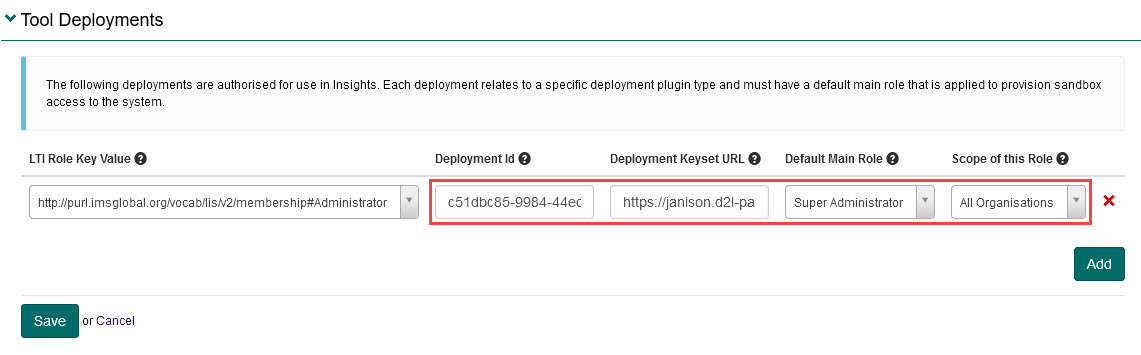
- Select Add.

- Add more tool deployment roles as required by repeating steps a to f.
- When you have added all required roles, select Save.
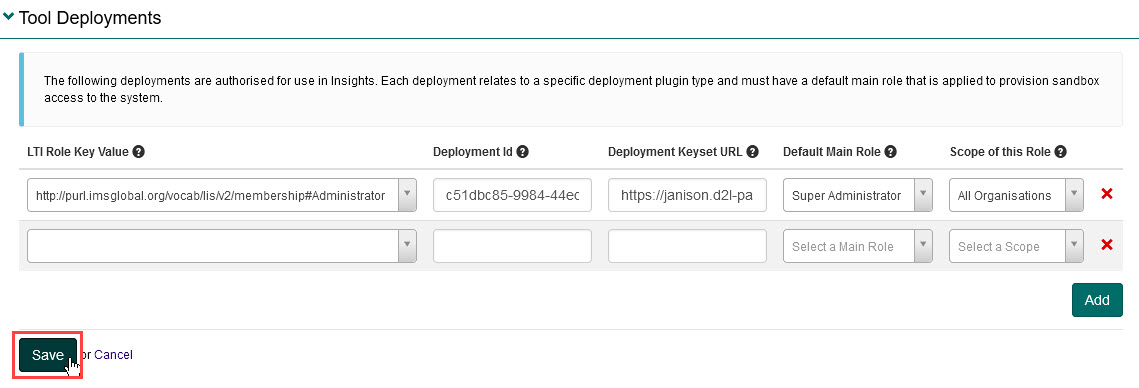
- The image below shows an example of how your tool deployments may look:

- Select the Administrator, Instructor or Learner option from the LTI Role Key Value drop-down field.
Set up any extra default roles required for users
Next any extra Janison Insights roles you want to assign to the LTI Role Key Values need to be set up.
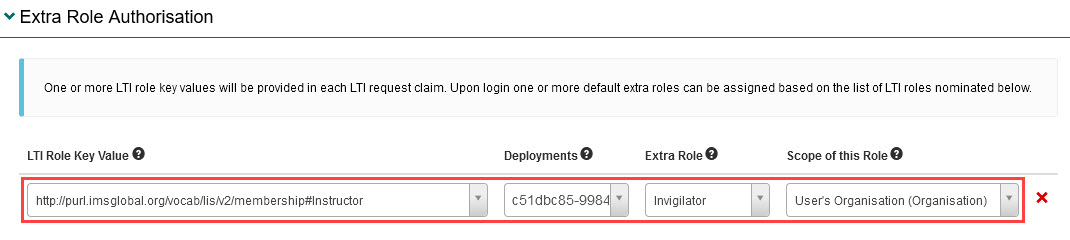
For example, if you have set the LTI Instructor role to be Test Manager by default in Janison Insights but you also want to the Instructor role to be assigned Invigilator in Janison Insights, you will need to add the extra role here.
- While still on the External LTI Platform Settings editable screen, select the Edit icon next to the Extra Role Authorisation expandable section.

Then complete the following steps:
- Select the Administrator, Instructor or Learner option from the LTI Role Key Value drop-down field.
- Select one of the deployments you created in the Authorise tool deployments step above from the Deployments drop-down field.
- Select an extra Janison Insights role to be added for the selected LTI Role Key Value from the Extra Role drop-down field.
- Select the scope of the extra role being added from the Scope of this Role drop-down field.
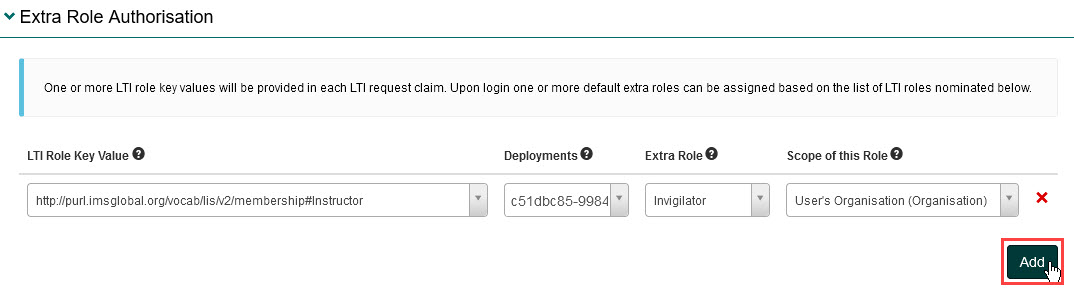
- Select Add.
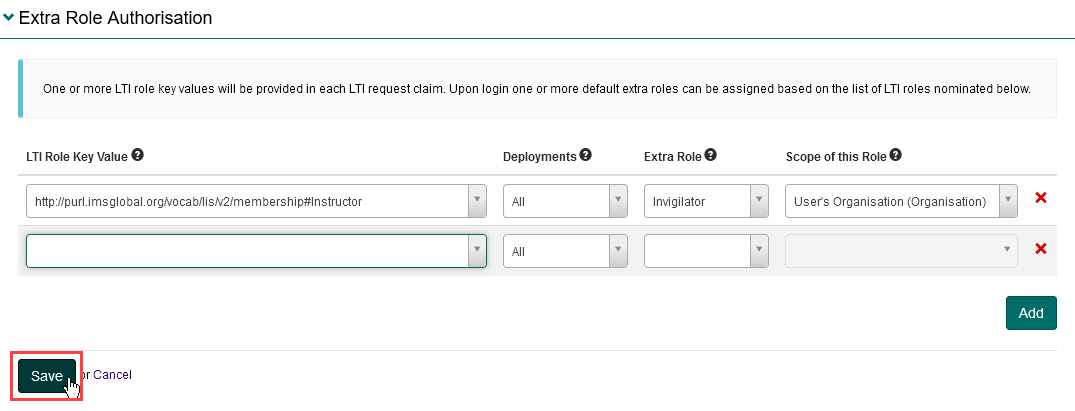
- Add more extra roles by following steps a to e.
- When you have added all required extra roles, select Save.
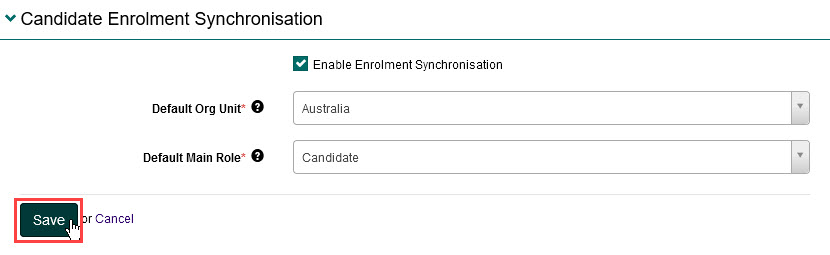
Enable synchronisation of candidate enrolments
Enabling this option and selecting default values for Organisation Unit and Main Role means candidates created from the Sync Exam Class function will be assigned these values.
- While still on the External LTI Platform Settings editable screen, select the Edit icon next to the Candidate Enrolment Synchronisation expandable section.

Then make the following changes:
- Select the Enable Enrolment Synchronisation checkbox.
- Select a default Organisation Unit from the Default Org Unit drop-down field.
- Select a default main Role from the Default Main Role drop-down field.

- Select Save.
You have now completed all the steps required on the editable External LTI Platform Settings screen.
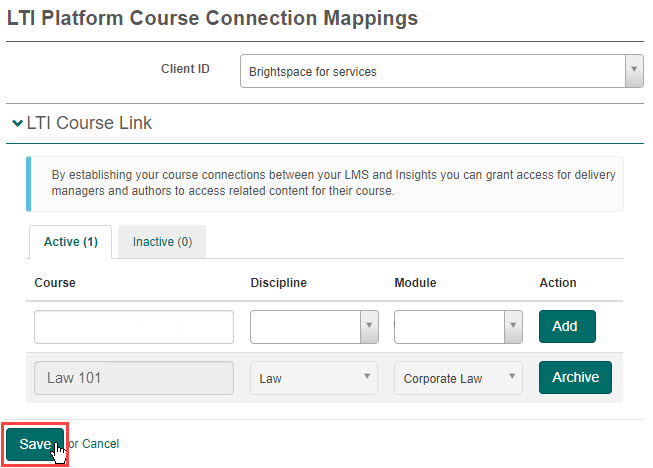
Map required courses
You now need to create LTI platform course connection mappings between Brightspace and Insights. These are used to grant access for Delivery Managers and Authors to access content related to their course.
- In Janison Insights, navigate to Settings > LTI Course Link Settings.
- The LTI Platform Course Connection Mappings screen displays. Select the required Client ID from the Client ID drop-down field.

- Enter the course name in the Course field.
- Select the course’s discipline from the Discipline drop-down field.
- Select the course’s module from the Module drop-down field.
- Select Add.

- Repeat steps 3 to 6 to map all required courses.
- Select Save.
You have now completed all Janison Insights setup steps.
How Janison Insights is used within Brightspace after integration
Once integration is configured, administrators and candidates can access Janison Insights from within Brightspace.
Administrator experience
Administrators can access Janison Insights via integrated navigation within Brightspace to author tests, manage delivery and mark tests.
For example, accessing the event overview page in Janison Insights from within Brightspace:

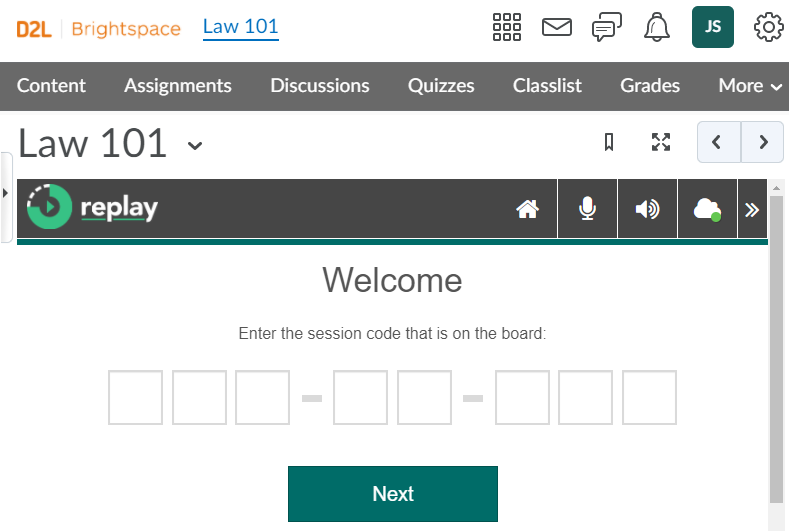
Candidate experience
Candidates can access Janison Insights via integrated navigation from within Brightspace to view upcoming test events during the term, auto-login and undertake their test in the Janison Replay Test Player. Returned test results can be viewed in their grade-book.
For example, accessing a Janison Insights test from within Brightspace: