What are Groups and Group Types?
A Group is a collection of users that are grouped together for various purposes such as grouping markers or test-takers.
For example, a Group may contain students undertaking tests for particular subjects such as:
- Astronomy
- Cardiovascular
- Climate change
Groups are used to:
- Enrol multiple test-takers into an assessment event.
- Add multiple markers to a marking project.
- Send announcements
- Archive users.
- Marking Team (Group Type)
- Astronomy (Group)
- Cardiovascular (Group)
- Climate change (Group)
The Groups contain Markers with expertise in those subjects and would be used to quickly assign them to a marking project.
Another example might be:
- Exam class (Group Type)
- Astronomy (Group)
- Cardiovascular (Group)
- Climate Change (Group)
Important
Only people with an Administrator role can view or add Groups and Group Types.
Create group Types
You can add a group type and the related group using these steps.
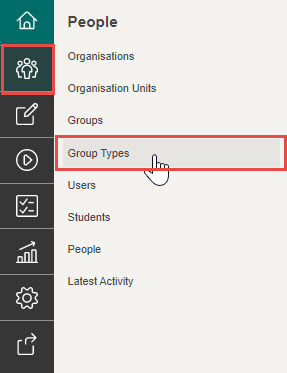
- Select the People icon in the Menu, then select Group Types.
- Select the Add Group Type button.

- Complete the New Group Type information:
- Enter a name for the new Group Type in the Name field.
- Enter a brief description about the Group Type in the Description field (this is optional). This description is for your reference and will not display in other areas of the system.

From here, you also have the ability to add Groups to the newly created Group Type.
Tip
If you want to link Groups to an Organisation or Organisation Unit, you will need to add the Groups from the Groups section. In this case, select the Save Group Type button and skip the following steps.
- Add Groups by entering a new Group name in the Enter a new group field, then select the + icon, or select Enter on the keyboard, to add the group.

- Repeat step four for each new Group you want to create. Once finished, select the Save Group Type button to save the new Group Type and Groups.
View and edit a group type
Group Types can be accessed from the Group Types tab under People in the Menu. This screen displays any Group Types which have already been created.

Tip
You can reorder the list of Groups by Display Name or Last Updated On by selecting the appropriate column heading.
From this screen you can:
- Search for a Group Type
- View a Group Type’s details
- Edit a Group Type
Create groups
There are three ways you can create Groups:
- Manually adding them from the Group Types section – best used when you need to create Group Types (see the Create Group Types section)
- Manually add a single Group from the Groups section – best used when the Group Types already exist or aren’t needed, or you want to link the Group to an Organisation or Organisation Unit
- Importing multiple Groups from a file
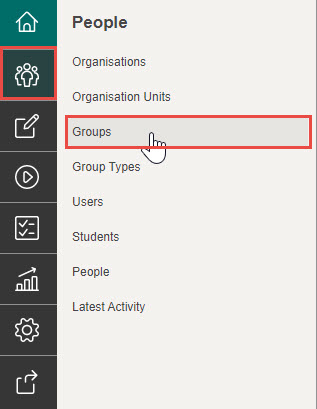
To create Groups, select the People icon in the Menu, then select Groups.
Add a single group
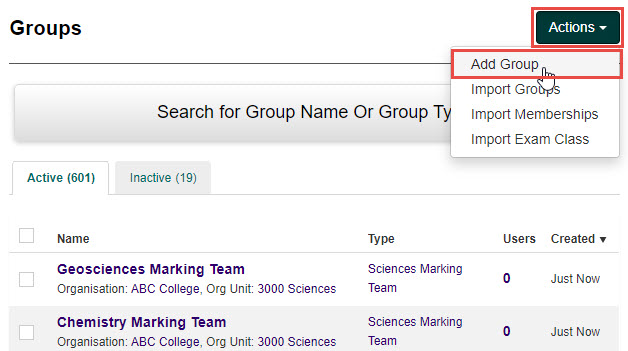
- Select Add Group from the Actions drop down button.
- Complete the New Group information:
- If you would like to link the Group to an Organisation, select it from the Organisation drop-down field.
- If you would like to link the Group to an Organisation Unit, select it from the Org Unit drop-down field.
Tip
Leave the Organisation and Org Unit fields blank if you would like the Group to be standalone. For more information see the Introduction to people section.
- If you would like to link the Group to an existing Group Type, select it from the Group Type drop-down field.
- Enter a name for the new Group in the Name field.
- As you type the name, the Group ID field will automatically populate. You can leave this as is, or edit to one of your choosing.
- Enter a brief description about the Group in the Description field (this is optional).
- The new Group defaults to active. Uncheck the Is Active checkbox if you want to create the Group but have it remain inactive for now.

- Select the Save Group button to save the new Group
Import multiple groups
- Select Import Groups from the Actions drop down button.

- Complete the following:
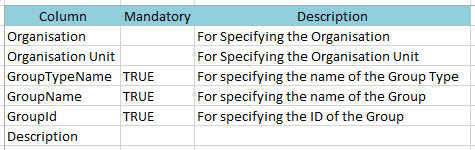
- Select the Template link to open a sample Excel template. The template will provide you with sample data. The Supported Attributes tab has information on requirements for the different fields.
- Open the downloaded Excel template, enter all required data and then save the template to your local machine.
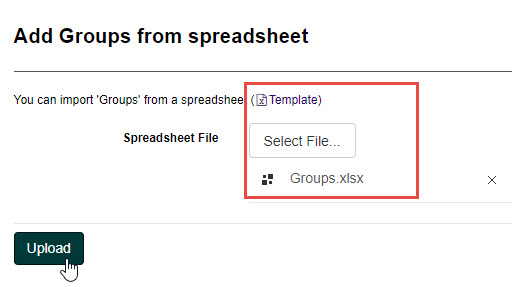
- Select the Select File button to locate and select the saved file on your local machine.
- The uploaded file will display. Select the Upload button to complete the import process.
- Select the Template link to open a sample Excel template. The template will provide you with sample data. The Supported Attributes tab has information on requirements for the different fields.
- If you are updating Groups previously imported, select the Update Group details based on spreadsheet checkbox.
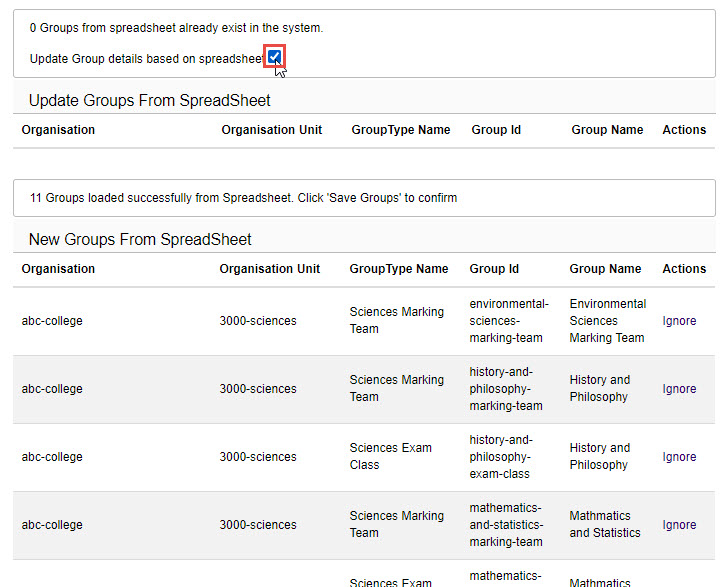
- Select the Save Groups button to save.
View and edit a group
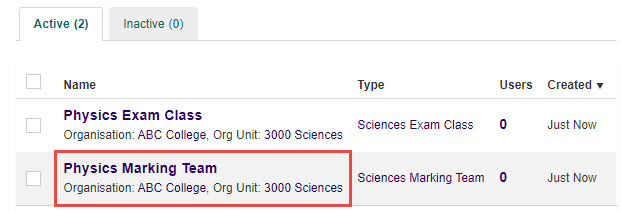
Groups can be accessed from the Groups tab under People in the Menu. This screen displays any Group Types which have already been created.

Tip
You can reorder the list of Groups by Name, Type, Users or Created by selecting the appropriate column heading.
From this screen you can:
- Search for a Group
- View a Group’s details
- Edit a Group
Add users to a group
There are two ways to add Users to a Group from the Group section.
Manually add a user to a group
- Locate the Group you wish to add Users to.
- Select the Name of the Group to open it.
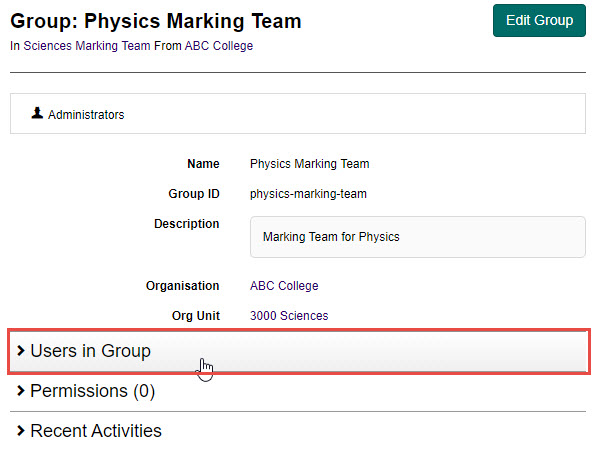
- Select the Users in Group expandable section.
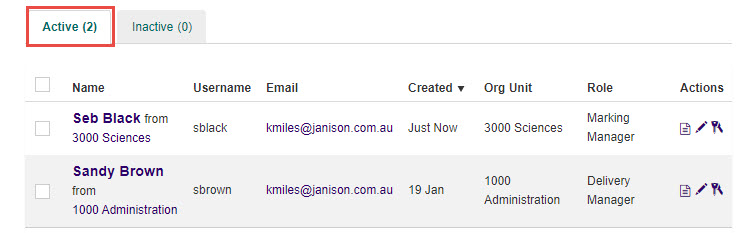
- Select the second box and select any Users you want to add to the Group. Click the Add button to add them.

These Users will now appear down the bottom of the screen under the Active tab.
Tip
To archive or remove Users from the Group, select the checkbox next to their name, then select the Archive button to archive them, or the Remove button to remove them.
Import users to a group
To import Users from a file:
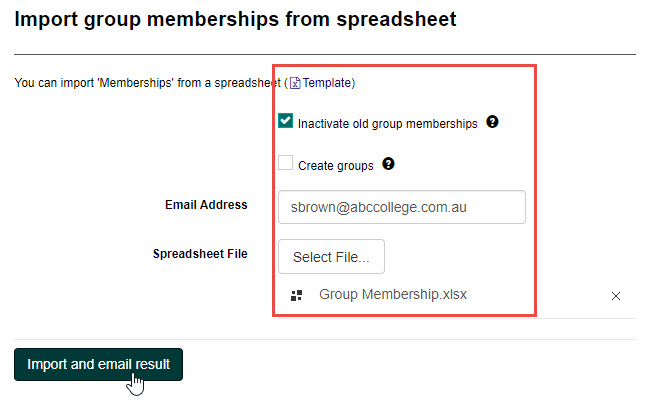
- From the Groups section, select the Import Memberships button.

- Complete the following:
- Select the Template link to open a sample Excel template. The template will provide you with sample data. The Supported Attributes tab has information on requirements for the different fields.

- Open the downloaded Excel template, enter all required data and then save the template to your local machine.
- Select Inactivate old group memberships (optional). Any group memberships a User has which are not specified in the import file will be inactivated. This only applies to Group Types specified in the import file.
- Enter an Email Address to receive import feedback.
- Select the Select File button to locate and select the saved file on your local machine.
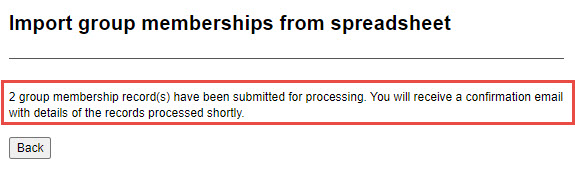
- The uploaded file will display. Select the Import and email result button to complete the import process.
- Select the Template link to open a sample Excel template. The template will provide you with sample data. The Supported Attributes tab has information on requirements for the different fields.
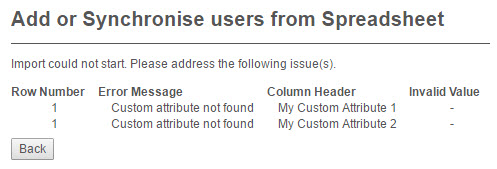
If issues exist in the import file, feedback will be displayed. You will need to address these issues before you can proceed.
If no issues exist with the file, feedback will be displayed.
Tip
You can also import group membership using the User import feature. You can read more about this topic in the Import Users section.