Welcome to the Janison Insights help portal
Enrolment based marking
In the marking team expandable, you can add the markers.
Select the pencil icon to enter edit mode.

You have two methods to add markers, via the Marking Team dropdown or via the Users dropdown. Let’s look at each of these options.
Using this method, you have the option to quickly add multiple markers.
Note that someone will need to create a marking team group and to add the markers to that group prior to this so that the group displays in the drop-down. You can read more about this in our document on Groups.

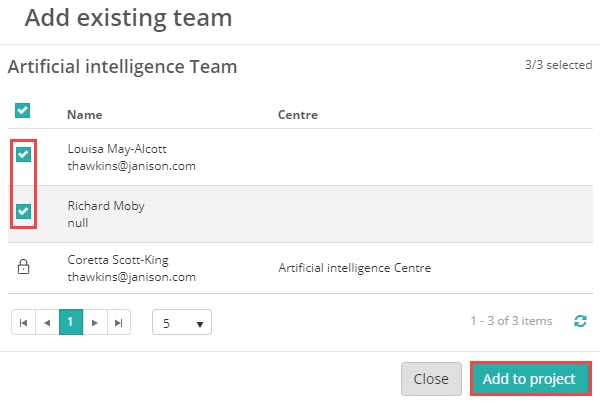
A modal displays where you can select the markers you want added to the project.
Select the required markers and then select Add to project.
You will not have the option to select markers already existing in the project, a lock displays instead of a checkbox.

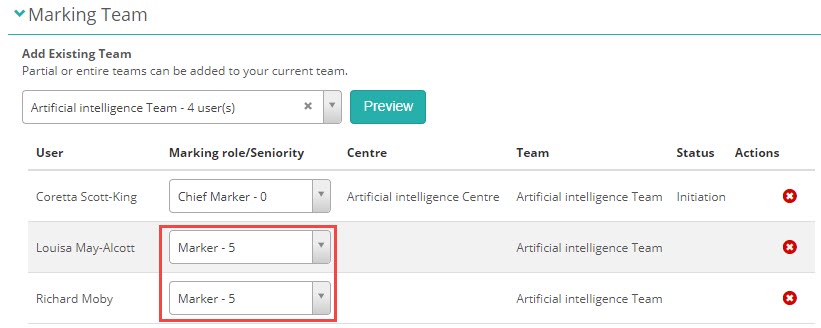
The markers now display in the list, and you’ll need to assign them the Marking role/Seniority.
Select Marker – 5 from the Marking role/Seniority dropdown.

You also have the option of adding a single marker.
Select the marker from the User dropdown and select the Marking role/Seniority and then Add.

Select Save and the markers are now members of the marking project.
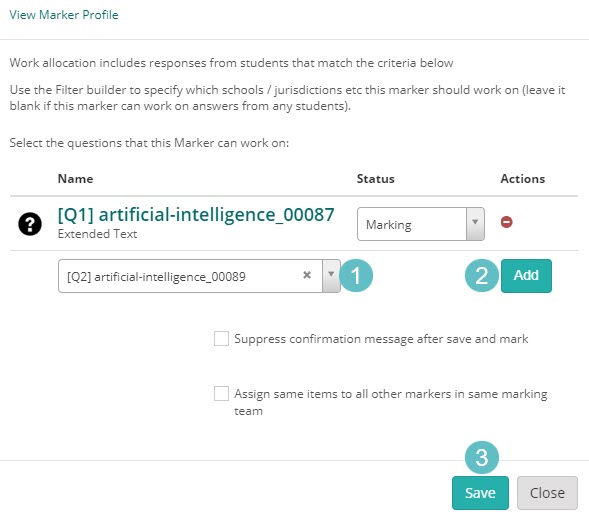
When you create a marking project, you have an option to Allocate all items to mark to all markers by default. This makes the scripts for these items available for the marker to mark.

If this option was unchecked, or if you wish to make changes, you can do this from the Marking Team section.
Select the work allocation icon ![]() .
.


1300 857 687 (Australia)
+61 2 6652 9850 (International)
ACN 091 302 975
ABN 35 081 897 494
© 2024 Janison
Janison acknowledges the traditional owners of the land on which we work and meet. We acknowledge the continuous care of the land, animals and waterways. We pay our respects to Elders past, present and emerging.