Test components
An assessment package contains a number of test components. Each component will have a unique code associated with each student participating in the exam.
Important
To use test components, assessment packages must first be enabled in the settings. See the Enable assessment packages section for more information.
Create a test component
-
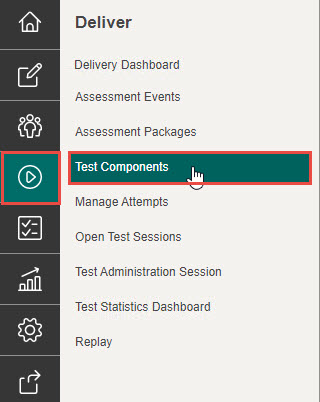
Select Deliver in the Menu, then select Test Components.
-
Select the Add Test Component button.
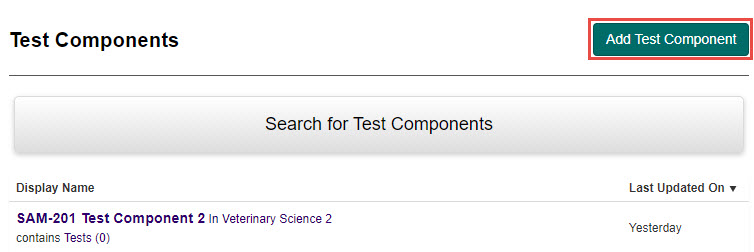
This displays the New Test Component screen.
-
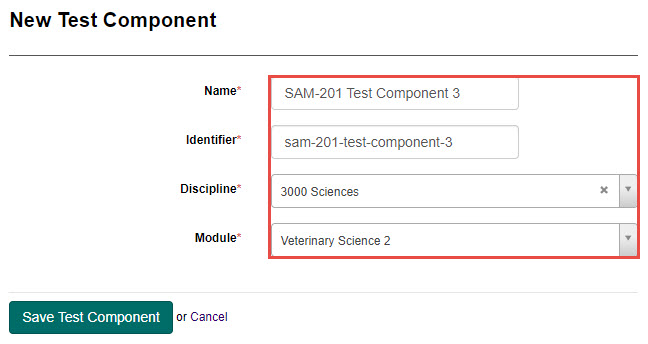
Complete the following:
- Enter a name for the test component in the Name field.
- As you type the name, the Identifier field will automatically populate. You can leave this as is, or edit to one of your choosing.
- Select a discipline from the Discipline drop-down field.
- Select a module from the Module drop-down field.
-
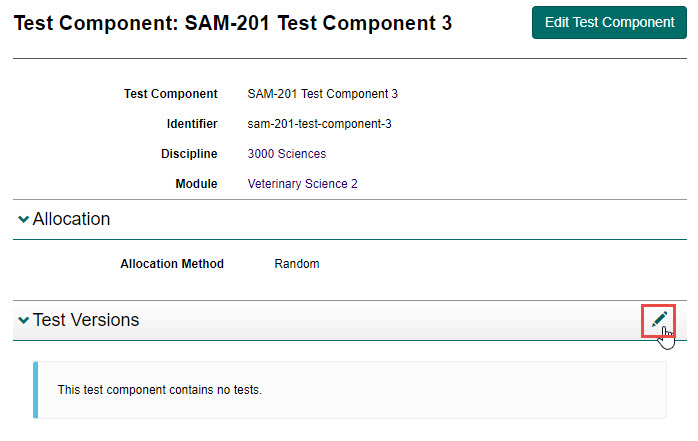
Select the Save Test Component button to save your changes.The Test Component screen displays with additional options.
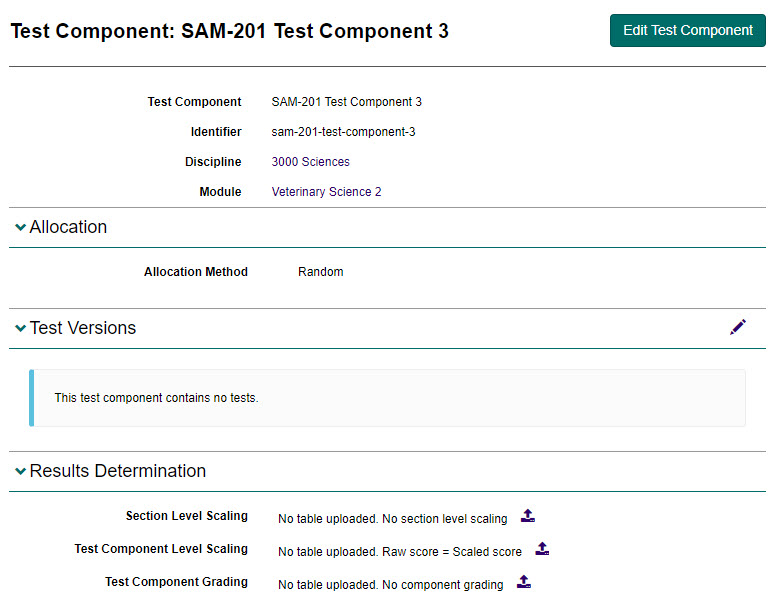
Test versions
Within a test component, there may be one or more test versions.
To add a test version:
-
Select the Edit icon next to the Test Versions expandable section.
-
Search for your test or locate it in the list and select the + icon to add the test to the test component.

The test will now display above the search functionality.
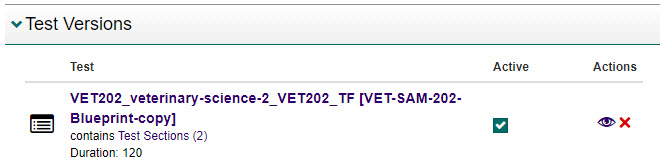
- Repeat for each test version you wish to add.
- Select the Save button to save your changes.
Results determination
This section allows you to import data from provided templates which tells the system how to determine the results of the test components.
To do this:
-
Select the Import icon next to the appropriate option – Section Level Scaling, Test Component Level Scaling or Test Component Grading.

-
Complete the following:
-
Select the Template link to open a sample Excel template. The template will provide you with sample data. The Supported Attributes tab has information on requirements for the different fields.

- Open the downloaded Excel template, enter all required data and then save the template to your local machine.
- Enter an email address in the Email Address field for the system to send the import result to.
- Select the Select File button to locate and select the saved file on your local machine. The file will be uploaded and display on screen.
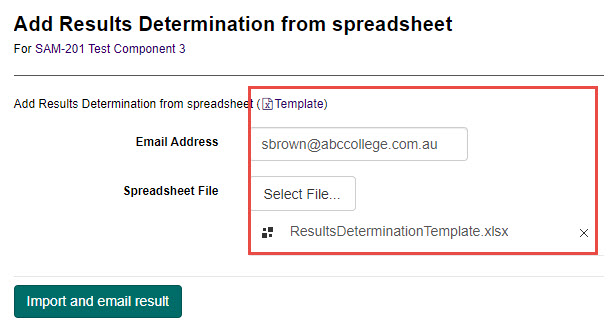
-
Select the Template link to open a sample Excel template. The template will provide you with sample data. The Supported Attributes tab has information on requirements for the different fields.
-
Select the Import and email result button to complete the import.A notification will display advising of the import success. Select the Back button to go back to the Test Component screen.

The Results Determination section now displays the added import.

Search for a test component
To search for an existing test component:
-
Select Deliver in the Menu, then select Test Components.
-
Select the Search for Test Components expandable section to search, or locate the test component from the list.

Edit a test component
To edit an existing test component:
- Search for a test component as previously covered in the Search for test component section.
-
Select the test component to open it.
*Insert image – 04_test-components_image-14*
-
Select the Edit Test Component button to edit the Name, Identifier, Discipline or module (optional) or select the Edit icon next to the Test Versions expandable section to edit this. The Results Determination section can be edited by selecting the Import icons next to any of the items.
*Insert image – 04_test-components_image-15*