Branching tests
A branching test presents different test sections to test-takers, depending on their scores. This means that there are different possible routes through the test, depending on a test-taker’s ongoing performance in the test sections. The test automatically adapts to a test-taker’s performance and presents items to the test-taker that match their achievement level.
In the example below, all test-takers start with test section A. Each test-taker then takes one of four possible test paths; ABD, ABE, ACF or ACG. The path with the highest difficulty is ABD and the path with the lowest difficulty is ACG.

Benefits of branching testing
The measurement of test-taker performance is more precise. By asking a wider range of questions, test administrators achieve differentiation of test-takers without increasing the length of the test for individuals.
Branching tests reduce discouragement among test-takers facing initial difficulties by providing questions of varying difficulty that align better with their performance, while simultaneously presenting high-achieving test-takers with more challenging questions.
Settings
Navigate to Settings > Test Designer Settings and expand the Test Authoring Settings section.

Create a branching test
Follow the steps in our documents on items and test sections to create the required sections containing your items.
Once you have created your tests sections, navigate to Author > Tests and Surveys.
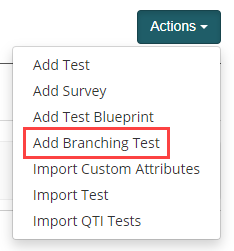
Select Add Branching Test from the Actions menu.
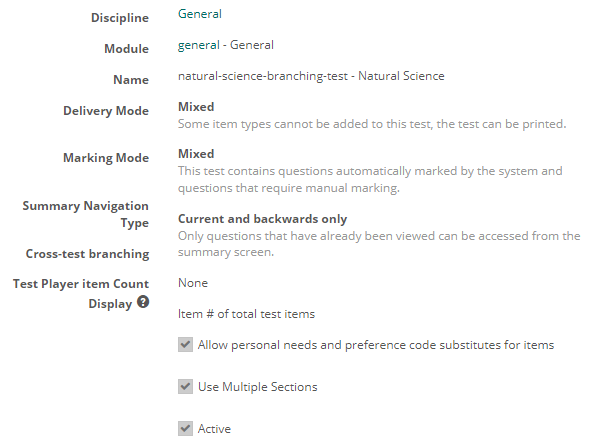
Complete the New Branching Test form. The fields are the same as a non-branching test, with the exception of the Cross-test branching field. Select this option if you would like to branch across tests.
See the screen captures below for an example of a completed test form.


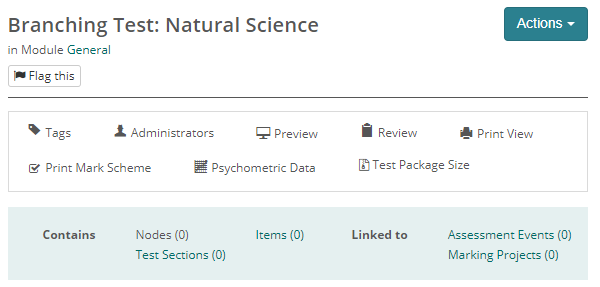
Once saved, a branching test contains several sections that require configuration. We have only covered the sections specific to branching tests in this document. For general settings such as timing options, please refer to the documents on tests.
Below is the branching test as it appears once saved.

Add sections to the test
Add the sections to your test as you would add them to your non-branching test. You will use the short name when selecting test sections for your nodes. To change these values, edit the section to make the the fields editable.
See the example below.

Set up the branching structure
Once you have added sections to a branching test, you need to set up the structure of nodes and branching rules.
In the example below the nodes are shown by the letters A to G. Each node can contain one or more test sections.
Test-takers start with a test section in node A.
The four possible test paths that test-takers take are ABD, ABE, ACF and ACG. Test-takers moving through a node route are actually seeing test sections, so they experience one of possibly multiple parallel tests or test paths.
There are three main steps to setting up the branching structure:
Step 1: Define nodes
Nodes contain one or more test sections and have defined destination nodes.
In the example above, the destination nodes for node A are nodes B and C.
Step 2: Create branching rules
A branching rule specifies the test section scores that determine how test-takers go from a node to one of its destination nodes.
In the example above, at node A, test-takers scoring at or above a certain value will go to node B; test-takers scoring less than that value will go to node C.
There can be different rules for different test sections in the node.
Step 3: Validate the branching
The system checks whether test section route errors exist.
Note 1: While it does not occur in this example, a branching rule could direct a pathway backwards, so that, for example, a rule could take test-takers with certain scores from node F to node B.
Note 2: A test section can be part of more than one node.
In both of these situations you should take care that you do not produce a test path such that a test-taker returns to a test section that they have already completed. Branching validation will find this error and report it to you.
In the explanations below, for simplicity, there is only one test section per node.
Lets look at these three steps in detail.
Define nodes
In this section the nodes are created and defined, with test sections and destination nodes for each node.
Select the pencil icon on the Nodes section.

Enter an Identifier for all nodes and then select one or more Test Sections for each node.
Once you have completed the step above, return to the top of the list and select destination nodes, where appropriate.

In the example above, nodes with Identifier D, E, F and G do not need destination nodes because they are at the end of node routes.
Branching node count provides the option to specify the number of previous nodes whose scores are to be used in branching from this node. The value selected against a node will dictate the number of preceding nodes, including itself, whose scores will be considered when branching from the current node to the destination node.
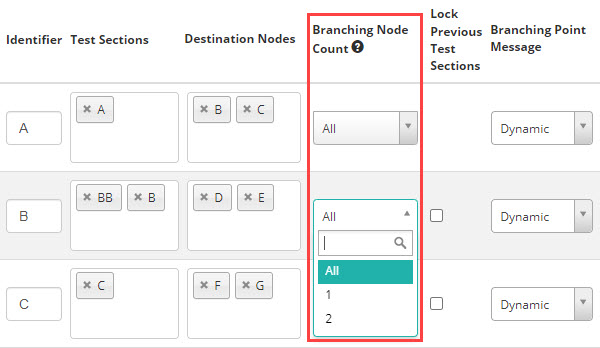
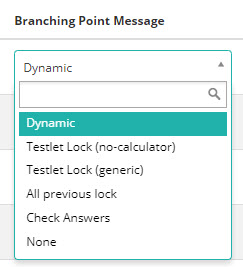
Branching Point Message allows the author to choose a message to display to the test-takers at the end of the node. Authors can edit these messages in string resources.

Create branching rules
In this section, rules are defined to control how test-takers move from one node to other nodes. They are based on the total score that test-takers have when they reach the end of the node. The scores include past test sections as well.
Select the pencil icon on the Branching Rules section.

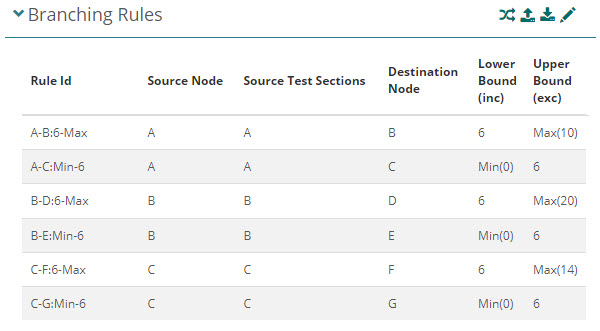
The system automatically generates the Rule Id.
- Select a Source Node. The rule will be applied here as an outbound rule.
- Select the required Source test sections. If you don’t select anything in the Source test sections field, the rule applies to all test sections in the node.
- Select one of the node’s Destination Nodes to specify where the rule will take test-takers.
- Enter the lowest score for the test section in Lower Bound. This value is inclusive.
- Enter the upper limit for the score in Upper Bound. This value is exclusive.
In this example, the first rule states that for source node A, test-takers scoring above 6, will go to node B.
The second rule states that for source node A, test-takers scoring less than 6, will go to node C.

Once saved, the system displays the values for the lower and upper bounds where you selected Min and Max.
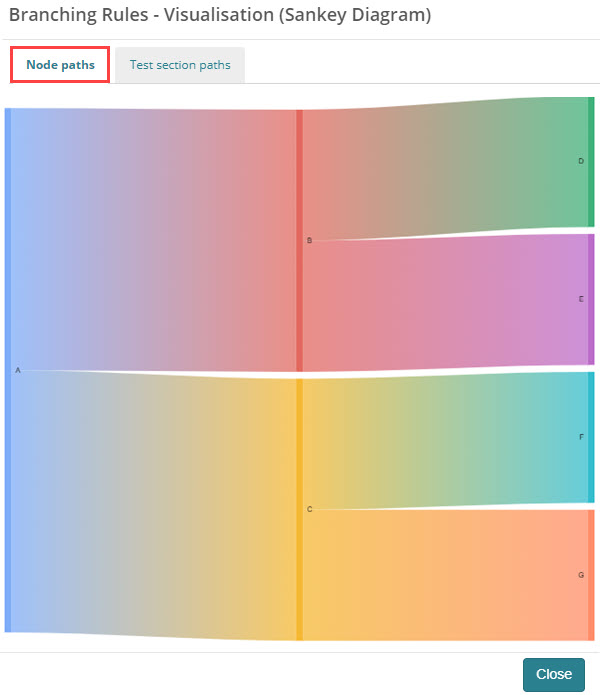
Visualisation with Sankey diagram
A Sankey diagram is a visualisation technique that allows to display flows. Select the visualisation ![]() icon to open the Sankey diagrams of node and test section paths.
icon to open the Sankey diagrams of node and test section paths.
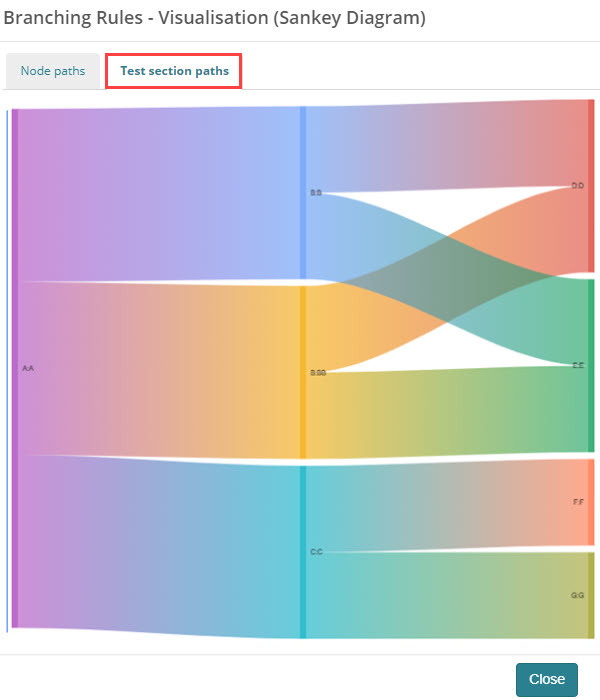
If the nodes each contain one test section, then the test section paths will look the same as the node paths. If not, view all the test section paths by selecting Test section paths.
Hover over the paths to view the related data.

Import/export branching rules
Once you have created branching rules you can export them to excel.
Export branching rules
Select the export ![]() icon on the Branching Rules section.
icon on the Branching Rules section.
An excel file will download.
Sheet 1 contains the branching rule data.
Sheet 2 contains details about the export such as the time & date of the export.


Import branching rules
Select the import icon ![]() on the Branching Rules section.
on the Branching Rules section.
The import screen displays. Select Template, the template downloads.

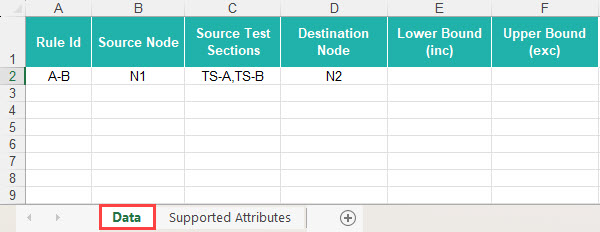
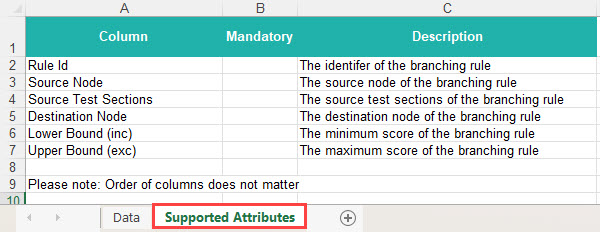
The Supported Attributes tab provides a description of the fields and the Data tab provides some sample data that you should delete and replace with your import data.
Populate the spreadsheet with your data, on the import page Select File and Import and email result.

A feedback screen displays with a link to optionally view the import log. The log is handy to troubleshoot if your import fails.

Validate branching
You can validate the branching structure, for example check for branching errors such as looping test section routes, with the branching validation tool.
Expand the Branching Validation section.
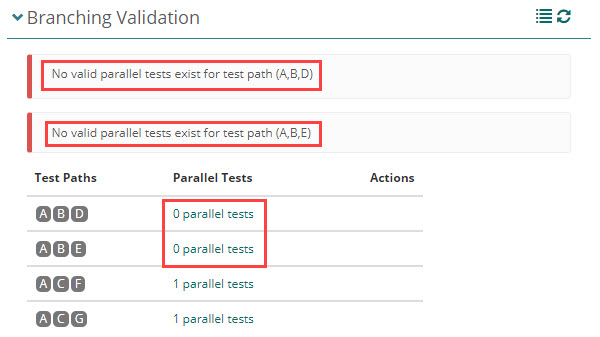
If there are branching errors in the test, feedback displays as in the screen capture below. You should correct any errors and select the refresh icon to reload the analysis.
If there are no errors, the Test Paths and Parallel Tests created by the test branching rules are displayed.
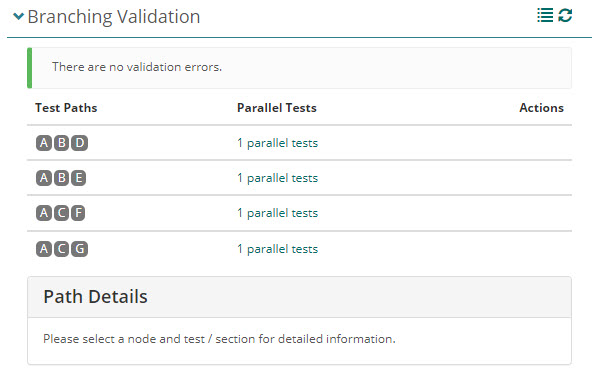
You can view more detailed information in the validation section. As there is only one test section per node in this example, there is only one parallel test, the test sections A, B and D.
- Select a node to highlight it in the whole display. In the example below, node A is selected and all its occurrences are highlighted in blue.
- Select a test section to view details, including inbound and outbound branching rules.
- Optionally select the eye icon to preview the test section.
In the example below, test section A was selected and its Path Details are shown at the right.

Enemy test sections
You can specify that certain test sections can never be presented to the same test-taker in a test. Such test sections are called enemy test sections and are optional in a branching test.
You can create one or more groups of enemies. For each group, only one of its test sections can be given to a test-taker. If a test-taker has already been allocated one of the test sections, they cannot be allocated any other test sections in the same group of enemies.
The validation process described in the previous section will take these groups into account and warn that certain test paths have no valid parallel tests because of test section memberships in such groups.
Select the pencil ![]() icon in Enemy Test Sections.
icon in Enemy Test Sections.

Select at least two test sections and Save.
