Custom Page Modules
Introduction
Custom Page Modules are similar to Learning Modules in that pages are built in the Course Designer using panels. The difference between the two types is in the purpose of these pages. Learning pages are viewed in the Course Player for delivering learning or training. Custom Pages can be used to:
- Insert pages into the My Learning Dashboard using String Resources or the Pin to Dashboard feature.
- Make pages available in other places in the system using the Menu setting.
- Make web pages available outside of the CLS using the Allow Unauthenticated Access feature.
A common use of a Custom Pages is to provide a welcome message or instructions on the landing page of the system. Like any web page, media such as video and images can be added to the page.

Custom Pages Modules are an additional CLS option that must be switched on at a global level via tenant level settings. If you require this setting to be turned on or off please contact your account manager.
Create a custom page module
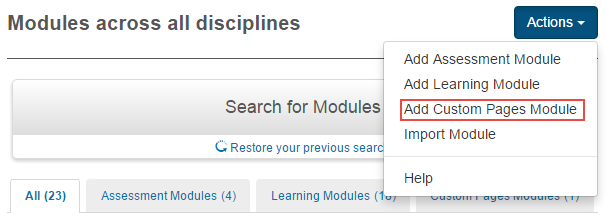
To create a custom page module:
Browse to Design > Modules

From the Actions drop-down select Add Custom Page Module.
Managing Custom Page Modules is the same as managing Learning Modules. Please see the documents on Managing Modules for further information on editing, viewing, importing and exporting modules.
Creating Custom Pages
Creating a Custom Pages involves the same steps as creating Learning Pages.
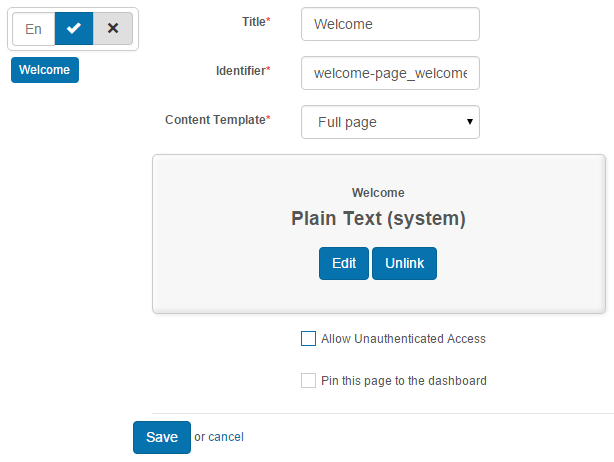
Two unique options are available on a custom page, Allow Unauthenticated Access and Pin this page to the dashboard. These are covered in detail in the next topics.
Pin Page to the Dashboard
The My Learning Dashboard is the page where learners access their catalogue enrolments. You can directly add one or more pages from a Custom Page Module to the My Learning Dashboard. Each such Page is displayed within a tile on the My Learning screen.
There are two configurations required before this will work:
- The Smart Dashboard plugin must not be active on your site. You will need to contact the Janison support services team to deactivate the plugin if required.
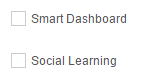
- In Settings > My Learning Dashboard Settings, the tile type Custom needs to be checked.

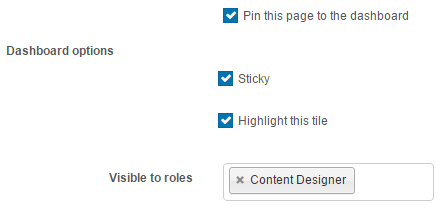
Check the box next to Pin this Page to the dashboard to make the page appear as a tile on the My Learning Dashboard.

Highlighted below is the custom page.

Sticky
This will force the tile to appear in the top left corner as shown in the above screenshot. If this option is not checked, the tile will appear at the end of the page.

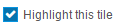
Highlight this tile
This option will apply the site Accent Primary colour to the background of the tile as shown in the screenshot below. See the topic on Styles and Images for instructions about how these colour values are set.

Insert Page into the Dashboard
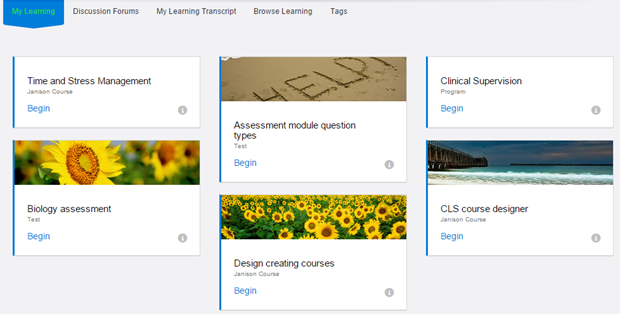
The My Learning Dashboard is the page where learners access their catalogue enrolments. It is possible to add a custom page to the top of this dashboard. This provides the opportunity to include instructions or information for the Users in the form of videos, images, text or other media. Below is a screenshot of the My Learning Dashboard without the Custom Page.
Note: This option is only available if the Smart Dashboard plugin is active on your site. You will need to contact the Janison support services team to have this activated.
To add the page to the Dashboard you need to need to locate and update a String Resource with a key called JService/UiElements.DashboardIntro.
Select Settings > String Resources.
- You cannot search for this term but can easily locate the resource by clicking the Default Value heading. This will sort the resources by Default Value and those with this field blank will be listed first.
- Click the pencil icon to edit it.

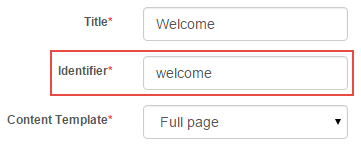
- Paste into Value, replacing identifier with the Identifier of your Custom Page as highlighted below.
In screenshot below the custom page has been added to the Dashboard. The Value of the String Resource is.

Note that you can also add custom pages to the My Learning Dashboard as separate tiles, see Pages in Custom Pages Modules for details.
Allow Unauthenticated Access

This option makes the page accessible without logging into the CLS. It can only be accessed on the CLS site where the page was created. This functionality has a number of uses, for example a welcome page that anyone can access or a diagnostics page that checks a computer’s readiness for an upcoming event without requiring log in to the CLS site.
The web address of a custom page will be:
The site address/pages/page Identifier. For example, http://help.cls.janison.com/pages/welcome
The site address is the address of the CLS where the page was created.

The identifier is the Identifier of this Page.
Below is a custom page accessed without authentication. You will notice that there are no menus. The page can be viewed only.

Link Custom Pages to Menus
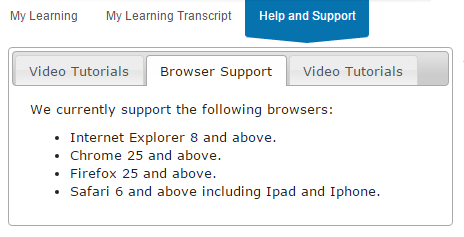
It is possible to link one or more custom pages to the CLS menus. In the screenshot below a Help and Support page has been added to the top menu.
The menu can be adjusted in Settings > Menu. You will find detailed instructions for linking custom pages to menus in the document on Customise a Menu.
The code used to achieve the above was where help is the identifier of the custom page.
The screenshot below highlights the line used to add the Help and Support custom page to the top menu.

Restrict Access with Roles
In the Visible to Roles box select one or more Roles from the drop-down list to specify which Users will see this Page in their dashboards. If you do not enter anything, then all Users will see it.

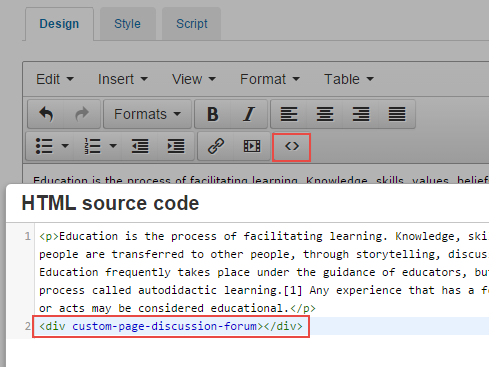
Add a Discussion Forum
You can add a discussion forum to a page by adding the following code to the source code of the page:
The discussion forum will be attached to the custom page as shown below.

Use the  button to enter source code mode. Paste the required code as indicated below.