Part 1: Learning Module Surveys
Learning module surveys are created by selecting a learning module during the survey creation process.
Read more.
Step 1: Create a Survey
- Go to Author > Tests and Surveys.
- From Actions, select Add Survey.
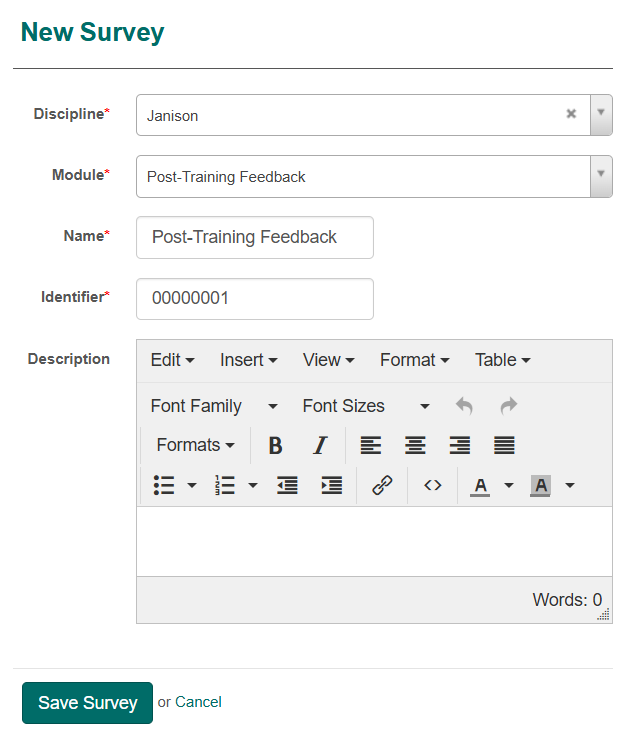
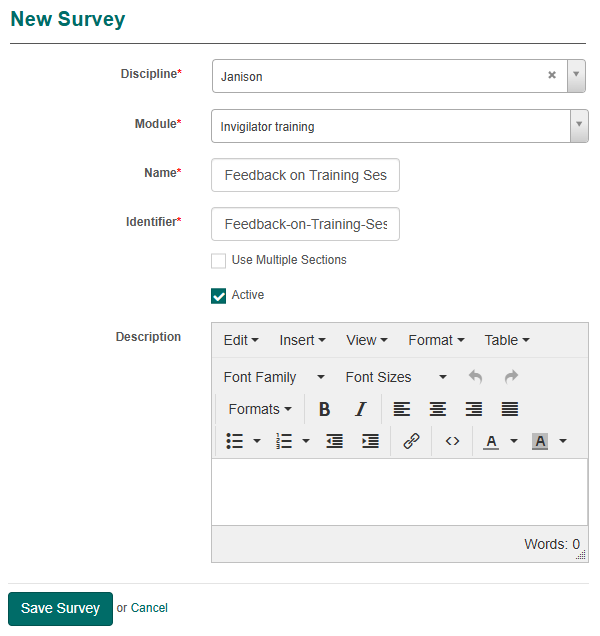
- Complete the form:
- Discipline – select from list.
- Module – select a learning module.
- Name / Identifier – enter survey details.
- Optionally, add a Description.
- Select Save Survey.
Here is an example of a completed New Survey form.
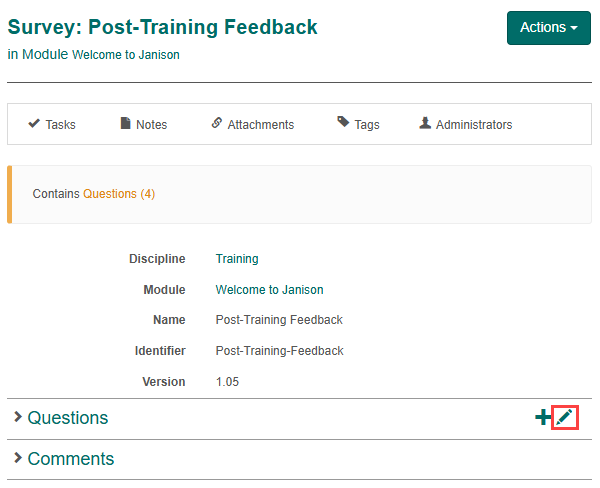
The survey is now created and ready for questions to be added.
Step 2: Add Questions
Learning Module Surveys only support Multiple Choice, Multiple Choices and Short Answer question types.
You can create new questions or add existing ones:
Option A: Create New Questions
Assessment Question Types
- Choose one of two ways to create a new question:
- From the left nav: Select Questions > Actions > Add Survey Question.
- From the Questions expandable in the survey: select the + icon.
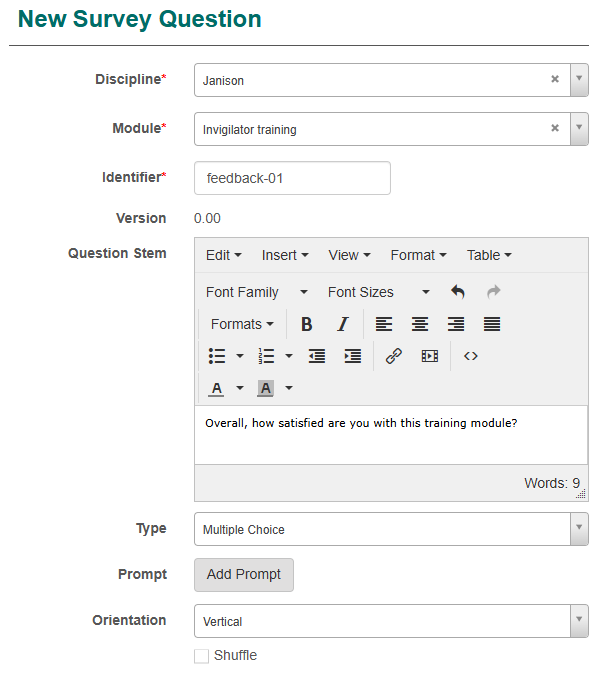
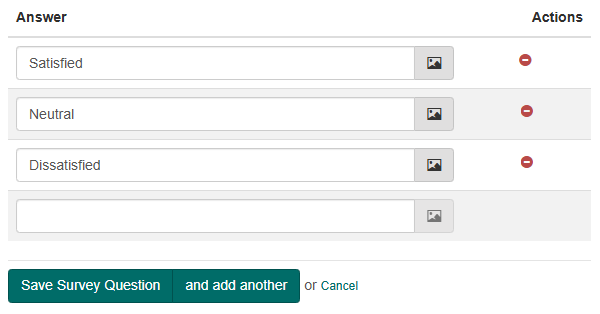
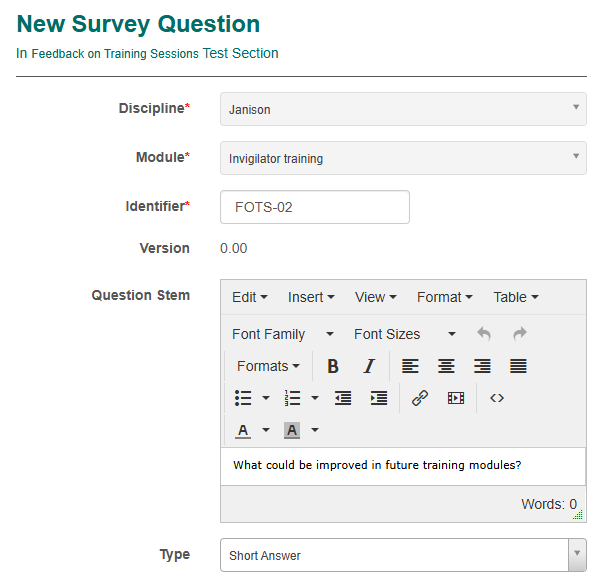
- Complete the question form:
- Identifier – unique ID (e.g., LM_Survey_Q1).
- Question Stem – the text of the question.
- Type – select Multiple Choice/Choices or Short Answer.
- Click Save Survey Question or and add another.
Here is an example of a multiple choice New Survey Question form.
Option B: Add Existing Questions
- Open the survey.
- In the Questions expandable, select the pencil icon.
- Search for and select previously created questions.
- Click Save to link them into this survey.
Step 3: Add the Survey to a Learning Module
Add a Panel to a Page.
- Go to Author > Modules.
- Search for and select the required module.
- Click Contains (0) pages to open edit mode.
- Create a new page:
- Enter a panel title.
- Select Survey Quiz from the content template list.
- Select the survey from the Test dropdown.
- Select Save.
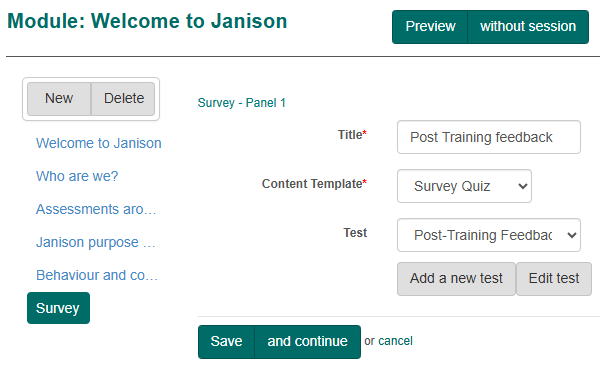
The survey is now linked to the module. Use Edit or Unlink if needed.
Part 2: Assessment Module Surveys (Survey Player)
Assessment module surveys are created by selecting an assessment module during the survey creation process.
Read more.
Step 1: Create a Survey
- Go to Design > Tests and Surveys.
- From Actions, select Add Survey.
- Complete the form:
- Discipline – select from list.
- Module – choose the assessment module.
- Name / Identifier – enter survey details.
- Use Multiple Sections –
- Leave unchecked for a single-section survey.
- Check to allow multiple sections.
- Optionally, add a Description.
- Select Save Survey.
Step 2: Add Sections (for multi-section surveys)
Sections allow you to group related questions into categories. To enable sections, select Use Multiple Sections when creating the survey.
- Open the survey.
- Under Sections, select +.
- Complete the section form:
- Name – section name.
- Identifier – unique ID.
- (Optional) Add description or thumbnail.
- Cannot Skip – makes the section mandatory.
- Save the section.
- Repeat to add more sections.
In the example below we have created two sections in this survey.

Step 3: Add Questions
Assessment Surveys support a wide range of question types.
To add questions, you first need to open the section where the questions will be placed.
Once inside a section, you can either create new questions or add existing ones:
Option A: Create New Questions
Assessment Question Types.
You can create a new question in one of two ways:
- From the left navigation:
- Select Questions > Actions > Add Survey Question.
- From inside the section:
- In the Questions expandable, select the + icon.
Then complete the New Survey Question form:
- Identifier – a unique ID (e.g.,
AS_Survey_Q1). - Question Stem – the text of the question.
- Type – choose from the full range of survey question types.
- Click Save Survey Question.
Here is an example of a short answer question type.
Option B: Add Existing Questions
- Open the survey and go into the relevant section.
- In the Questions expandable, select the pencil icon ✎.
- Search for and select previously created questions.
- Click Save to link them into this section of the survey.