Learning Modules
Introduction
There are 3 types of Modules:
- Assessment – these are containers for assessment entities, including Tests, Surveys, Questions and Media Resources. Their primary purpose is to assess knowledge.
- Learning– these are containers for learning content. They can also contain quizzes and surveys but the primary purpose is learning.
- Custom Pages – these are very similar to Learning Modules but can be used in customised page layouts.
This section of the Help site covers the 2nd and 3rd types of Modules, however the introduction below explains the three types of Module to help you understand the differences.
The first type of Module, the Assessment Modules, are managed differently from the two other types of Modules because they are specialised for assessment. When candidates undergo assessment they are enrolled in a Catalogue Item that is linked to one or more Tests. Each Test is linked to one or more Questions. All of the Tests and Questions must belong to the same Assessment Module, which itself belongs to the same Discipline as they do. There are many types of Assessment Questions that can be created, see the document on Assessment Question types.
The diagram below shows these relationships:
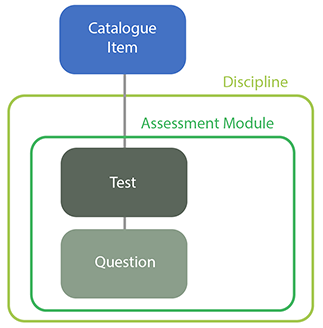
Thus, you create an Assessment Module as a kind of shell, with Tests and Questions that belong to it and various settings, such as the Test Player’s skin. As the diagram shows, you do not link an Assessment Module to the Catalogue Item directly.
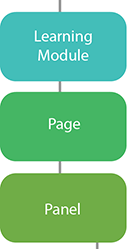
Learning Modules are structured differently. A learner enrols in a Catalogue Item that is linked to one or more Courses. Each Course is linked to one or more Learning Modules. And each Learning Module contains one or more Pages, with each Page composed of one or more Panels. All of these entities belong to the same Discipline. The diagram below shows these relationships:
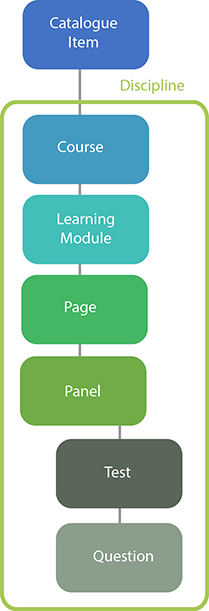
The diagram shows that the Pages, Panels, Tests and Questions are linked to the Learning Module and they also belong to it. It also shows that Panels can also be linked to Tests and Questions in order to make learning more interactive and reflective. A number of specialised Panels enable this and are linked to a smaller number of Question types, see the document on Learning Question Types (Panels).
Custom Pages Modules are almost the same as Learning Modules. However, Custom Pages Modules are not oriented towards inclusion in Courses. Extra options for their Pages mean that they can be linked to the My Learning Dashboard and Menus, as well as optionally viewed outside the CLS, see the document on Custom Page Modules for more details.
To summarize this discussion of Modules: Assessment Modules are specialised for assessment and can contain a large range of Question types. Assessment Tests and Questions must be part of Assessment Modules. Learning Modules are specialised for learning but may also contain Learning Tests and Questions. The more limited range of Tests and Questions that are integrated in the Panels of Learning Module Pages are oriented towards enhancing the learning experience. Overall, these belonging relationships mean that Tests and Questions belong to only one Module and cannot be directly used in other Modules. If the Module is deleted, they are deleted too.
Modules can be managed by selecting Design > Modules.

Manage modules
Modules are managed by selecting Design > Modules.

The screen shows a list of all of the Modules, which can be divided into several categories.
- Click Search for Modules to search the list.
- Enter the search word in the search field.
- Click Search.
- The search results will appear.
- To perform another search click Reset Search.
- Click All to display all of the Modules.
- Click Learning Modules to display only Learning Modules.
- Click Custom Pages Modules to display only Custom Pages Modules.
- You can order the list by name or date of last update by clicking the heading names.
- Each Module in the list is a link to further details about it. The Module’s linked entities (in the example below: Pages, Resources, Questions and Tests) also function as links to further details about them.

Note that a User who only has authoring permission in the scope of one Module will not be able to see the full list of Modules.
Inspect Module Details
Inspecting a Learning Module’s details gives you access to information about it and links to its Pages (and hence, Panels), Tests, Questions, etc.
To inspect a Module navigate to Design > Modules and click the Module name. This takes you to its details screen.
The name and type of the Module and the Discipline it belongs to (a clickable link) are listed at the top left hand side.
The widget bar is underneath this. Of particular importance are:
- Tags – Modules can be tagged as a way of categorising and locating them, see the document on Linking Tags for instructions on how to do this.
- The Administrators widget: you can click it to view and edit Users with various Roles over the Module.
- Click Export to export the Module to a .zip file
- The next section lists the entities that are linked to this Module. These are clickable links.
Note that clicking Pages allows you to view, add and edit the Pages in this Module. Similarly, clicking Questions or Tests allows you to view the Questions and Tests in this Module and possibly add to and edit them.
- The middle section displays the Name, Identifier and Workflow status of the Module.
- The Description of the Module is displayed underneath. Note that this text is used in Introduction Panel types.

Add a Learning Module
To create a Learning Module that learners can enrol in, first add the Module then go to a Course in the same Discipline and edit the Course to link it to the Module. As the diagram shows, the Course must itself be linked to a Catalogue Item:

As the diagram also shows, once the Learning Module has been created, you add Pages to it, which themselves contain one or more Panels.
Add a Learning Module
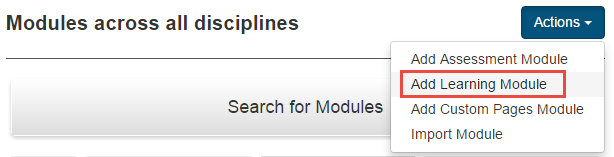
To add a Learning Module, start by selecting Design > Modules and select Add Learning Module from the Actions drop-down menu.
- Enter the Name and and Identifier of the Module.
- Select a Discipline from the drop-down list.
- Enter a Description if desired.
Note: When you place an Introduction panel type on a Page, this description and the name of the Module animates on to the Page.
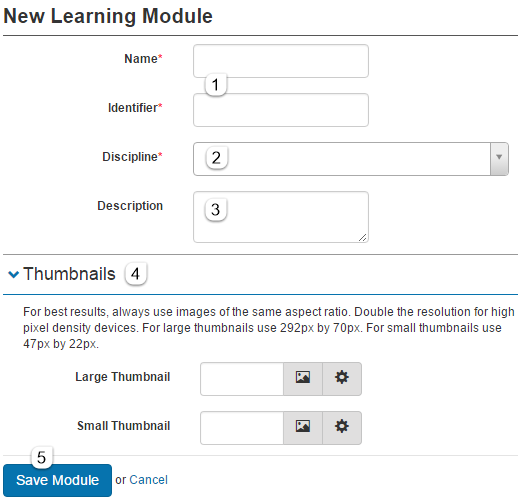
- You can override the default module thumbnail images with your own choices. Click the picture icon to select a Resource. Click the settings icon to enter its settings. If required, enter the desired onscreen Width and Height for the thumbnail and put the textual alternative in AltText.

- Click Save Module.
The next step is to add Pages to the Module.
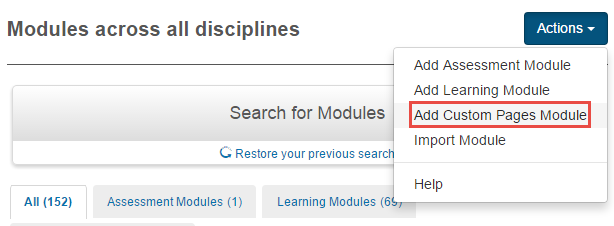
Add a Custom Pages Module
To add a Custom Pages Module select Design > Modules and select Add Custom Pages Module from the Actions drop-down menu.
Follow the instructions for adding a Learning Module and save.
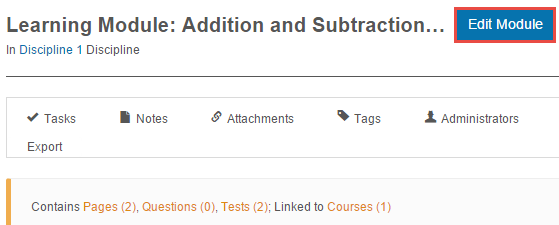
Edit a Learning Module
To edit a Learning Module navigate to Design > Modules and click the desired Module’s name. This takes you to its details screen.
Click Edit Module.
The edit screen will allow you to change the basic information entered when the Module was created, see the document on Add a Learning Module for details.
Note that the details screen for a Module provides other editing functionality, as well as links to the entities belonging to that Module. For example, to add or edit the Pages in a Module, click the Pages link on its details screen.
Delete a Learning Module
To delete a Learning Module click Delete Moduleat the Module’s edit screen. Note that this enables you to delete it, but keep in mind that this also deletes everything that belongs to it. Thus, you will be asked to confirm your intention to delete it.
You may be prevented from deleting the Module if it is referenced by other documents.
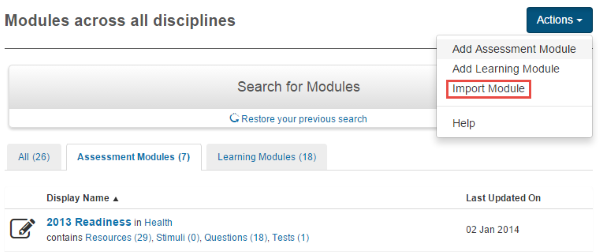
Import a Module
You can import a Learning Module that has been previously exported as a zip file.
Navigate to Design > Modules and select Import Module from the Actions drop-down menu.
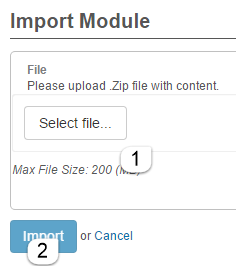
- Click Select file to browse to the file on your local hard drive and upload the zip file. You may receive some warnings such as Discipline does not exist, but these warnings in general can be ignored.
- Click Import.
Export a Module
To can export a Learning Module through its Inspect Learning Module details screen.

After you click Export, the Module is exported to a .zip file which is saved to your computer.
Add a Page
A Learning Module contains one or more Pages and each Page is linked to one or more Panels. When you create a Page, you set the number of Panels it can have and their layout on the screen by selecting a Content Template.
To add a Page to a Learning Module, select Design > Modules and locate the Module. Click its Pages link:

Note that you can also click the Pages link on the Module’s details screen.
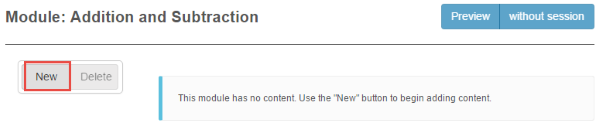
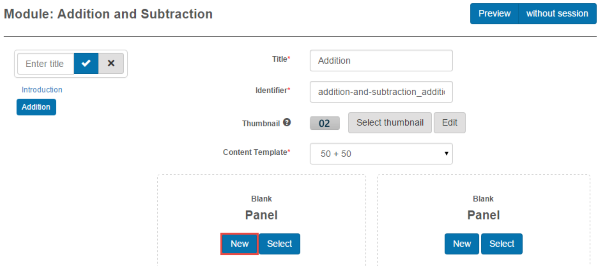
On the Module’s pages screen, click New:
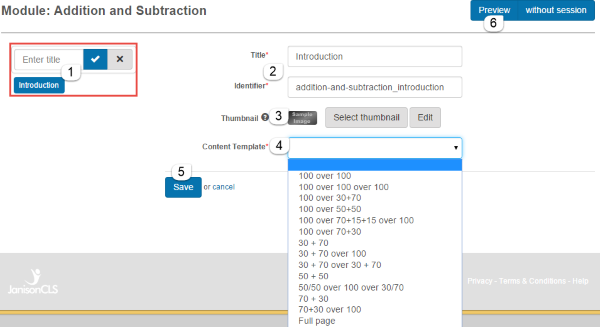
- Enter the page Title (this will appear at the top of the page in the Course Player) and click the tick icon.
The new Page’s title will appear on the left hand side. - The Title and Identifier fields will be automatically filled in on the right, but they can be edited.
- Click Select Thumbnail to insert an existing Resource image for the Page’s thumbnail (47 x 22 pixels is ideal). This will be displayed on the top of the Course Player. You may need to upload another suitable image into the Resource collection.
- Select a Content Template from the drop-down box to specify the layout and number of Panels.
The Templates are listed as percentages, for example 50+50 means that the Page is split vertically at the center into two equal (50%) Panel areas:

30 + 70 over 100 means that the Page is split horizontally, then the top half is split vertically with a 30:70 ratio:

- Save the page.
- You can see how the Page is going to look in the Course Player by clicking Preview at any time.
As you create more pages, you will see their titles listed on the left hand side. You can move a Page’s position in the page order by dragging its title up or down in the list.
You can click a Page’s title at any time to view and edit the Page’s details, including the Content Template selected.
Once Pages have been created they are ready to link to Panels. So the next step is to add Panels to the Page to add content to the blank Panels you have just established.
Note that if the Content Templates available for the Page do not meet your needs, you can create your own templates, see the document on Adding Content Layout Template for instructions.
Add a Panel to a Page
A Page is linked to one or more Panels. When you create a Page, you set the number of Panels it can have and their layout on the screen by selecting a Content Template.
Each Panel also has its own Content template, including templates that allow it to link to a Test (and hence, Questions). The template specifies the kind of content that can be added or linked to the Panel.

Panels make it possible for you to create different kinds of Pages without needing skills in HTML and CSS. Note that Panels belong the Learning Module itself and after creation, they can be linked to one or more Pages if desired.
Broadly speaking, you can create two kinds of Panels in Learning Module Pages: those for learning content, see the document on Learning Panels, and those for Tests and Quizzes, see the document on Test Panels.
To add a Panel to a Page:
- Select Design > Modules, select the Module and click the Pages link.
- Either create a new Page and select a Content Template for its layout or click the name of an existing Page from the list at the left hand side.
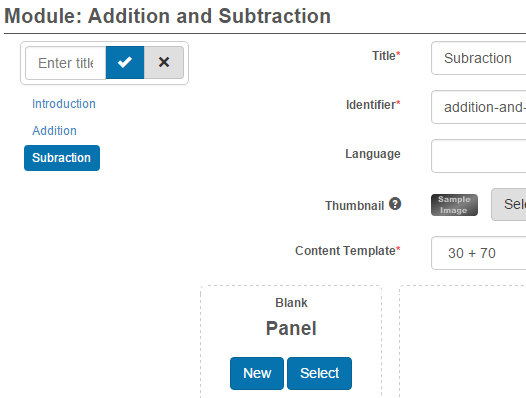
- Add a new Panel by clicking New.
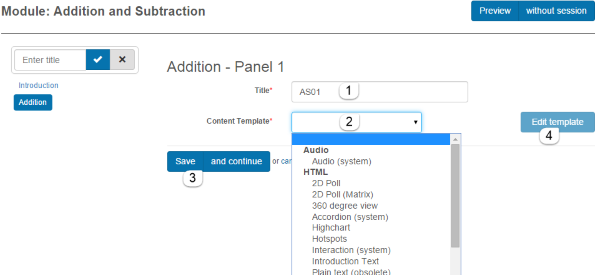
- Add a Title for the Panel.
- Select a Content Template from the drop-down list to specify the kind of Panel that you are creating. Depending on what you choose, there will be further information to enter. See the document on Learning Panels and the document on Test Panels for the options and details required.
- Select Save and continue to save your work and keep you on the current Panel screen or click Save to return to the Page screen.
- Click Edit Template if you want to inspect the Template details.
After you have clicked Save and returned to the Page level, you will see the Panel you have created:
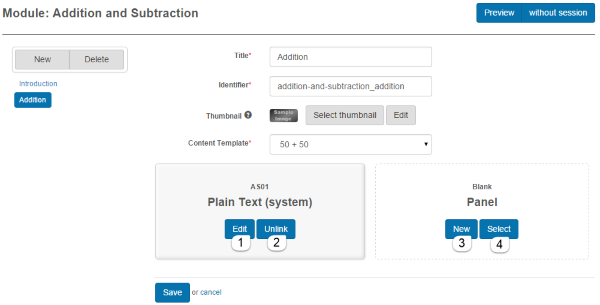
Other options now are:
- Click Edit to edit the Panel.
- Click Unlink to uncouple the linked Panel. It will not be deleted and will be available for selection throughout the Module.
- Click New to create up another Panel.
- Click Select to link to a Panel in this Module that you have already created.