Templates
Introduction
Templates determine the layout of Course pages and Panels as well as Catalogue Items.
- Content Layout Templates specify the layout of Learning Module Pages.
- Content Panel Templates specify the types of Panels in Learning Module Pages. They make it possible for you to create different kinds of Pages without needing skills in HTML and CSS because they do the work for you.
- Program Templates are legacy templates that were previously used to determine how a catalogue item displays when launched. Although they may be active if added in the past, there is not need to use them any longer. The CLS now has a single template which is used by default when a Catalogue Item is created.
To access Templates select Design > Templates.

Add Content Layout Template
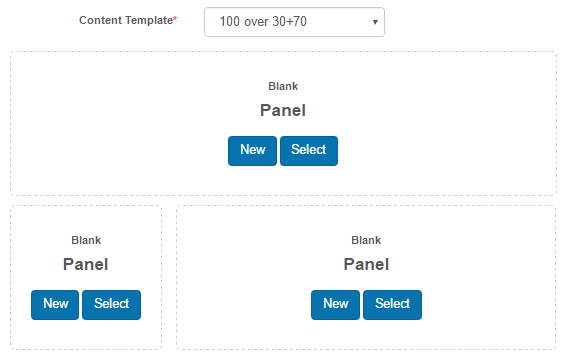
Content Layout Templates specify the layout of a Learning Module page. For example, 30 + 70 over 100 means that the Page is split horizontally, then the top half is split vertically with a 30:70 ratio:

You can read more about how Content Layout Templates are used in a module in the document on Add a Page to a Learning Module.
The Content Layout Templates are listed when you are adding a new Page.
You can create your own Content Layout Templates.
Browse to Design > Templates
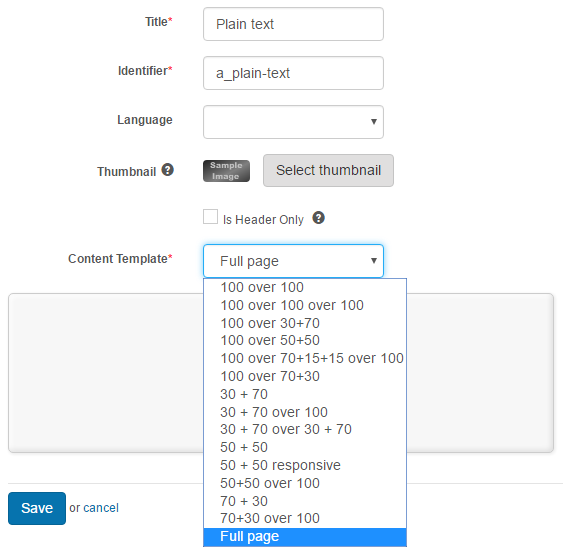
- Select Add Content Layout Template from the Actions dropdown.

- Enter a Title, the Identifier will be automatically populated.
- Enter an optional Description.
- By default the Mode is set to Programmer. Change to Designer.

A rectangle with + icons will appear.
- To add one or more panels, select the + icon on the relevant side.

- To change the proportion of a panel select a number from the selector.
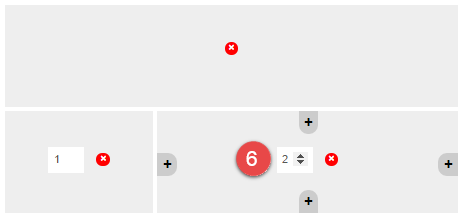
You can delete a panel using the icon.
icon.
- Select Save Content Layout Panel.

When the Template has been saved it will be available as an option when creating a new Page in a Learning Module.
Program Template
Note: Program Templates changed in August 2016, release 1606 . This article is only relevant to existing Janison clients who previously set these templates in their Catalogue Items. In future, a 1-size-fits-all template and will be replacing the templates listed below. The new template will be assigned automatically to new Catalogue Items created.
Program templates are linked to Catalogue Items and determines how a Catalogue Item display. The Program Template options can be viewed by navigating to Design > Templates and accessing the Program tab.
There are three global options available. The difference between these are outlined below.

Singular Asset – should be used if there is only one Learning Asset. For example a Learning Event or a Trackable Document (video, image etc.).
Default Vertical – used if there are multiple Learning Assets linked to a Catalogue Item. The information is displayed in a list format.
Default Vertical (opens in new tab) – designed to be the same as above but launches the selected Learning Asset in a new tab.
Custom-designed Program Templates created to meet specific client needs are possible however they need to be developed by the Janison team.
Settings Required
Before you can select a Program Template it is important to ensure the right Settings have been activated.
- Browse to Settings > Tenant Settings > Catalogue Item Settings.

Activate the following by checking the box.
- Enable custom templates for catalogue item presentation.
When this is turned on you will be able to see the three global program templates in the drop-down menu of the edit page for the Catalogue Item.

- Navigate to Settings > Browse Learning Settings.
- Discuss catalogue content – check second point (enable catalogue item discussion by users that have started the content).
- Recommended content – check allow user to recommend content to other users. Link is displayed on enrolment details page.
This will allow Ratings, Comments and the option to Recommend to a Colleague on the Singular Asset Program Template.

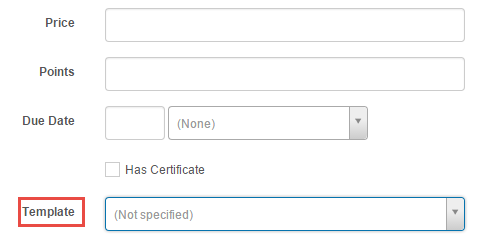
The option to select a template appears in the Catalogue Item edit page.
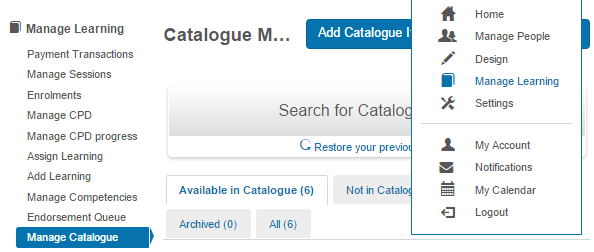
- Browse to Manage Learning > Manage Catalogue.
- Search for and select the Catalogue Item required.
- Select Edit Catalogue Item from the Actions drop-down menu.
- Template can be found in the middle of the edit page and is selected using a drop-down menu.
Program Templates in more detail
Singular Asset
Has many detailed features including:
- Enrol button.
- The ability to give a star rating.
- Recommend to a colleague button.
- The ability to leave a comment.
- Overview – will only display information if a description has been written.
- Basic information including enrolment status, type of Asset, release date, last viewed, and duration.

Note; if Singular Asset is chosen but there is more than one Learning Asset in the Catalogue Item the page will still load. It will display the top Learning Asset from the list only. A list of Assets will not be produced.
Default Vertical
Features displayed:
- Enrol button.
- Enrolment status and duration.
- Overview – will only show if a description has been written in the Catalogue Item.
- Name of the course.
- Basic information including enrolment status and duration of learning.
- Select on the + beside the learning asset for more details including enrolment status.

Default Vertical (opens in new tab)
As above but opens Learning Asset in a new tab.
Export Content Templates
Navigate to Design > Templates.
Select Export Content Templates from the Actions drop-down menu.

- By default all content templates are checked. Uncheck the templates that you do not wish to export.
- Click on the arrow beside the scope to activate the drop-down menu and select from local, global or all.
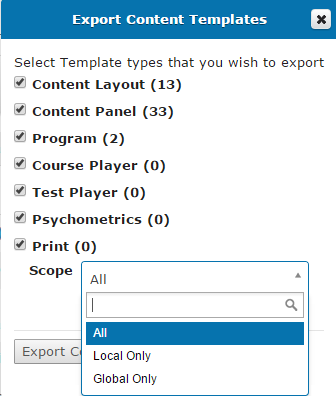
- Click Export Content Templates. The required templates will save to your local machine as a .zip file.
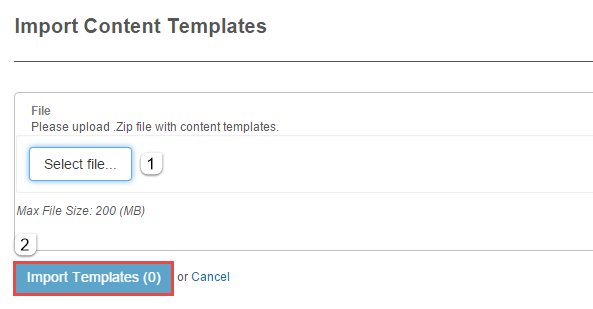
Import Content Templates
Additionally content templates can be imported. To do so navigate to Design > Templates.
- Select Export Content Templates from the Actions drop-down menu.

- Click Select file… to load content templates from your local browser.
- Select Import Templates.