Introduction/instruction
Item authors can use an introduction or instruction section to provides test-takers with essential directions, including instructions, information, and guidelines.
These sections also give authors the opportunity to include practice items, allowing test-takers to become familiar with the item types. These items are neither timed nor assessed.
Below is an example of how an introduction/instruction section could look.

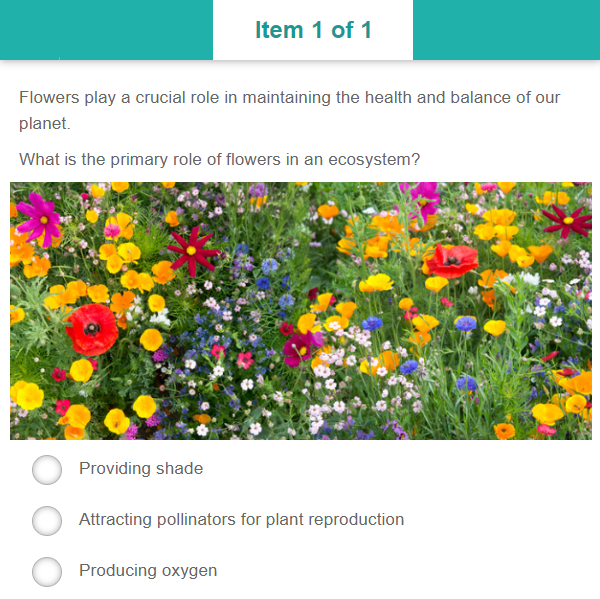
Item
An item section contains the test items. A test can contain more than one item section to allow for item categorisation. There are a wide range of item types available to bring your test to life.
For a deeper dive, check out our item types guides here.
Below is an example of how an item in an item section could look.
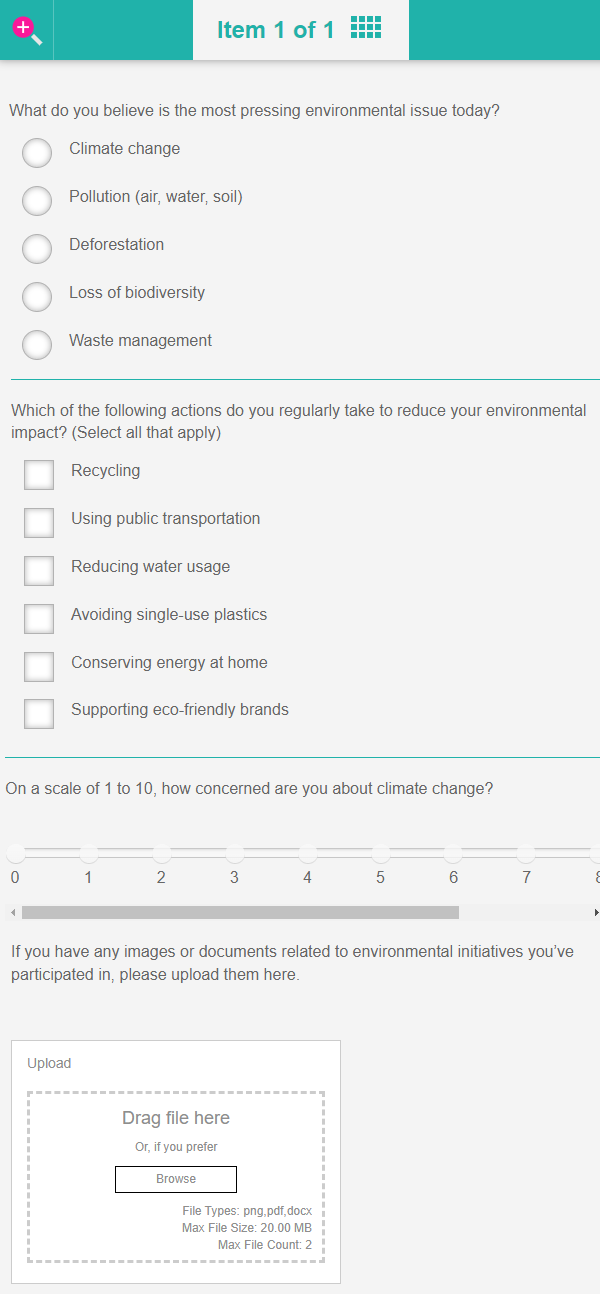
Survey
A survey section is used to collect data from respondents to gather information, opinions, or feedback on specific topics. It is common to use survey sections at the beginning or end of a test.
For a deeper dive, check out our survey guide here.
Below is an example of a survey.


Exit sections
An exit section displays at the end of a test once the test-taker has submitted their answers.
There are three types of exit sections available:
- Exit
- Exit if failed
- Exit if passed
Let’s explore these three exit types in more detail.
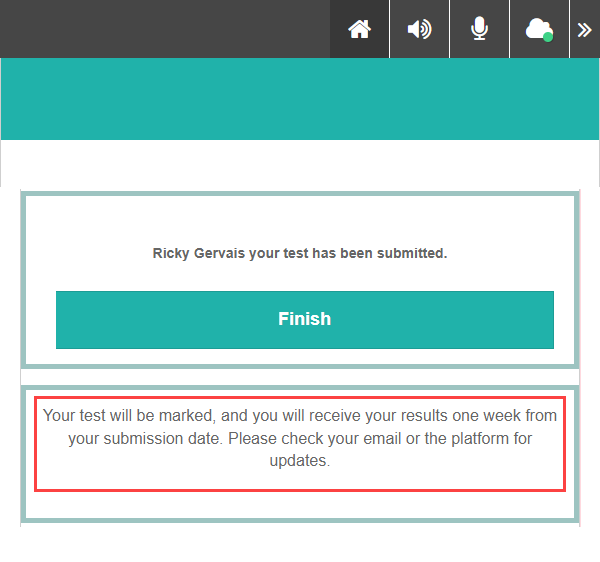
Exit
This exit type displays text entered into an “instruction” item type linked to the exit section. This text is displayed to the test-taker on the Finish screen as highlighted below.
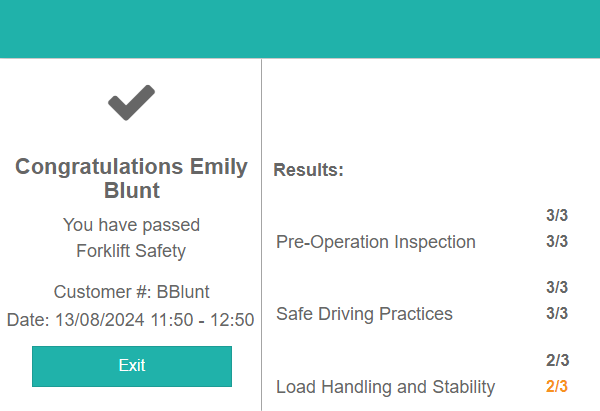
Exit if passed
This exit type shows a passed screen along with the results, as seen in the screen capture below. Only test-takers who pass will see the feedback screen.
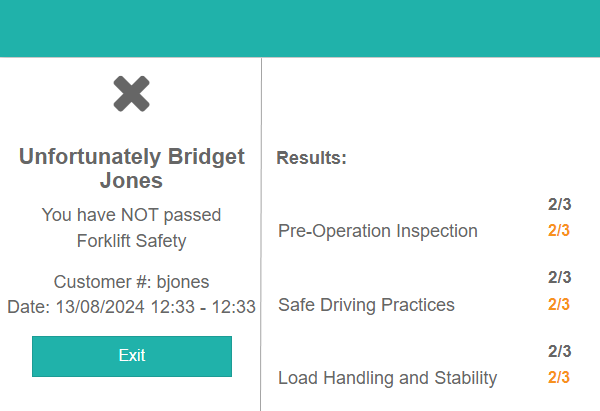
Exit if failed
This exit type shows a not passed screen along with the results, as seen in the screen capture below. Only test-takers who fail will see the feedback screen.
Add feedback to a test
We’ve covered the steps in our guide on test feedback here.


Create a test section
There are two ways to create and manage test sections:
- From the Author menu
- From the Sections expandable in the test.
Let’s take a closer look at these two methods.
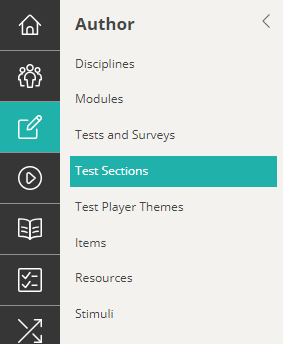
From author menu
Navigate to Author > Test Sections.
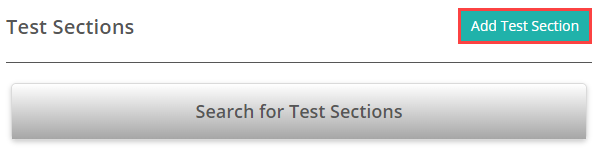
Select Add Test Section.
Complete the form as required. Below is an example of a completed form.
Live Marking of Items must be set to This section is to support live marking of responses in the test player.
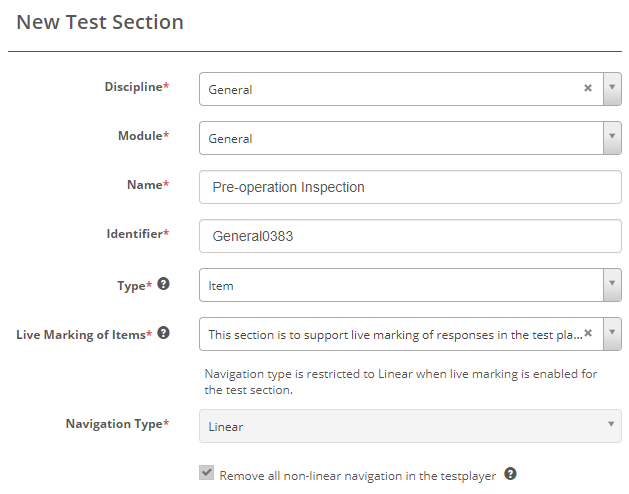
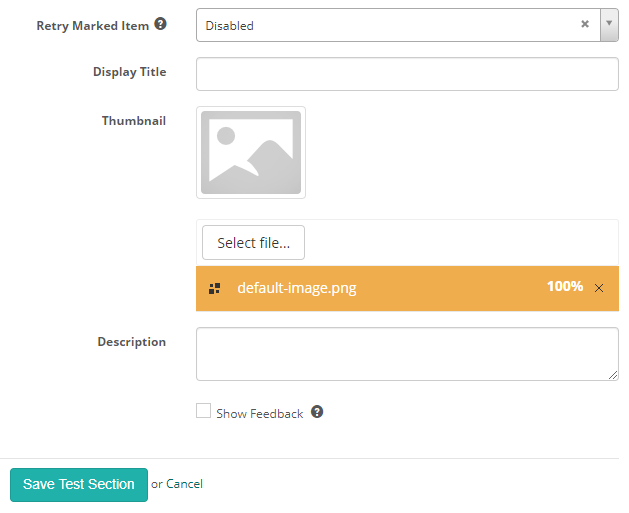
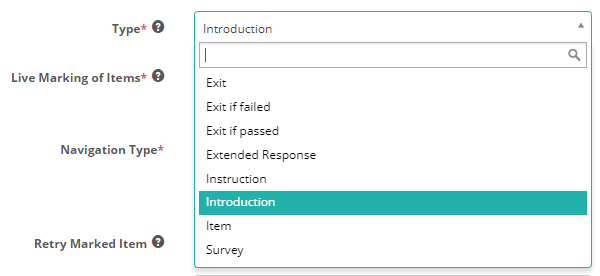
In the Type dropdown, you have the option to select one of the section types we covered above.
From within a test
This method of creating the test section also automatically adds it to the test.
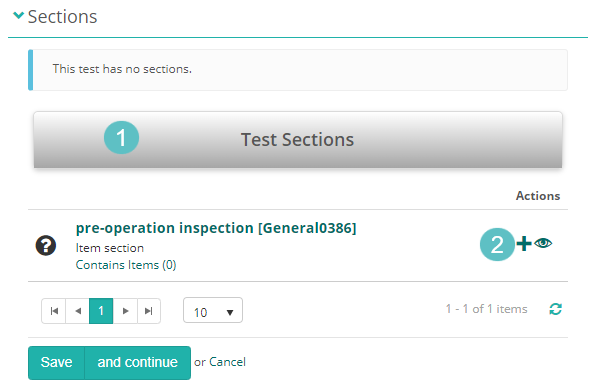
Select the Plus+ icon from the test Sections expandable.
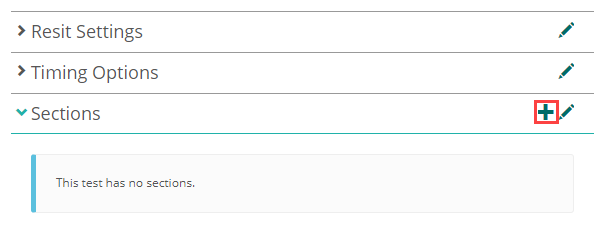
The test section form appears, and from here, follow the same steps as creating a section from the author menu, outlined earlier.
Add a section to a test
If you have created the test section from the author menu, the next step is to add it to the test.
Navigate to Author > Test and Surveys.
Open the required test and select the pencil icon on the Sections expandable.
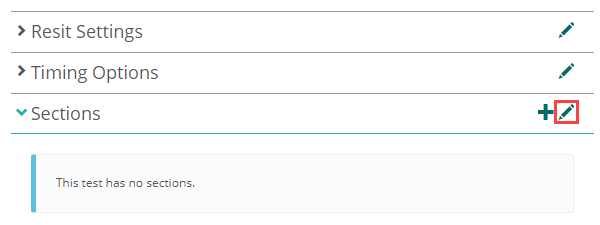
- Search for the section.
- Select the plus + icon.
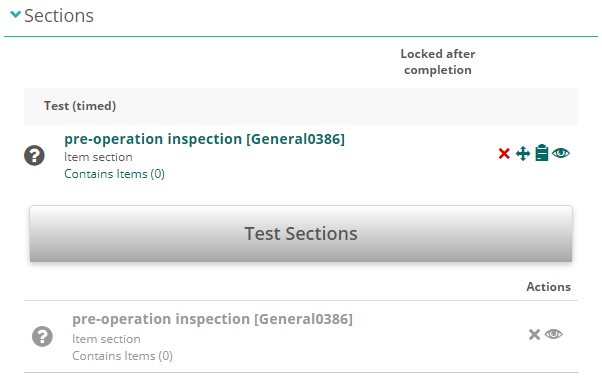
The section moves to the top and becomes inactive at the bottom.
You can also create a section directly within the test.
Add items to a test section
There are two ways to create and manage items:
- From the Author menu
- From the Sections expandable in the test.
Let’s take a closer look at these two methods.
From the Author menu
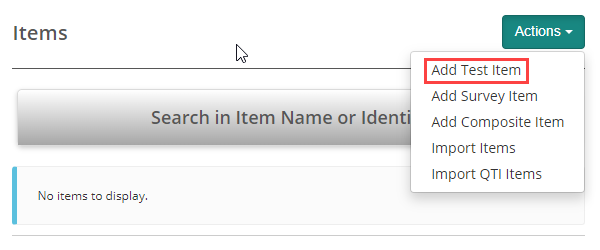
Navigate to Author > Items.
Select Add Test Item.
The steps from this point vary depending on the item type you select. For a deeper dive, view our guides on Item types.
From here we need to link them to our test section.
Link items to a section
Open the test section and open the Questions expandable.
- Search for the item
- select the plus + icon.
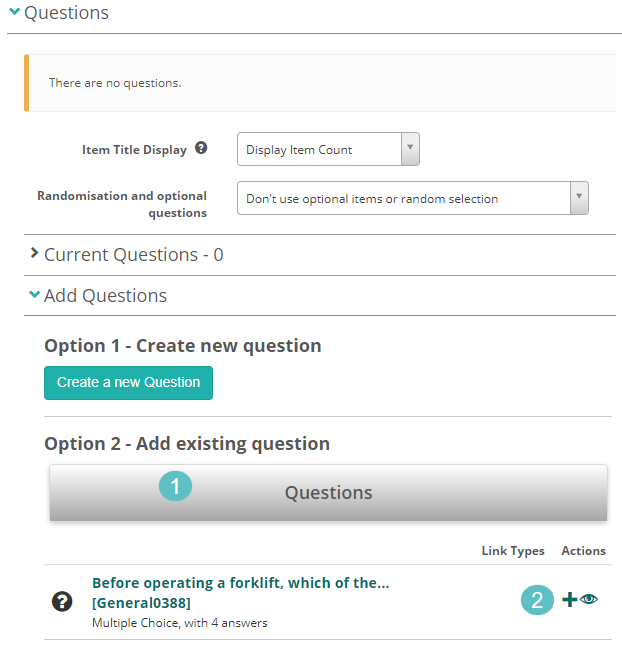
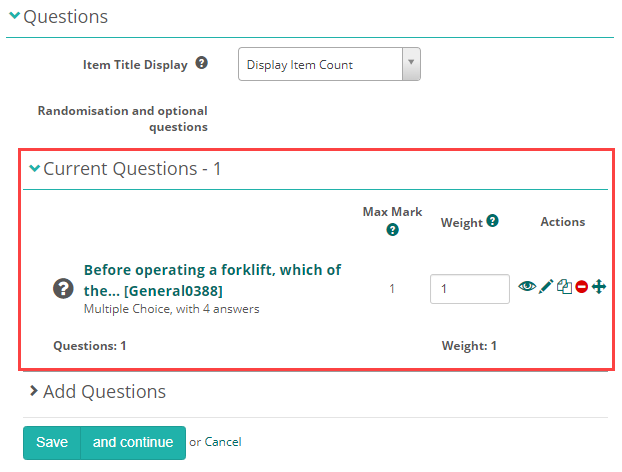
The item moves from the Add Questions section to the Current Questions section.
You can repeat these step to add more items or Save.
From the questions expandable in the test section
This method of creating an item also automatically adds it to the test section.
Navigate to the required section.
Open the Questions expandable.
Select Create a new question.
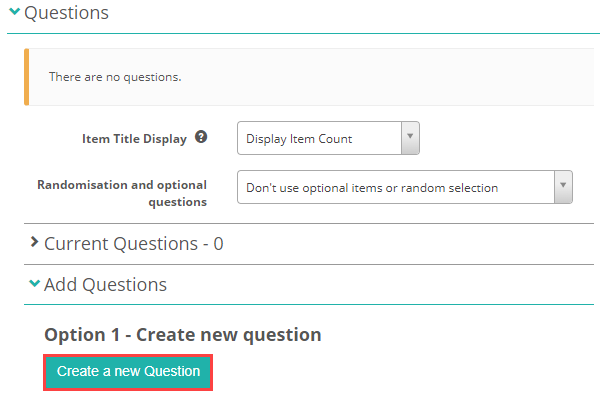
The new item form displays, from here the steps are the same as described above.
The new item form appears, and from here, follow the same steps as creating an from the author menu, outlined earlier.
Settings
To enable test sections, navigate to Settings > Test Designer Settings and expand Test Section Options.
Select Enable Test Section Banks.
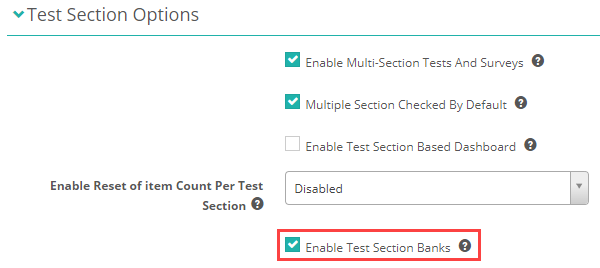
Additional settings are available, and your Janison account manager will configure them to meet your specific requirements.