Create a marking project
In Janison Insights, marking projects are used to manage all aspects of marking candidate responses.
Marking projects can be created in the following ways:
| Method | Description |
|---|---|
| Manually | Marking projects can be created by people with the system role of Chief Marker. When creating a marking project, the Chief Marker is also responsible for setting up the marking team, activating the marking quality controls, setting the marking schedules and more. |
| Automatically | If the appropriate setting is enabled, marking projects can be automatically created when an assessment event is progressed to delivery or closed. See the New marking project automation section for more information. |
Manually create a marking project
To manually create a marking project, you will need to wait until a test session has been finalised. You will then need to close the assessment event and create a marking project for Markers to mark the manually marked question types. The remaining question types will be automatically marked by the system.
There are two places you can manually create a marking project from:
Via the Marking Projects screen
To create a marking project from the Marking Projects screen:
-
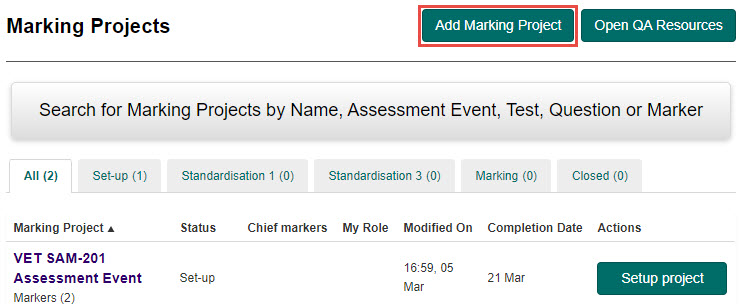
Select Marking from the Menu, then select Marking Projects.

-
Select the Add Marking Project button.
-
Complete the following:
- Select one or more assessment events from the Assessment Event drop-down field.
- Select a test from the Test(s) drop-down field (optional).
- Enter a name for the marking project in the Name field.
- As you type the name, the Identifier field will automatically populate. You can leave this as is, or edit to an identifier of your choosing.
-
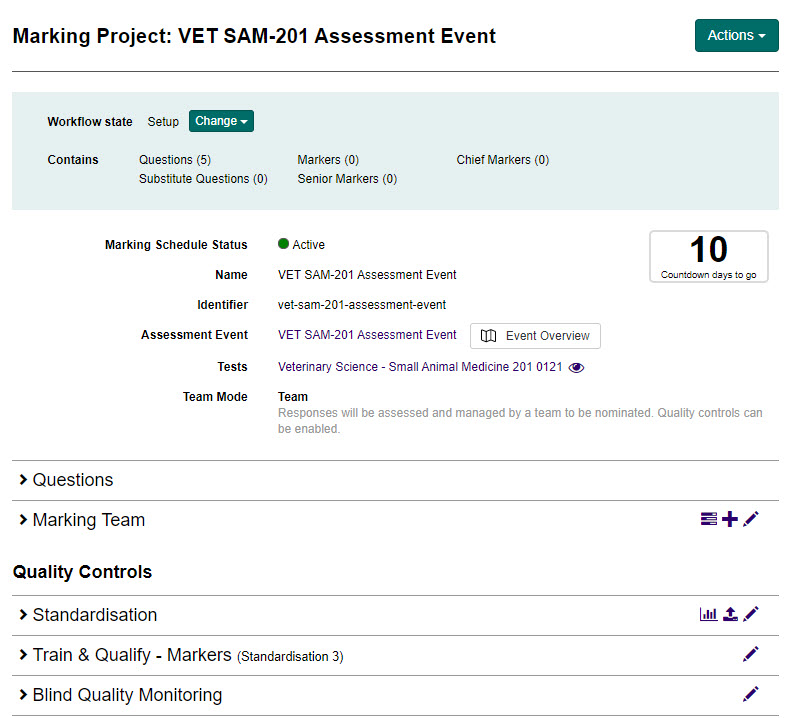
Select a date in the Completion date field. This will form the basis of the ‘Countdown days to go’ counter on the Marking Project Details page.
- Select an option from the Team Mode field.
- Enter a description in the Description field (optional).
- Select a group type for the marking centre, marking teams and exam centres (optional).
- Select the Allocate all items to mark to all markers by default checkbox (optional) to remove the need to manually assign questions to Markers.
- Select the Mark all questions as though they are one checkbox (optional) if you would like the Markers to not be able to select the question they are marking. There will just be a ‘Mark more’ button and the system will randomly allocate them responses to mark from any of the questions in the marking project.
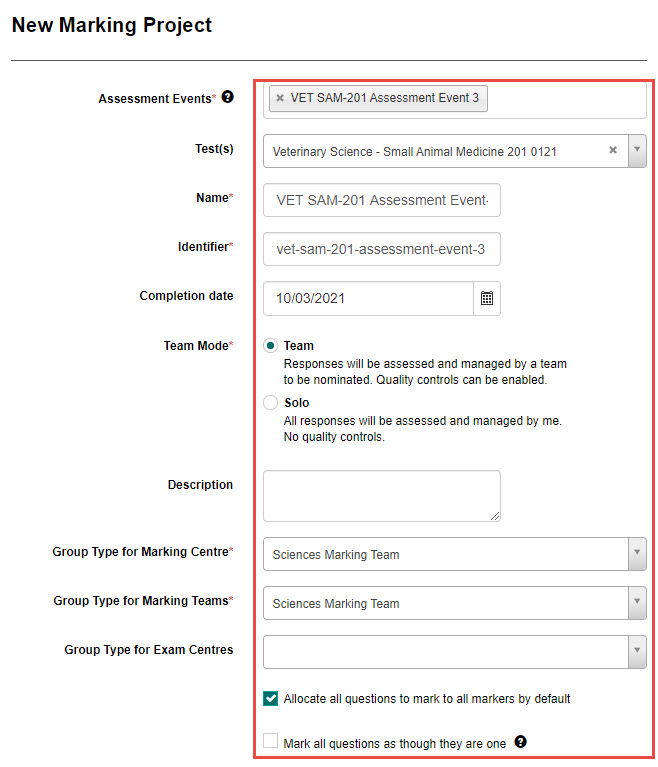
- Select the Save Marking Project button to save.
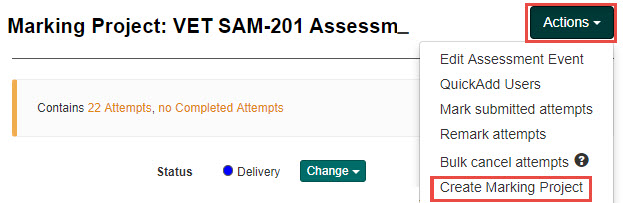
Via the assessment event
You can also manually create a marking project from the menu on the Assessment Event screen.
To do this, select Deliver in the Menu, then select Assessment Events. Open the required assessment event and select Create Marking Project from the Actions drop-down button.
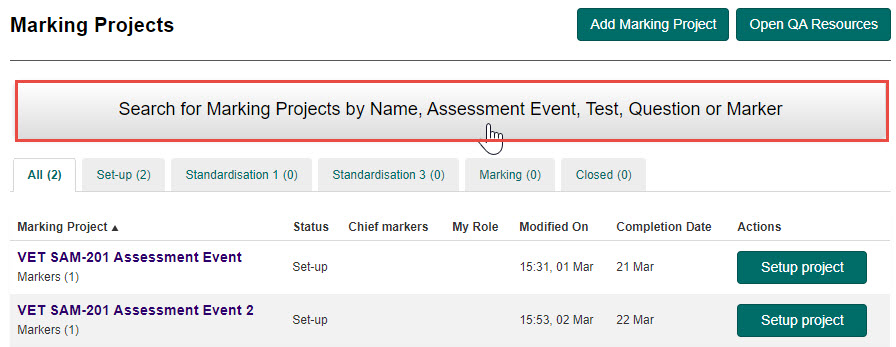
Find a marking project
If the marking project has been automatically created, you will just need to find it and make any edits necessary.
To do this:
-
Select Marking from the Menu, then select Marking Projects.
-
Use the Search functionality to search for the marking project, or locate it in the list.
-
Select the Marking Project name or the Setup project button to open the appropriate marking project.

The Marking Project screen is displayed.