Marking settings
You can control which options and features are available in a marking project via two places in Janison Insights.
Important
Access to these settings will depend on your role permissions in the system.
Marking extended settings
These settings can be accessed by selecting Marking in the Menu, then selecting Marking Extended Settings. From here you have various other options and settings.
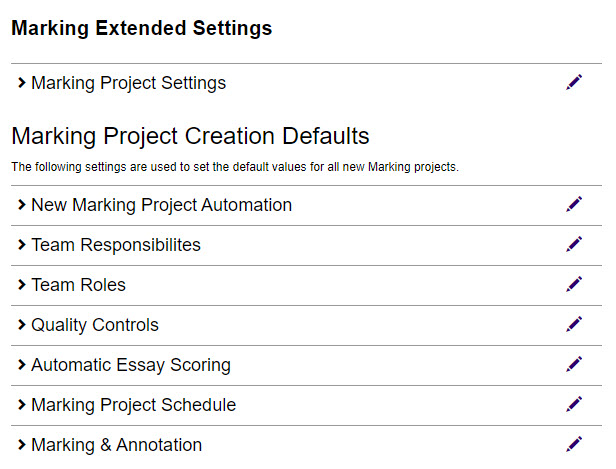
To view these, select each expandable section, or select the Edit icon to edit the appropriate setting.

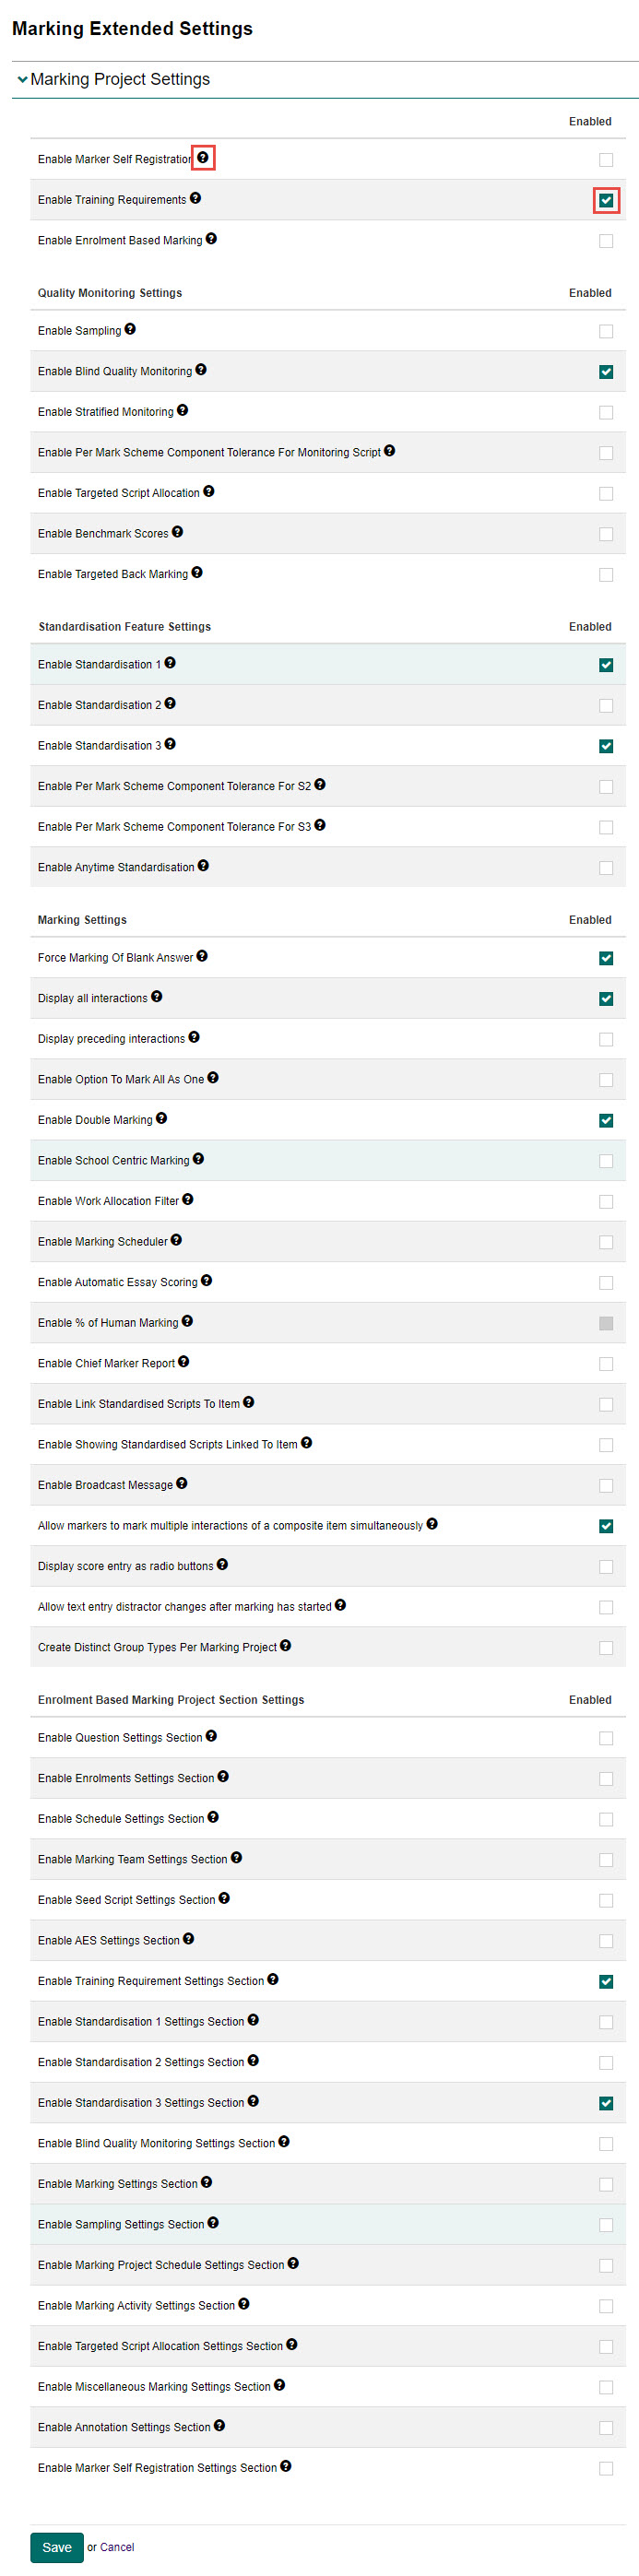
Marking project settings
This section allows you to configure the various settings for the marking project.
The various options and settings are displayed. You can select the ? icon next to any option to see more information about that option. To enable any of the options, select the Enabled checkbox next to that option. To disable an option, ensure the checkbox remains unchecked.
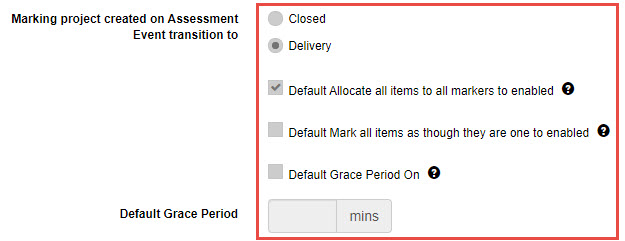
New marking project automation
This section allows you to set the default values for automation of new marking projects.
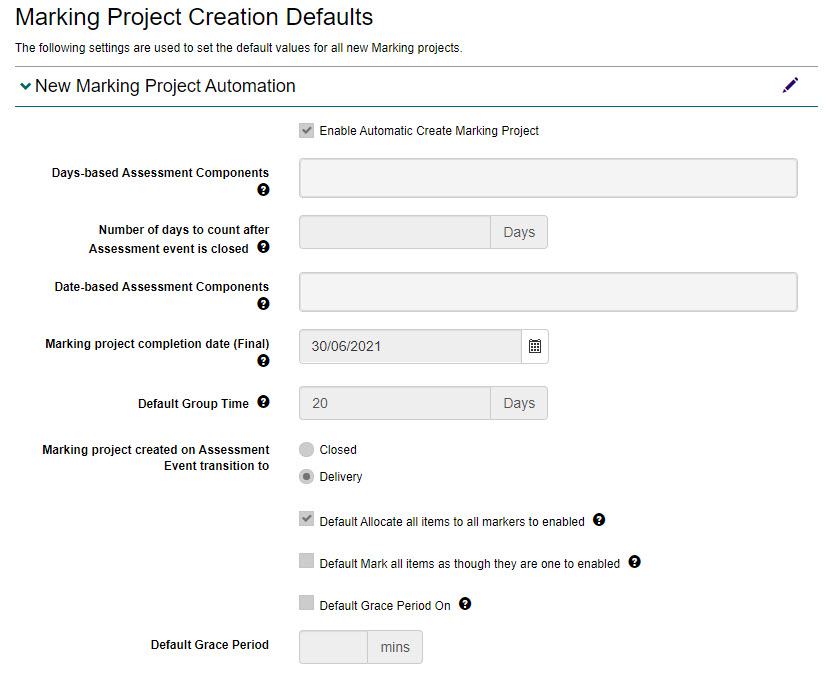
To enable the system to automatically create marking projects, ensure the Enable Automatic Create Marking Project checkbox is checked.

To select when the marking project is created, select either the Closed or Delivery option. This means the marking project will be automatically created when the assessment event is moved to the appropriate status. You can also select the other default marking behaviour around how marking is assigned and grace periods for Markers to change their scores.
Team responsibilities
This section allows you to set the default values for marking activities each role will have the right to perform in new marking projects. This can be overridden in any marking project if required.
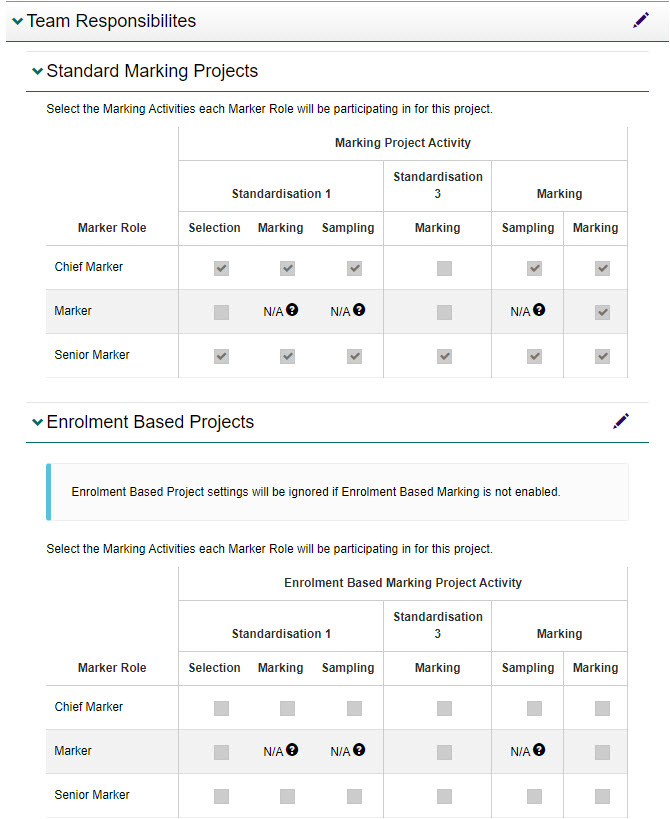
Important
In the above image, you can see the marking activities for standard marking projects and enrolment based projects. The enrolment based project settings will be ignored if enrolment based marking is not enabled.
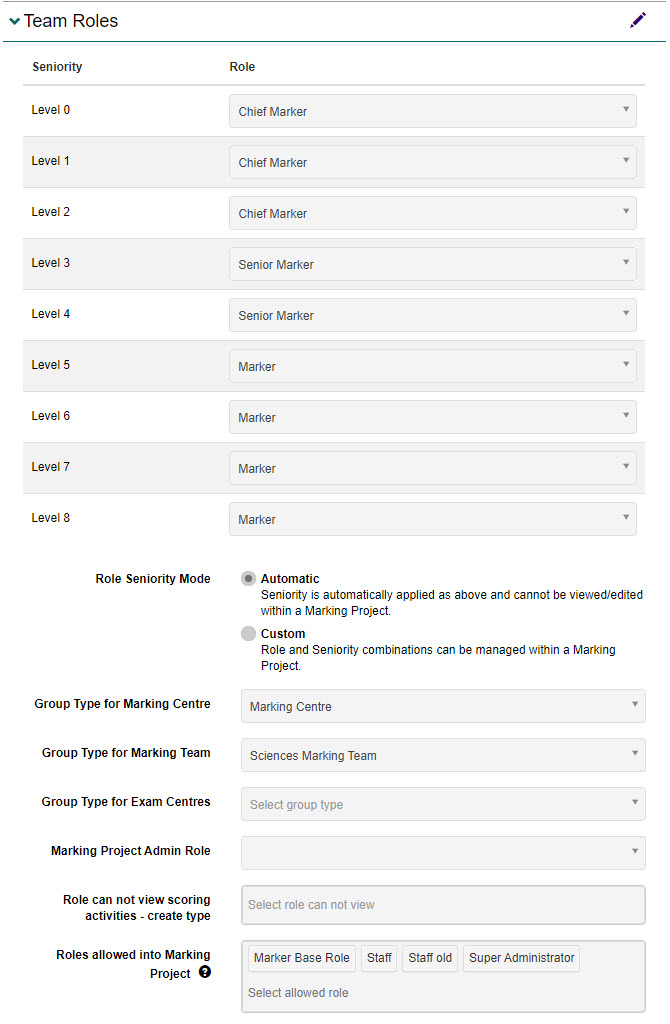
Team roles
This section allows you to set the default group types for marking centres and teams. Markers will need to be a member of these teams, or it will not be possible to add them to a marking project. You can also set the role responsible for administering the marking project.
Quality controls
This section allows you to set the default quality control requirements for marking in regards to standardisation, sampling and double marking.
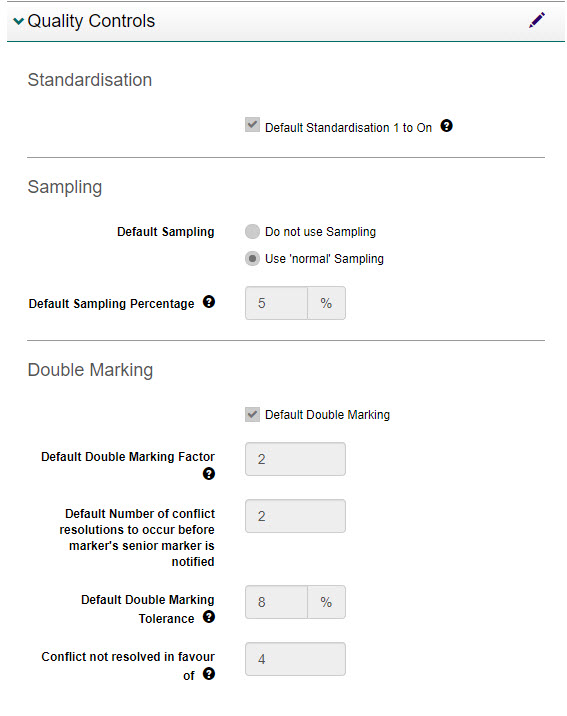
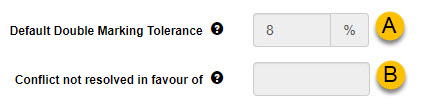
Two settings of note are:
| # | Setting | Description |
|---|---|---|
| A | Default Double Marking Tolerance | The value specified in this field sets the extent to which the double Markers can disagree on their scores. Any scores that exceed the tolerance will be flagged for review by the Senior Markers. |
| B | Conflict not resolved in favour of | The value specified in this field allows you to specify the number of scripts a Marker can mark for which a Senior Marker does not resolve in favour of the Marker when resolving the conflicts. Once a Marker reaches the value, the system will send a notification to the Senior Marker. |
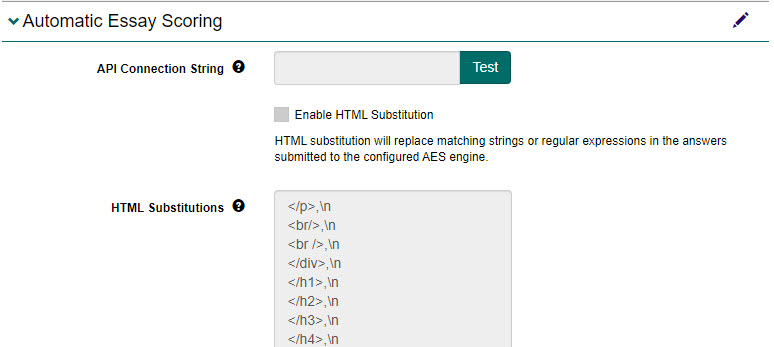
Automatic essay scoring
This section allows you to provide a connection string for a third-party scoring service or enable an HTML substitution.
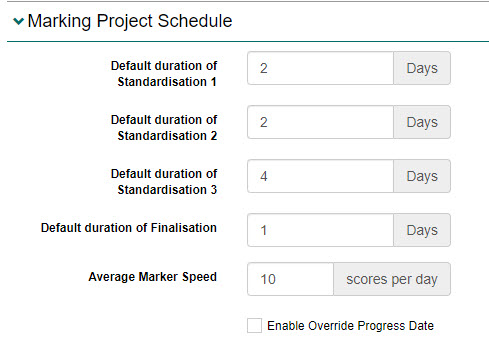
Marking project schedule
This section allows you to set the times available for each phase of the marking project. The system doesn’t enforce the values but provides an overview of the preferred or ideal timeframes.
Tip
Marking times can be enforced using the settings in the Marking sessions schedule section on the Marking Project screen.
The system calculates the Marking Project Completion Date based on the start date plus the total number of days indicated in the marking project schedule.
Marking and annotation
This section allows you to create custom annotations which will be available to Markers for on-screen marking across all marking projects.
Tip
To learn more about configuring available annotation tools for an entire marking project or individual questions in a marking project, see the Marking and annotation settings section.
To add custom annotation tools
-
Select the Edit icon next to the Marking & Annotation expandable section.

-
Review the on-screen instructions, then complete the following:
- Enter the annotation family in the Annotation Family field.
- Enter the annotation name in the Annotation Name field.
- Enter a symbol in the Symbol field. You can view the symbol in the Preview column.
- Select the Show in box checkbox (optional) if you would like the symbol to be shown in a box.
- Select the Toggle checkbox (optional) if you would like to allow for the tool to be toggled on and off.
- Select the Add button to add the annotation tool.
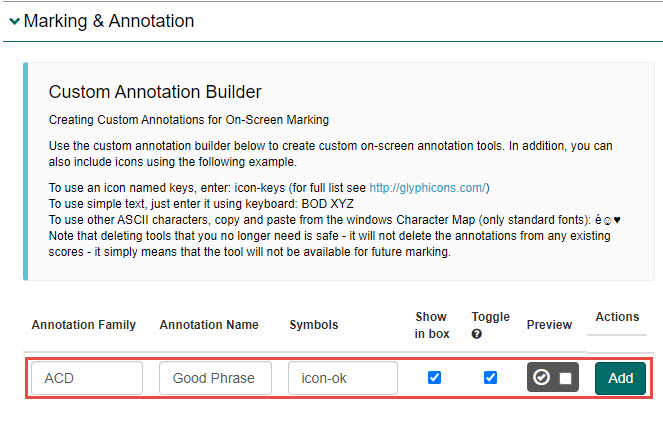
- Repeat this process for all tools you wish to add.
-
Select the Save button to save your changes.
The icon will now be available in the marking projects.
Tip
Custom annotations can be enabled or disabled at a marking project level. To learn how to do this, see the Custom annotation tool settings section.
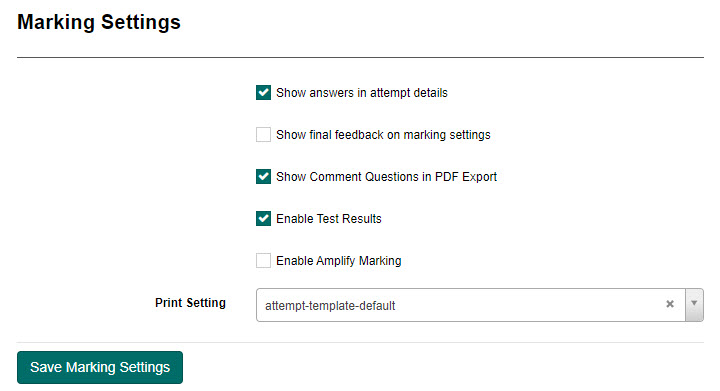
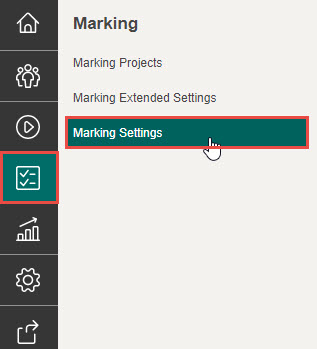
Marking settings
These settings can be accessed by selecting Marking in the Menu, then selecting Marking Settings.
From here you have various options and settings.