


There are configurations required for the tag, item, test section and test. For the purpose of this document, we have created a test on Forklift safety with three sections: Pre-Operation Inspection, Safe Driving Practices and Load Handling and Stability.
Let’s take a closer look at the necessary configurations for each of these areas.
Tags
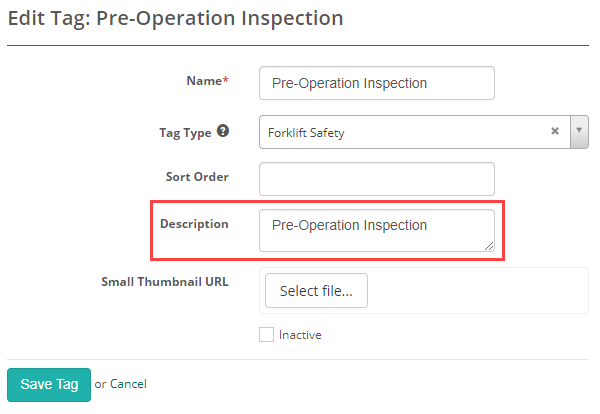
The description field of the tag displays in the Results section of the feedback screen as highlighted in the screen capture below.

To add a description to a tag, Browse to Settings > Manage Tags.
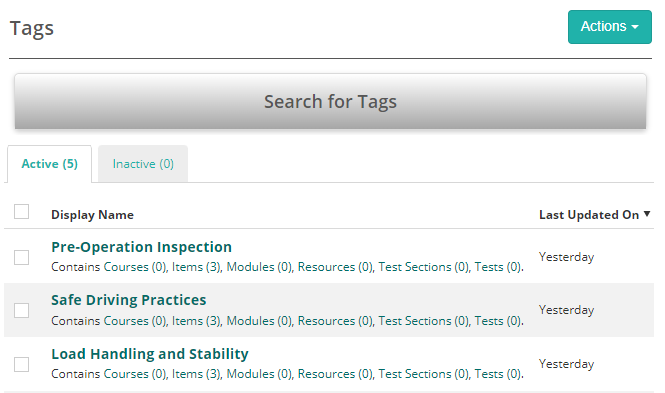
In this example we have set a tag type of Forklift safety and three tags: Pre-Operation Inspection, Safe Driving Practices and Load Handling and Stability.
Select a tag and open it in edit mode, enter a Description.
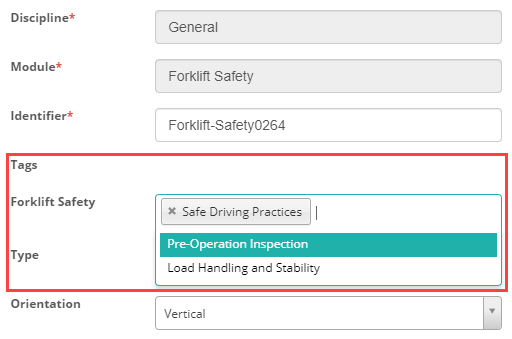
At the item level, select the tag that best fits your item.
Item
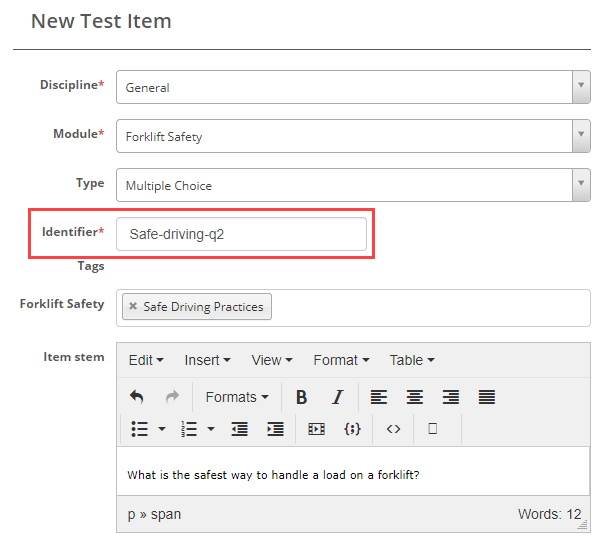
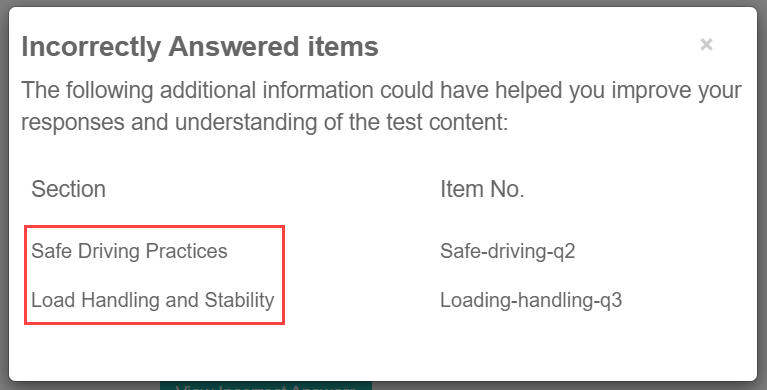
The identifier of the item displays for the Item No. in the View Incorrect Answers modal as highlighted in the screen capture below.

Below is an example of the item Identifier used for the Item No in the screen above.
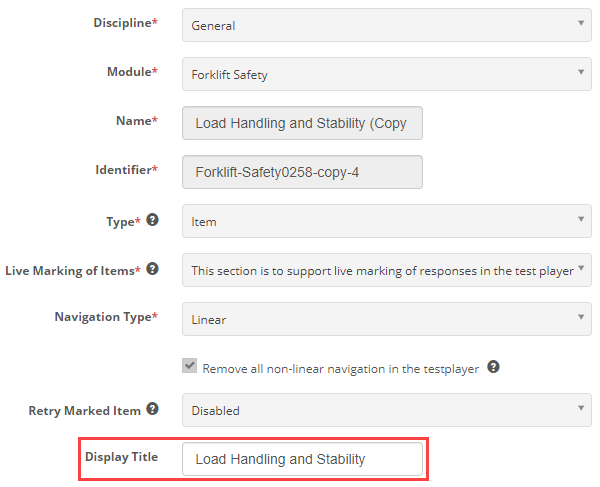
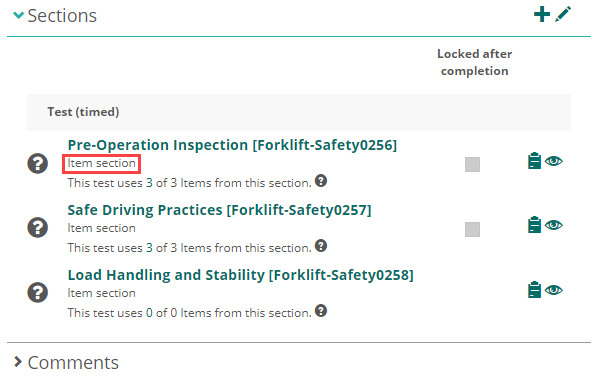
Test section
The Display Title of the test section displays in the Section of the View Incorrect Answers modal, as highlighted in the screen capture below.
Test or blueprint test
Advanced Pass/Fail Settings
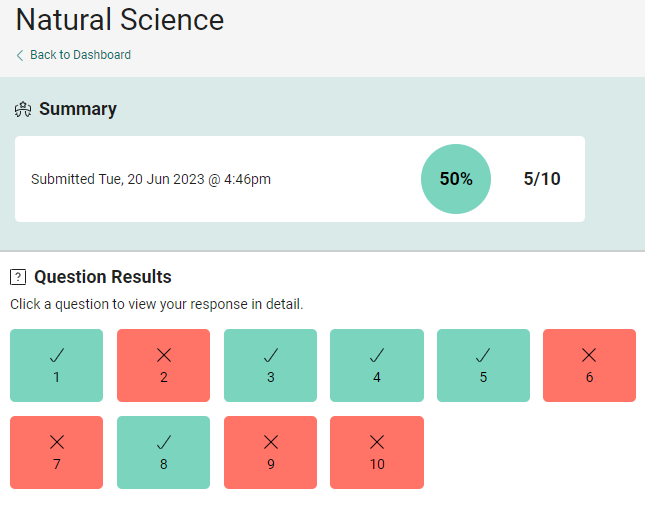
Results displaying on the feedback screen depend on information added to this section. It is therefore important to complete this section.
Tooltips ![]() provide information about the purpose of each field.
provide information about the purpose of each field.
Many of the configurations are optional. Below is an example of a completed form relating to the test used in this document.
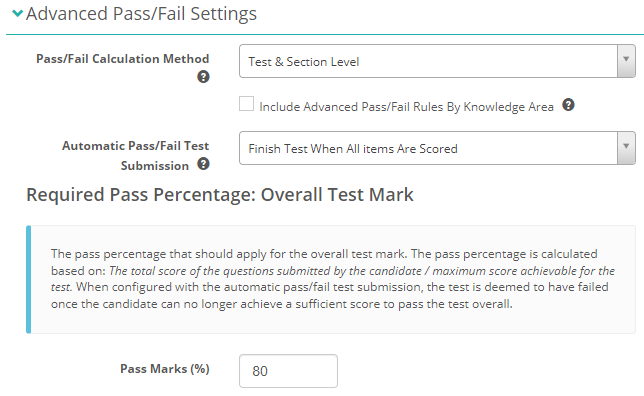

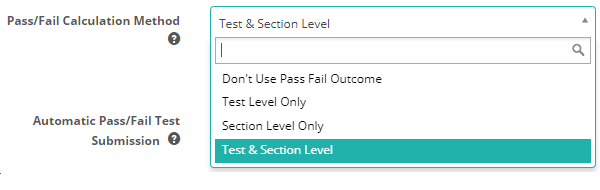
Pass/Fail Calculation Method – In this selector you can elect an advanced calculation method to configure pass/fail rules between test and individual test section marks. The options are Don’t Use Pass Fail Outcome, Test Level Only, Section Level Only, or Test & Section Level.
Select Include Advanced Pass/Fail Rules By Knowledge Area to enable the ability to configure create pass/fail rules based on tags/tag types to elect one or more item authored for a similar knowledge area to determine the pass/fail outcome in combination with the required pass percentages configured for the test.
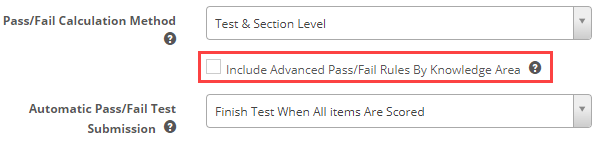
Automatic Pass/Fail Test Submission – Elect a test submission method to stop and submit the test when a pass/fail condition is met. Note: All questions must be automatically marked to utilise this setting. Options are Disabled, Finished Test On Failure To Achieve Pass Mark %, Finish Test When All Items Are Scored, Finish Test When All Items Are Scored Or Failure.

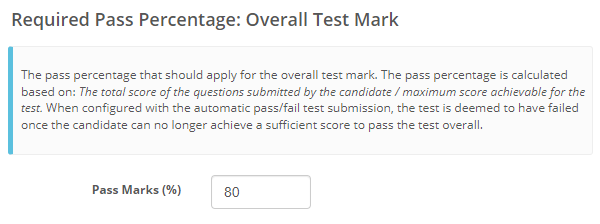
Required Pass Percentage: Overall Test Mark
The pass percentage set here applies for the overall test mark.
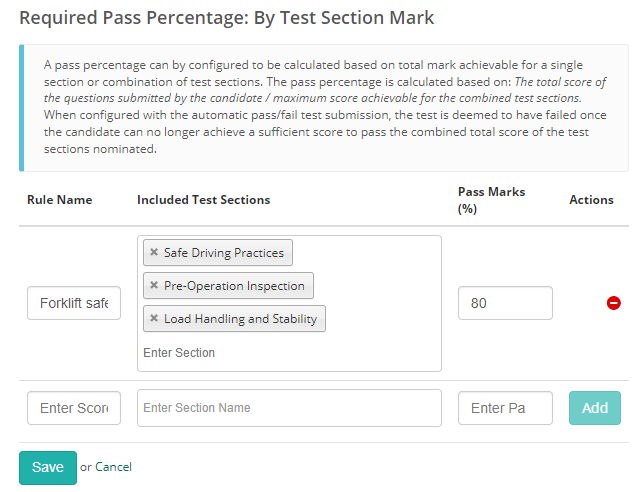
Required Pass Percentage: By Test Section Mark
You can set a pass mark (%) per section of the test.
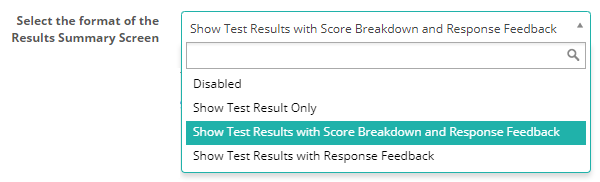
Results Summary Configuration
In addition to Advanced Pass/Fail Settings covered above, Results Summary Configuration is also essential to make the results display.
Below is an example of the section completed relating to the example used in this document.
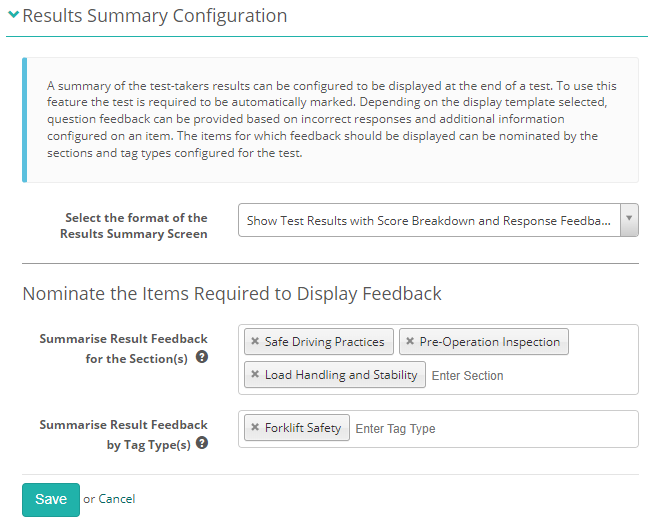
The options for the results summary screen are:
- Disabled
- Show Test Results Only
- Show Test Results with Score Breakdown and Response Feedback
- Show Test Results with Response Feedback
Setup details specific to regular tests
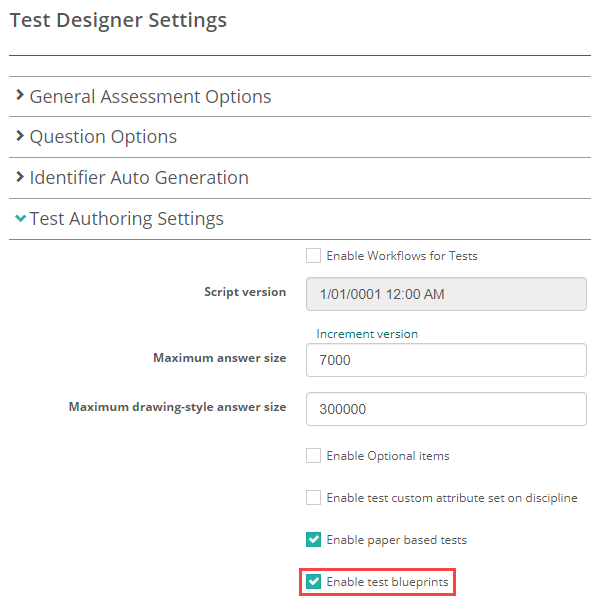
Test blueprints
Test blueprints must be active on your site for the tags system to be available. This enables tags for both regular tests and test blueprints.
Navigate to Settings > Test Designer Settings and expand the Test Authoring Settings section.
Select Enable test blueprints.
‘Exit’ test sections
To display test feedback, add the “exit if passed” and “exit if failed” sections to the test. Below is a screen capture of the sections in the test used as examples in this guide.
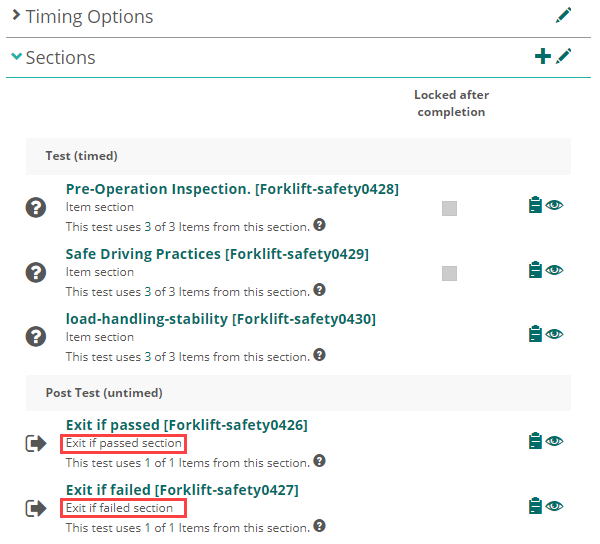
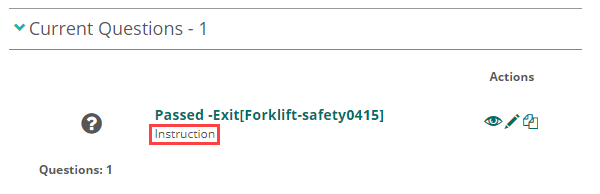
Exit sections must contain an Instruction item type. The content of the item is irrelevant, as test-takers will not see the text.
Setup details specific to test blueprints
Test blueprints only need to have Item section types.
You need to configure everything in the test blueprint. Once these steps are complete, create the blueprinted test.
Related documents
Item feedback and live marking
With this feature, as a test-taker completes an item, the system marks it and provides feedback. Read more.

Results and feedback from the Candidate dashboard
Test-takers can view their results from the tiles on their dashboard. Read more.

Practice test feedback
Test authors can add feedback to example or practice tests. If this feature is active, once a test-taker completes the example test, they can review their test and feedback after submission. Read more.