

Create a drawing interaction item
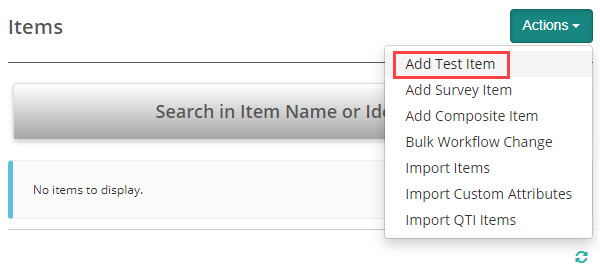
Navigate to Author > Items.

Select Add Test Item from the Actions drop-down.
The New Test Item screen displays.
Complete the form as required. Below is an example of an new item we created.
Select Drawing interaction as the item type and enter the Item stem.

Upload base image (optional)
You now have an option to add a Base Image if required. You would use a base image if you require the test-taker to mark-up the image as part of the question. Open the practice test to view examples of items with and without base images. In this example, we’re going to upload an image.
Select into the image icon area.
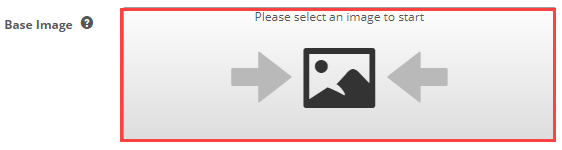
The resources manager displays. You can either select an existing image or upload a new image.

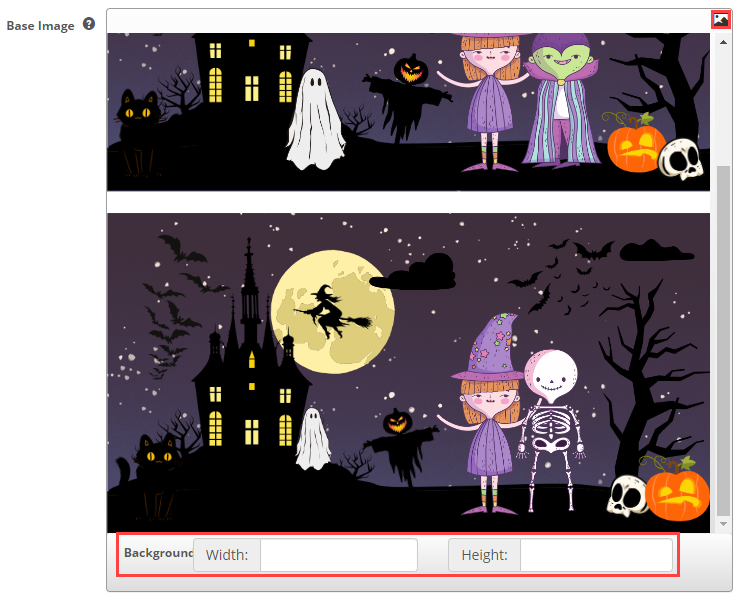
Once the image has uploaded you have an option to upload a new image or to edit the image using the image icon ![]() .
.
You can optionally set the Width and Height of the image using the fields at the bottom.
Once complete, save your item.
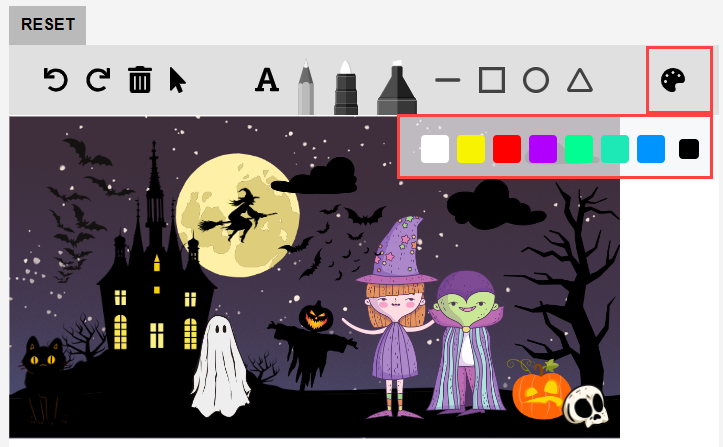
Colour picker
Once you have saved your item, a Color Picker section displays. The colours you select here will be available for test-takers to use in the palette.
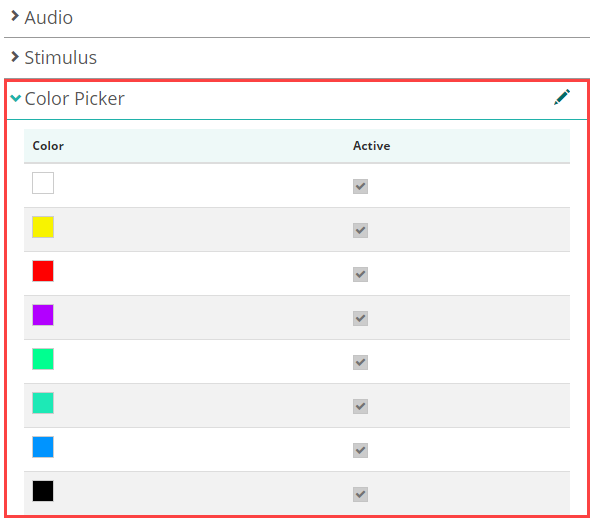
In this example we’ve selected all the colour options which makes them available when the test-taker selects the palette icon ![]() .
.
Marking and setting scores
Drawing interaction item types are human marked.
Once you save the item, a Marking section becomes available. This section gives you options to provide instructions and structured guidelines for markers.
Select the pencil icon ![]() .
.

Enter instructions for the marker in the Marking Rubric field.

The Marking Scheme Components section provides the facility for markers to assign individual points to specific criteria of the response. You can set a name, add a description and an available score for each component.
In this example, we’ve added a component for each of the differences we expect the test-takers’ to identify, and we’ve set 1 score for each, making 8 possible points available.

If you have created marking scheme components for a different item but they are appropriate to the current item, you can select the related item from the Select the reference Question dropdown, and the marking scheme components will display. This saves you the step of creating new components.
To do this, navigate to the top of the marking section and select the item from the Select the reference Question dropdown, and then select Copy. The marking scheme components relating to that selected item will appear.

Marking screen
The marking scheme components you created appear in the Scoring Pane on the marking screen. Markers select a score for each component. The Description you entered displays when the marker hovers over the tooltip icon ![]() .
.

The Marking Rubric instructions display below.
