Welcome to the Janison Insights help portal
Item types
The file upload item type requires test-takers to upload one or more files in response to a question or multiple questions. This is handy when the content needs to be created in third party software such as a video creation app, and then uploaded as a response.
Test authors have the option to limit the size and types of files test-takers can upload. They can also set single or multiple upload areas.
Important: File upload item types are currently not supported in tests if you’re using NoSQL. Support will be added in the future. Please contact your Janison account manager if you require further information.
In the example below we have created a simple file upload item. Test-takers can view the permitted file types, the max file size and the max file count on the upload tile.

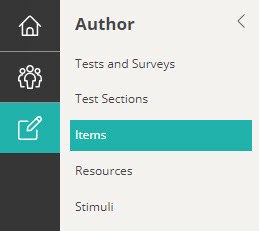
Navigate to Author > Items.
Select Add Test Item from the Actions drop-down.
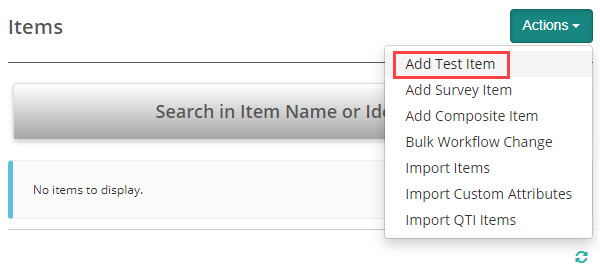
The New Test Item screen displays.
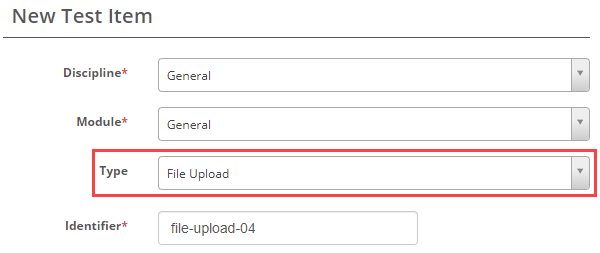
Complete the form as required. Below is an example of an new item we created.
Select File upload as the item type.
Enter the item stem. By default, the system will add a single upload area. To add additional upload areas, right click and select Insert Upload Area.
In the example below we’ve added three tasks and added an upload area for each task.
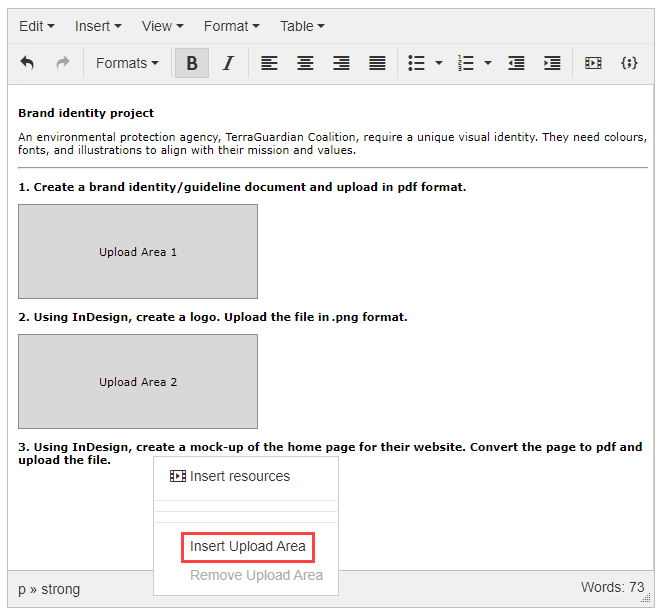
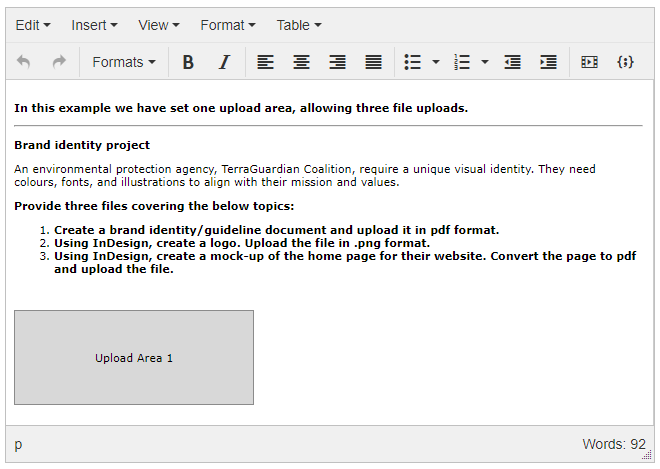
You could add a single upload area and allow three uploads as in the example below. In the next step we’ve covered how to set the permitted number of uploads.
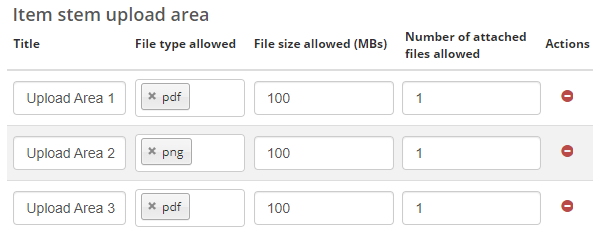
You can limit the file types, file size and number of attachments allowed in the section Item stem upload area. In this example, we’ve allowed .pdf and .png files. We’ve limited each file size to 100MB and limited the number of attached files to 1 per upload area.
This is what the above example would display like to a test-taker.

File upload item types are human marked.
Once you save the item, a Marking section becomes available. This section gives you options to provide instructions and structured guidelines for markers.
Select the pencil icon ![]() .
.

Enter instructions for the marker in the Marking Rubric field.
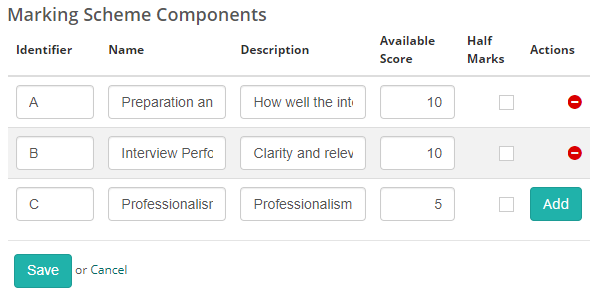
The Marking Scheme Components section provides the facility for markers to assign individual points to specific criteria of the response. You can set a name, add a description and an available score for each component.
In this example, we’ve added three components and we’ve set a score for each, making 25 possible points available.
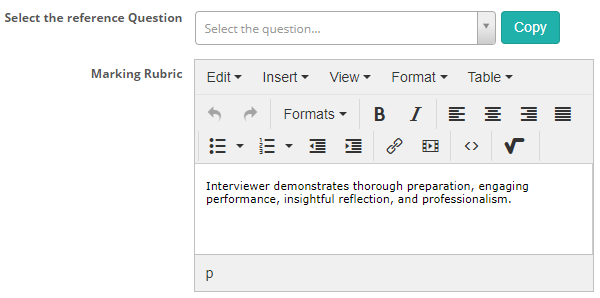
If you have created marking scheme components for a different item but they are appropriate to the current item, you can select the related item from the Select the reference Question dropdown, and the marking scheme components will display. This saves you the step of creating new components.
To do this, navigate to the top of the marking section and select the item from the Select the reference Question dropdown, and then select Copy. The marking scheme components relating to that selected item will appear.

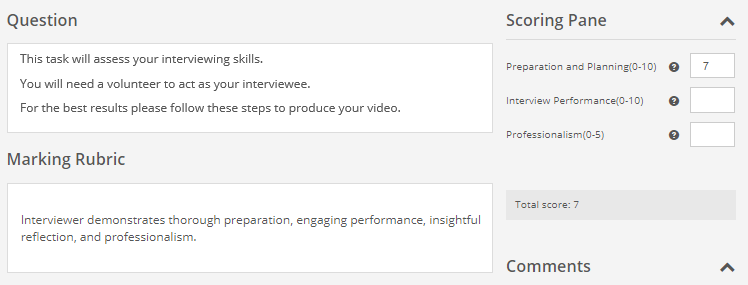
The marking scheme components you created appear in the Scoring Pane on the marking screen. Markers select a score for each component. The Description you entered displays when the marker hovers over the tooltip icon ![]() .
.
The Marking Rubric instructions display below.
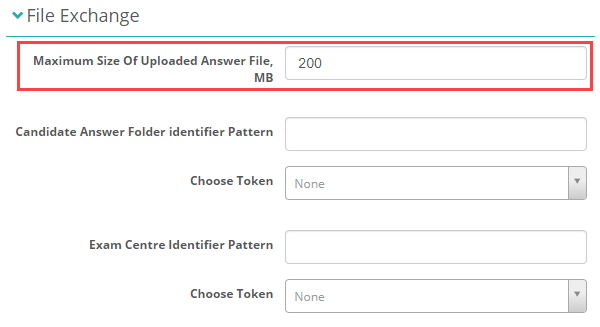
When creating an item, test authors can limit the max file size test-takers can upload, as covered above. The max size of uploaded files are further defined in settings. This limits the file size test authors can set at the item level.
To place a limit on the size of the files test authors can set at an item level, navigate to Settings > Test Designer Settings and expand the File Exchange section. In the field Maximum Size Of Uploaded Answer File, MB, enter a value.
Test authors can limit the types of files test-takers can upload when creating the item as covered above. The file types available for test authors to select are defined in settings.
Navigate to Settings > Resource Designer settings and expand the Available Resource types section.
Add or remove the File Types for Document.

1300 857 687 (Australia)
+61 2 6652 9850 (International)
ACN 091 302 975
ABN 35 081 897 494
© 2024 Janison
Janison acknowledges the traditional owners of the land on which we work and meet. We acknowledge the continuous care of the land, animals and waterways. We pay our respects to Elders past, present and emerging.