Browse Learning
Introduction
Browse Learning links to a catalogue of the Learning Assets available to learners. The Learning Assets are linked to Catalogue Items which are listed on the Browse Learning page as tiles. It is accessed from the Browse Learning menu when on the home page of the site.
By default the Learning Assets are listed on the page without any categorisation. In the screenshot below Browse Learning is shown in its default state.
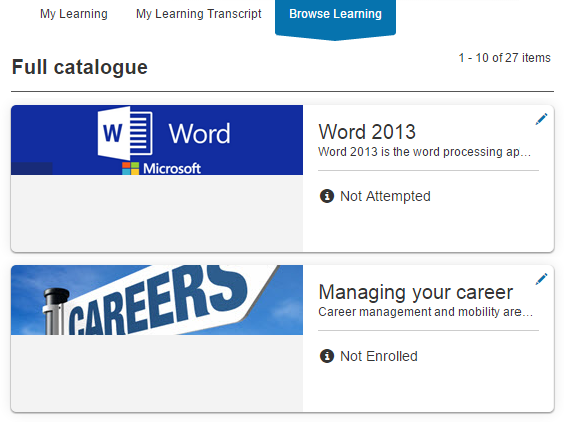
This is suitable if only a few Catalogue Items exist in the system. If there are many Catalogue Items it makes sense to group them into topics to prevent them from appearing in one long list. This can be achieved in Browse Learning Settings. The outcome can be a left hand menu structure as shown below.

Browse Learning Settings
User experience of the catalogue can be improved and changed using the settings available in Browse Learning Settings.
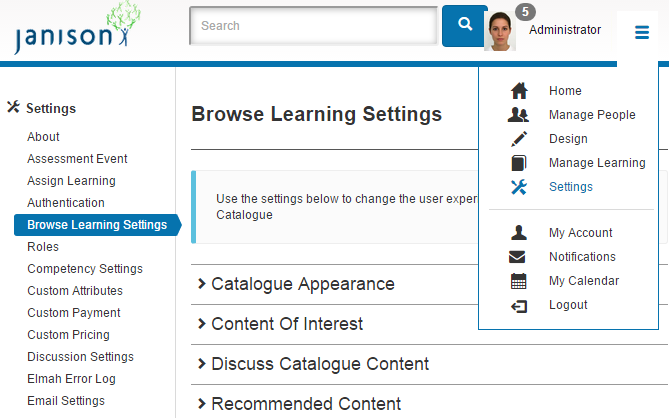
To access this page navigate to Settings > Browse Learning Settings.
Catalogue Appearance
This section controls Search options, Filter elements and Sort elements. The screenshot below shows some of the settings available in this section. All settings will be covered in detail below.

Subdomain
It is possible to customise Browse Learning per Subdomain.

In the drop-down select the Subdomain you would like to make the changes to.
Note: If you find that the changes you have made are not appearing on your site, it is probably because you have not selected the correct subdomain here.
Search Options
The Search fields can be turned on or off.

- No Search will remove the search field.
- Browse Learning Search will add a Search Catalogue field to Browse Learning so that the Learner can quickly find the Catalogue Items they are looking for.

- Global Browse Learning Search will provide a search field for administrators to search the system. It is not limited to the Browse Learning Catalogue.

Filter Elements
These settings control the top filters on the Browse Learning page to further increase the search criteria. They will only be relevant if the criteria exists in the system, for example, if only one language exists on the site it would not make sense to check the Language filter.

Learners will see the filters when they access Browse Learning as seen in the screenshot below.

- The Price filter will provide the option for the Learner to search for Free or Paid courses.
- The Language filter will provide the option for the Learner to search for Learning Assets in different languages.
- The Type filter will give the learner the option to search for different Learning Asset types; Assignment, Course, Document, Program, Survey and test.
Sort Elements
This option will add an additional Sort filter to Browse Learning.
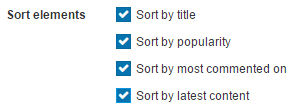
Checking any option will add it to the list in the Sort drop-down.

Sort by title adds a Title filter which will sort the list of Catalogue Items alphabetically.
Sort by popularity adds a Popularity filter which will rank the Catalogue Items by the number of enrolments they contain. The Catalogue Item with the most enrolments will be listed at the top.
Sort by most commented on adds a Comments filter which will sort the Catalogue items by the number of comments have been made on them. The Catalogue Item with the most comments will be listed at the top. Note that only certain Program Templates will provide the facility for Users to make comments against them. Please see the document on Program Templates for further information.
Sort by latest content adds a Newest filter which will sort the Catalogue Items by the date they were published. The most recently published Catalogue Items will be listed at the top.
Default Sort Element
The option selected from the drop-down will determine the element selected when a learner first accesses Browse Learning. For example, if the Default Sort Element is set to Sort by latest content, when Learners access Browse Learning, the Newest content will appear at the top of the list.

Show
The information displayed on the Catalogue Item tile can be controlled by checking these options.
Note that Ratings and Comments will only be available if a Program Template supporting this functionality is used in the Catalogue Item. Please see the document on Program Templates for further information.

- Price is the cost of the catalogue Item. This value is drawn from the Price field in the Catalogue Item. Please see the document on Payment Settings for further information.
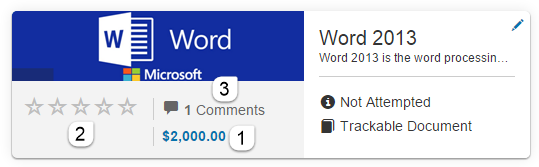
- Ratings can be added to the Catalogue Item by the Users who have undertaken the learning. These will appear on the Catalogue tile as a mark of quality. For this option to be available it needs to be enabled. For instructions to activate Ratings see the document on Discuss Catalogue Content.
- Comments can be added to Catalogue Items if configured to do so. These will appear on the Catalogue tile and learners can use it to gather information posted by other Users who have undertaken the learning. This option will only become available if enabled. For instructions to activate Comments see the document on Discuss Catalogue Content.
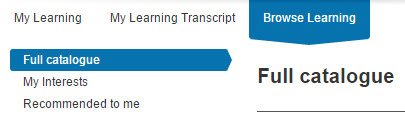
Show Tabs
Show Tabs control the left hand menu items relating to the full catalogue, interests and recommendations.

- Full Catalogue provides a link to all available Catalogue items.
- My Interests gives Learners the options to set a list of catalogue items based on their personal interests. More information on this feature is available in the document on Content of Interest.
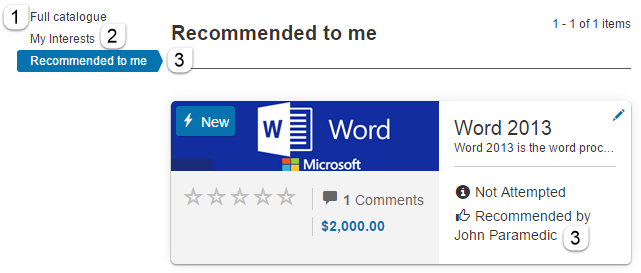
- Recommended to me will list all Catalogue Items that have been recommended to the learner by other users. More information on this feature is available in the document on Recommended Content.
Default left-hand side filter
The selection in the drop-down will determine which tab will be selected when Learners first click on Browse Learning.

For example if Full Catalogue is selected, it will be the highlighted tab when Learners access Browse Learning and they will be presented with the full catalogue of Learning Assets.
Custom Menu
The most common way to set the side filters in Browse Learning is outlined below in Side Filters. It is however possible to manually set the filters using a custom menu. For more information on this feature please contact your Janison account manager.

Filters
In earlier sections of this document we learned how to set top filters using Filter Elements and Sort Elements. You may require your own filters, this is possible by enabling this feature and setting up tags against your Catalogue Items.
To set custom filters you will need to complete two steps first:
- Set up Tag Types and Tags. For information on how to do this please see the document on Tags and Tag Types. As an example we have added a Tag Type of Provider. It contains 4 Tags relating to the providers of the content; Janison, CrossKnowledge, Skillsoft and Microsoft.
- Tag the Catalogue Items with the relevant tags. For information on tagging Catalogue Items please see the document on Manage Catalogue Item. In this example we have tagged all Learning provided by Microsoft with the Tag Microsoft.
Top Filters
Top Filters appear above the list of Catalogue Items.
- Navigate to Settings > Browse Learning and locate the Top Filters section.
- From the Select Tag Type drop-down select a Tag Type. It will be added to the Tag Type section directly below. Add as many Tag Types as required.

In this example we have added Provider.
- To remove the Tag Type click the
 icon.
icon. - Save the settings.
- Navigate back to Browse Learning and you will have a Provider (Tag Type) filter listing all the providers (Tags). If for example I filter by Microsoft, all learning Assets provided by Microsoft will be listed (all Catalogue Items with the Microsoft Tag applied).

Side Filters
Side Filters appear at the left hand side of the Catalogue Items in Browse Learning.
- From the Select Tag Type drop-down select a Tag Type. It will be added to the Tag Type section directly below. Add as many Tag Types as required.
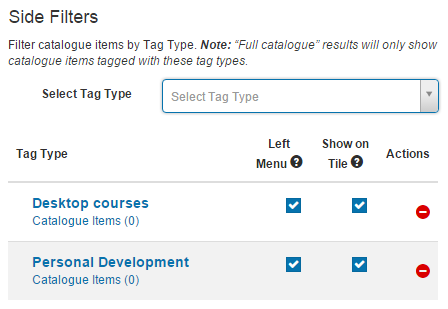
Four columns are available:
- Tag Type lists the Tag Types selected from the Select Tag Type drop-down.
- Left Menu – If checked displays the Tags and Tag Types in the left menu.
- Show on Tile – If checked will display the Tag on the Catalogue Item tile.
- Actions – clicking the
 icon will remove the Tag Type.
In this example we have added two Tag Types, Desktop Courses and Personal Development.
Navigate to Browse Learning to view the 2 additional left hand navigation filters, Desktop Courses and Personal Development. The Tags associated with each of these Tags Types appear directly underneath. They can be used to filter the category of courses in the Catalogue. The Numbers 2 and 3 in the screenshot relate to the columns, Left Menu and Show on Tile listed above.

Note that if a Tag Type is added to the Side Filters but no Catalogue Items are tagged with the corresponding Tags, the filter will not show in Browse Learning. This prevents filters with no content from appearing.
Content of Interest
Content of Interest gives the learner an option to set a link to topics in which they have an interest.
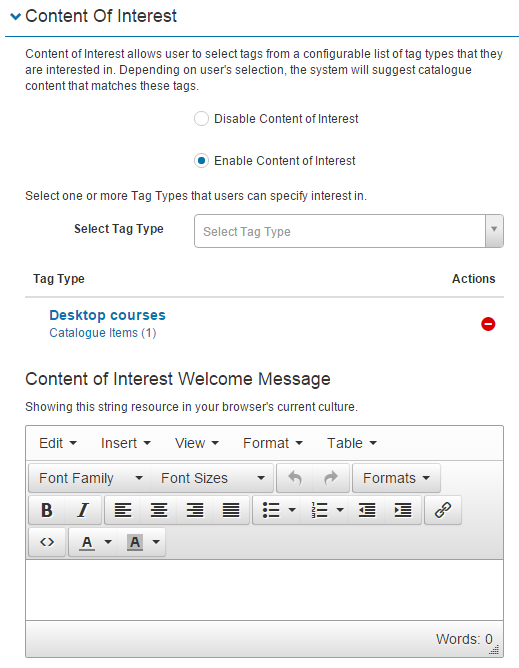
Enable Content of Interest

If content of Interest is enabled, an additional link, My Interests, will appear for Learners on the left of the Browse Learning page.
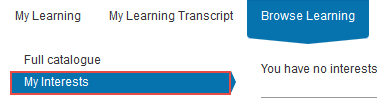
Select one or more Tag Types that users can specify interest in
The Tag Types added here will make them available as selection options for learners in Browse Learning.
- To add a Tag Type select it from the Select Tag Type drop-down. As selected it will be added to the Tag Type column below.
- To remove Tag Types click the
 icon
icon

Content of Interest Welcome Message
A welcome message can be added which the learners will see when they access the My Interests Page.

User Experience of Content of Interest
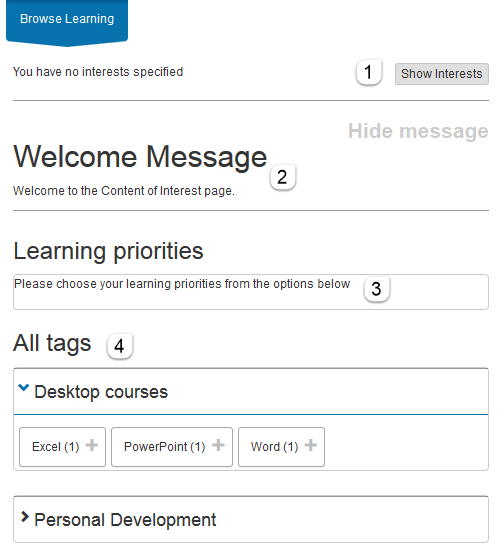
When learners click the My Interests link for the first time they will be see the page as captured in the screenshot below. Several key areas exist:
- Show Interests – Once interests are specified they can be accessed by clicking the Show Interests button.
- Welcome Message – The welcome message specified in Browse Learning Settings will appear here. This message will only appear the first time learners access the page.
- Learning priorities – Once the Tags (topics of interest) have been selected they will appear in this field.
- All Tags – The Tags available for selection as interests will appear here.
In the below screenshot the Learner has selected ‘Excel’ as the Learning Priority.

When the Learner clicks My Interests, Learning Assets tagged with Excel will appear in the list as shown below.
Learners can change their interests by clicking the Change button.

Discuss Catalogue Content
This feature gives learners the opportunity to rate and to make comments on Catalogue items. It works in conjunction with the Show setting in Catalogue Appearance.
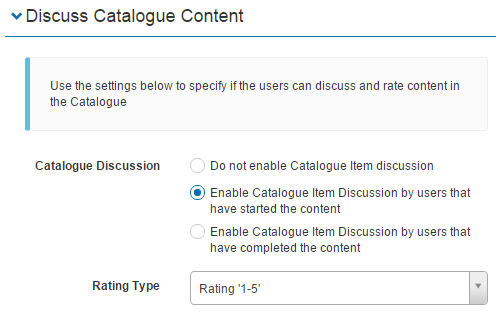
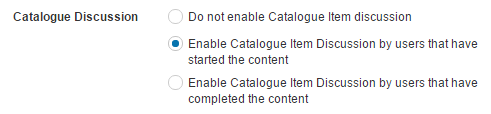
Catalogue Discussion
If enabled learners will have the option to comment on Catalogue Items. This can be set to be enabled if learners have enrolled in the content or restrict them from commenting until they have completed it.
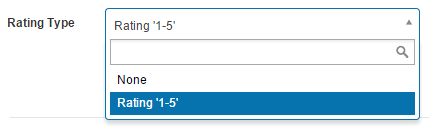
Rating Type
If Rating Type is set to Rating 1-5, learners will have the option to rate Catalogue Items.
Note that the comment section and Rate option will only be available if a Program Template supporting these settings is used in the Catalogue Item. Please see the document on Program Templates for further information.
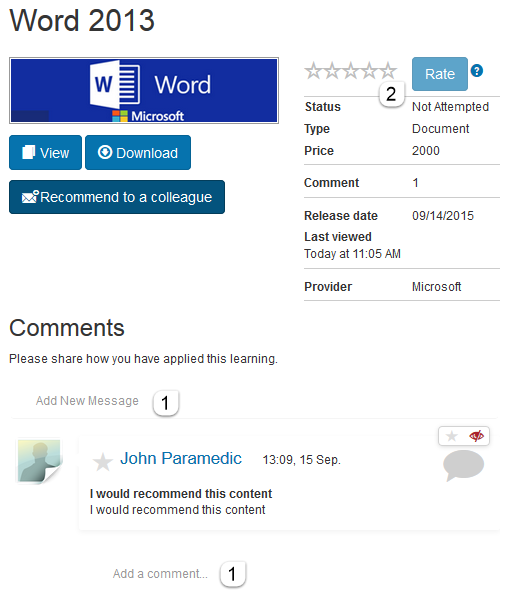
Learner Experience of Discuss Catalogue Content and Rating Type
- If enabled, learners will be given access to a Comments section where they can Add New Message or Add a comment to an existing message. These comments are visible to other learners.
- If enabled learners will be provided with the option to give the content a star rating using the Rate button.
Note that The Singular Asset Program Template has been used in the below Catalogue Item.
Recommended Content
This feature gives learners the option to Recommend Catalogue Items to other learners.

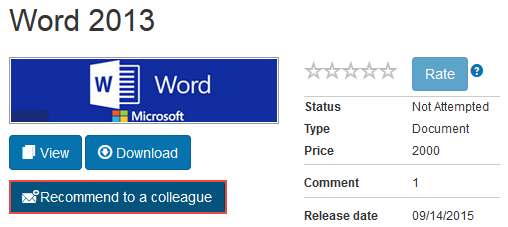
Learner experience of Recommended Content
If enabled learners will have access to a Recommend to a colleague button. This feature works in conjunction with the Show Tabs setting in Catalogue Appearance.
If the Recommend to a colleague button is clicked an email pop-up will appear with the following fields.
- A Recipients drop-down where target learners can be selected.
- Once selected a list of recipients which can be removed using the
 icon.
icon. - The Subject of the email. This field can be edited.
- The Message of the email. This field can be edited.
- The Send Email button sends the email.
