Roles
Introduction
A Role is a collection of rights that can be assigned to Users and determines what they can see and do in the system. Users have one Main Role and they may be allocated a number of Extra Roles that give them rights over particular entities in the CLS. Users never see more functions than they need to use. For example, someone with the additional Marker Role can mark Tests but can’t change Courses and Enrolments or manage Users. A User with a System Administrator Role can do and see everything.
The Security Manager Plugin provides a set of User Interface screens for an administrator and other authorised people to configure Roles to manage access controls.
Managing Roles in the system is not a trivial task, and will usually be completed by the Janison Client Services team.
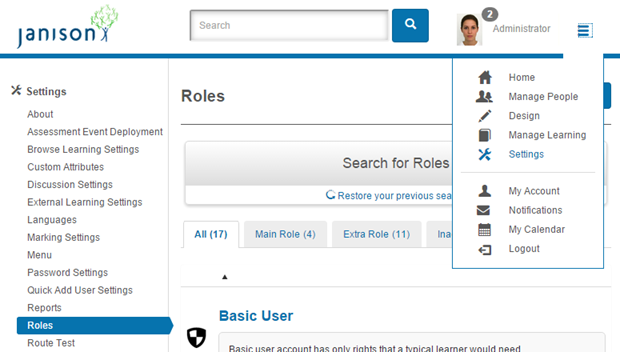
Roles are managed through Settings > Roles.
Concepts
- Rights – These are actions that can be performed in the system, such as Add User or Create Course.
- Roles– A collection of rights that refers to a set of actions or responsibilities a user can perform. A role could be Content Reviewer or Tenant Administrator.
- Entities – These are the objects in the system, such as Questions, Modules, Users, Organisations that are protected by security rules.
- Role Membership – When a User is assigned a role, they will be able to perform the rights for that role.
- Role Membership Scope – The Scope of Entities that a Role Membership applies to. For example, a user might be a Content Reviewer for a Course, or a Marker for a particular Tests.
- Role Inheritance from Global Tenant – Security roles are not inherited from the Global Tenant. When a new tenant is created, the roles will be created on the new tenant. This is because the Janison CLS cannot assume that Role Inheritance from the Global Tenant is desired behaviour. The Global Tenant typically serves different purposes, and may include plug-in settings that do not match the other tenants.
The CLS has some fundamental rules in order to maintain data integrity around the enforcement of Security.
- A user must always belong to an Org Unit. An Org Unit which could be a school, or some other organisational entity – is necessary for the system to understand where a user belongs – without this, the system would not know who can see or edit a given user.
- A user must always have a Main Role. For any user to log on, the system must understand what that user’s role is. By default, the Main Role of a user is Basic User. This Basic User role is hard-wired into the system as the default. It can still be customised, but it’s always there.
- Every Role is granted within a Scope. When a user is assigned a role, it must be assigned within a particular scope. This is important, because it limits and contains the scope within which a user can do things. For example, if a User has the role Teacher, the scope is likely to be set as the User’s School – that is, this User is a Teacher at their school. If the scope wasn’t specified, then the system would not be able to decide which students a Teacher is and is not allowed to see.
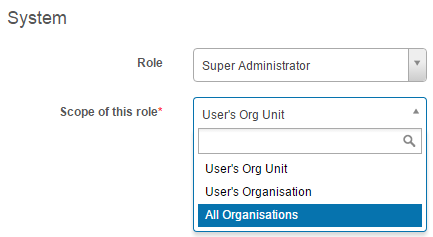
- The default scope for the default role, Basic User, is the User’s Org Unit.
- Users can have multiple roles. In addition to the Main Role, users can have extra roles. They must always have a Main Role – that is, regardless of any Extra Roles such as Content Reviewer for a Discipline, a user would still have a Main Role.
Security Hierarchies
Security Scopes imply that there’s a hierarchy of Entities. There are several access-control hierarchies in the Janison CLS.
- People Hierarchy
- Content Hierarchy
- Assessment Event Hierarchy
That means that Content and People are organised hierarchically around key Securable Entities, and permissions and access flow around this.
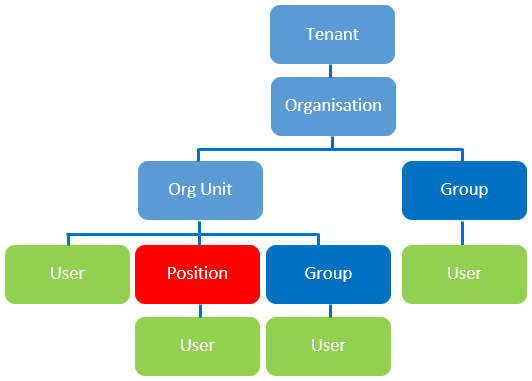
People Security Hierarchy
The diagram below shows the Janison CLS People Security Hierarchy.
Content Security Hierarchy
The diagram below shows the Content Security Hierarchy in the Janison CLS.
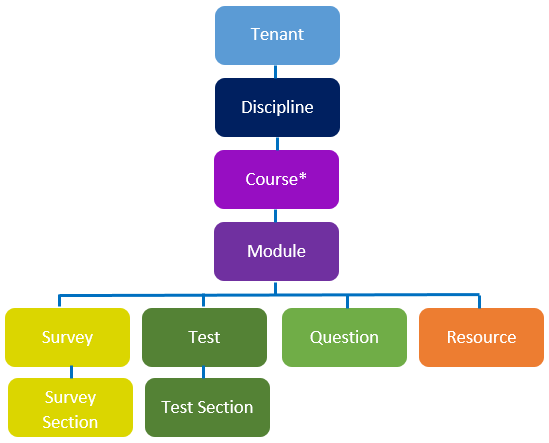
*Courses are only relevant for Learning Modules. See the document on Modules for an explanation on the difference between modules.
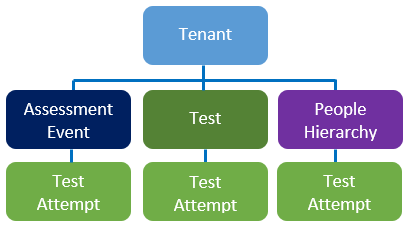
Assessment Event Security Hierarchy
The Diagram below shows the Assessment Event Security Hierarchy.
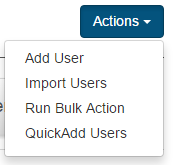
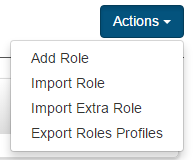
Key Actions Available

- Add Role – This allows for the creation of a new role.
- Import Role – This allows for the importing of an XML Role definition. This is particularly useful for sharing common role configurations between systems and tenants.
- Import Extra Role. This allows the import of roles via a spreadsheet.
- Export Roles Profile. This exports all roles to an xml file.
Menu Items and Buttons
Menu Items and Buttons are automatically hidden for users who do not have access to them. This is a design choice aimed at achieving simplicity, and ensuring that every user is presented with the least amount of clutter possible.
List Form
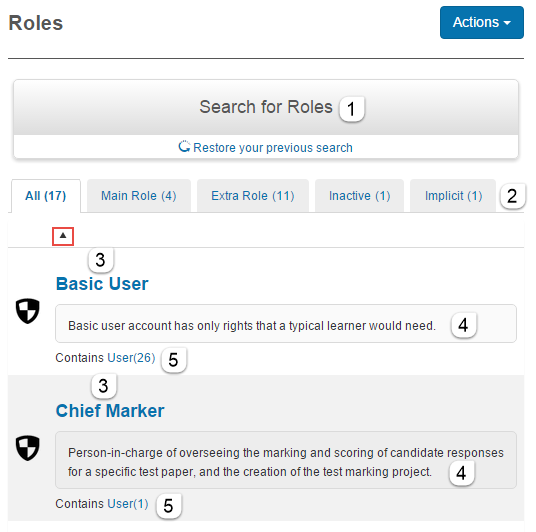
The List of Roles is located under Settings > Roles.
On this page you can:
- Search for Roles.
- View the categories of Roles, All, Main Role, Extra Role, Inactive and Implicit.
- It shows a list of available roles in the system. These can be sorted alphabetically by clicking the
 icon.
icon. - The Role descriptions outlining their purpose.
- A link exists to all users in the system who are members of the role.
Inspect
Each Role form consists of a top section and several other expandable sections as seen in the screenshot below.
To inspect a role navigate to Settings > Roles and select a Role. We will look at each section in detail in the following topics.

Form
Top Section

In this section you can view and edit the below fields.
Contains Users
This Section provides a link to all the Users with this Role Assigned to them.

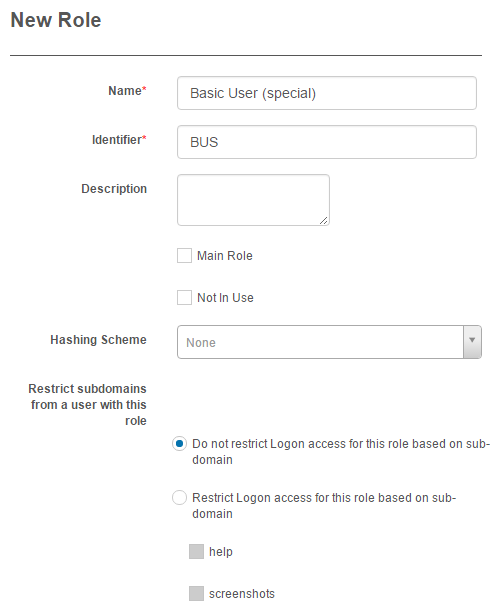
Name, Identifier and Description.

- Name – the name of the Role.
- Identifier – the unique identifier of the Role.
- Description – the description is optional but is helpful for explaining the purpose of the Role.
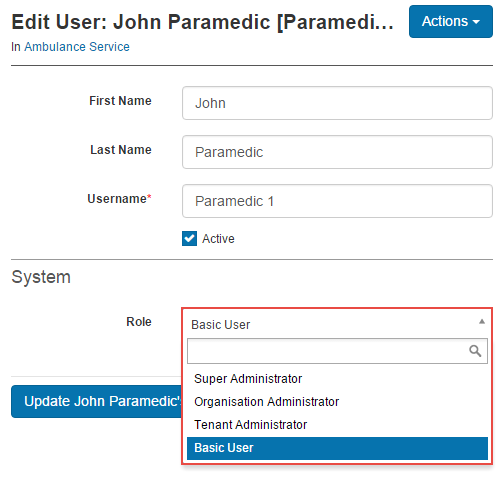
Main Role
If this option is checked the Role will appear in the drop-down in the System section of the User edit form. This means that the Role can be set as a Main Role for Users on the site.
Not in Use

If this option is checked the Role will become Inactive.
Hashing Passwords
Hashing schemes are used to secure passwords. Any passwords that are stored in the database can be stolen if the database is compromised. By applying a hashing algorithm to passwords, it makes it improbable for any attacker to determine the original password.
Several hashing schemes are available and can be set per Role.

Restrict subdomains from a user with this role
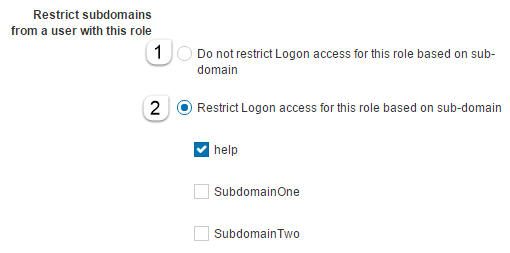
- Do not restrict Logon access for this role based on sub-domain – this setting will allow user with this Role to log into any subdomain.
- Restrict Logon access for this role based on sub-domain – This setting will allow users with this Role only to log into the subdomains selected. In the example in the screenshot above, Users with this Role will only be permitted to log into the Help subdomain. If they attempt to log into SubdomainOne or SubdomainTwo, they will encounter the below message and be prevented from logging in.
You are not allowed to login through this sub-domain.

Applicable Documents
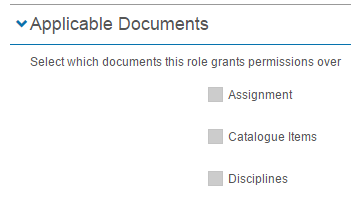
This section allows you to specify the entities/documents that appear in the Role drop-down of the Administrators widget.
To Edit Applicable Documents:
- Navigate to Settings > Roles and select the Role you would like to edit.
- Click Edit Role.

Securable Areas of the Documents
This sections allows you to specify what a User with the Role assigned to them can see and do in the system.

This section has 4 columns:
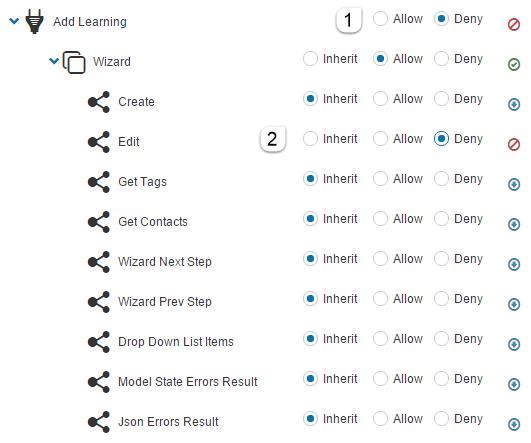
Area – this lists the areas of the CLS where the permissions relate to. It can contain one or more sub areas with child values. The below screenshot lists the Add Learning feature of the system. It has a sub area of Wizard and child values of relating to the Wizard of Create and Edit.

Access – Is the value of the Area and could be:
- Allow – Allows User access.
- Deny – Denys User access.
- Inherit – Inherits the value set at the parent level, in this case the Add Learning level which is set to Deny.
Effective – To make it obvious what the inherited value is, this column lists the actual values. For example if the parent Area is set to Allow, the Access column will list Inherit whereas the Effective column will list the actual value of Allow.
Indicator – There are three indicator icons to help you quickly understand the values of the Areas settings.
 Users with this Role are allowed in this area of the system.
 Users with this Role are not permitted in this area of the system.
 Users with this Role are allowed in some Areas and not allowed in other parts of this area of the system.
The below screenshot is of the Basic User Role. Three areas are highlighted as examples of different types of access:

Add Learning is set to Deny as a basic user undertakes learning but does not Add Learning to the system. They therefore do not require access to this part of the system.
Assignment is set to Mixed as Basic Users will only need access to parts of the Assignment feature. For example a Basic User may be required to submit an Assignment so Learner Submission will be set to Allow. They will not be required to Create or Edit an Assignment so these areas will be set to Deny. The basic User therefore has Mixed Access to Assignments.
Course Player is set to Allow as Basic Users require access to the course player to undertake courses.
Editing Securable Areas of the System
By editing a Role you can add or remove User access to Areas of the CLS.
To edit Securable areas click the edit pencil of the Roles section.

- Check the required option, Allow or Deny. Values entered at the parent level will cascade down to the sub and child areas by default and the Inherit radio buttons will be active.
- If required set any of the child options to Allow or Deny.
In the below example a Content Designer Extra Role has been set to Allow Add Learning but will not be permitted to edit the Learning once created.
Identifying which Area needs to be set
Although some Areas are easily identifiable such as Add Learning, others are more challenging to find.
As an example, say you need to provide a Tenant Administrator’s access to create User Enrolment Rules. Nothing in the Areas column has this label. To determine the correct Area to specify these step may assist:
- Log in as a User with access to the User Enrolment Rules feature and navigate to Settings > User Enrolment Rules.
- Copy the end section of the site URL as highlighted in the screenshot below.

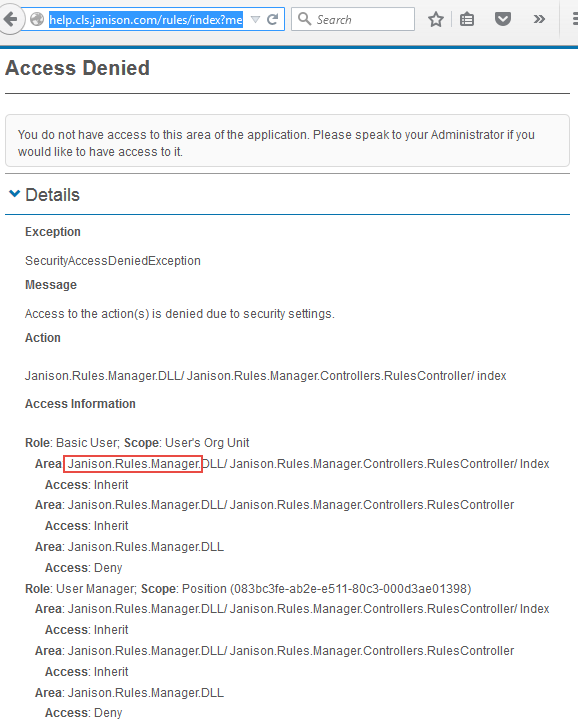
- Now log in as a User without this access to the User Enrolment Rules feature and paste the URL onto the end of the site URL, in this case, http://help.cls.janison.com/rules/index?menu=Settings.
- An Access Denied page will be returned.
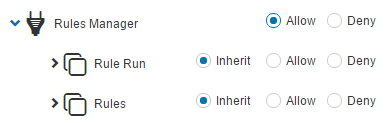
- Examine the details of the Access Information as shown in the screenshot below. The Area will be listed, in this case it is the Rules Manager.
You now know the Area to Allow. It would be advisable to copy the setting configuration of the Role with access to the Area.
Restrictions
Role restrictions allow you to set specific times and durations when Users can access the system.

This role has no restrictions
This option will not restrict access to the system.

Users in this role have access to the system only at specific times for specific durations
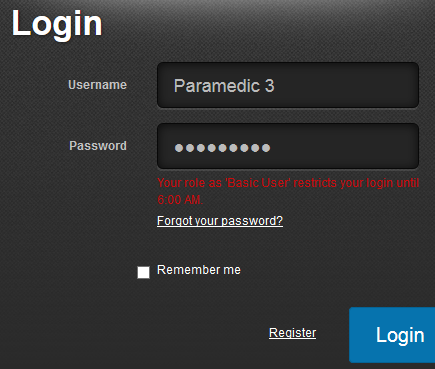
If this setting is active you will need to set an Earliest logon time and a Force log off at time. In the below example it will not be possible for Users to logon before 6 AM and they will be forced to log off at 6.30 PM.

If a User attempts to access the system outside of these hours the message, Your role as ‘Basic User’ restricts your login until 6:00 AM. or similar will be encountered.
Allow access on weekends
Checking this box will override the restrictions on weekends.

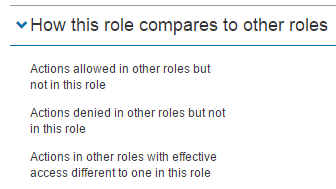
Compare Roles
This section has the functionality for Administrators to compare a selected Role to other Roles in 3 different ways:
Actions allowed in other roles but not in this role.
Actions denied in other roles but not in this role.
Actions in other roles with effective access different to one in this role.
In the below example we have opened the Basic User Role and have clicked the Actions allowed in other roles but not in this role link. By doing this we are going to determine what additional access any other roles has compared to the Basic User. In this example we are looking at the Content Designer Role. When Expanding Areas of the Role, we can see all the Areas the Content Designer has access to which the Basic User does not. For example Content Designer has access to the Asset Browser and File browser. The Basic User does not have access to these Areas.

If we open the Super Administrator Role and expanded the Actions allowed in other roles but not in this role link, there would be nothing listed in any of the other Roles as the Super Administrator Role has full permissions to every feature available in the system.
Menu
The Menu section displays the menu items a user logged in with that particular Role will see.
The first screenshot below is the Menu section of the Basic User Role. Only few menu items are listed compared to the Role in the second screenshot.

The below screenshot is the Menu section of the Tenant Administrator Role. Many more menu items than in the Basic User Role are listed.

Add Role
The Janison CLS ships with a number of in-built roles, however, it’s possible to create additional roles for flexibility purposes. This requires 3 steps:
- Create the role, providing a unique name and description
- Specifying Applicable Entities – this is a list of Securable Entity Types that the new role makes sense in the context of. For example, a role Parent only makes sense in the context of a User, and the role of Content Reviewer probably only makes sense for Disciplines, Modules, Tests and Questions.
- Navigate through the Securable Areas tree and allocate Inherit, Allow and Deny permissions as appropriate.
Export and Import
- Export Role – This allows for the exporting of an XML Role definition. This action is available once a Role is opened. This is useful for sharing common role configurations between systems and tenants.
- Import Role – This allows for the importing of an XML Role definition.
- Import Extra Role. This allows the import of roles via a spreadsheet.
- Export Roles Profile. This exports all roles to an xml file.
The Janison CLS provides Role Definition Export and Import tools, facilitating the sharing of common or standard role configurations between tenants.
The Export function for a role will generate an XML definition containing all the security tokens (i.e. statements about whether or not the given role is allowed a particular right). This function is mainly used by Janison staff to update the CLS product with new Roles containing in-built Role configurations.

User Extra Roles Widget
The User Extra Roles Widget provides the ability for authorised Users to view and manage extra roles for a given User directly from the User’s profile. The widget is available from the User detail screen only.
The Widget is divided into 2 sections:
- A section listing their existing Extra Roles. Extra Roles can be removed here by clicking the – icon.
- A section to add Extra Roles.

In the screenshot above the Main Role of the User is Basic User. The User is only required to be the marker for certain Learning Assets. Setting them as a Marker as their Main Role would give them access to mark all learning on the site. Applying the Marker Role as an Extra Role limits their access to mark only the stipulated Learning Assets.

Another example for the use of the widget could be to set a Content Designer for a discipline.
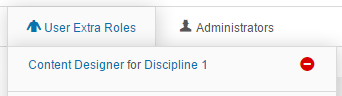
This would give them access to the Design Menu and anything related to the Discipline they are assigned to. In this example Discipline 1.
Finding the User Extra Role to meet your requirements
Finding the correct rights to assign to a user may take some trial end error. Here are some steps you can take to help you achieve the required outcome.
- With the admin account create a test user with a Main Role of Basic User.
- Log into the system with this test account. Note that you will need to use a different browser or use a new identity in the same browser.
- Logged in with the admin account assign an Extra Role to the test User.
- Refresh the page of the test user and examine the access change to determine if it is as required.
- If not you may need to try another User Extra Role or alternatively adjust the Securable areas of the application for the role you have selected.
Administrators Widget
The Administrators Widget provides the ability for authorised Users to view and manage extra roles for one or more Users from within the scope of the Entity it is configured in. The widget is available on all Details forms for Securable Entity Types as listed below.
- Organisations
- Groups
- Organisation Units
- Users
- Disciplines
- Modules
- Tests
- Surveys
- Test section
- Questions
- Resources
- Stimuli
The Widget is divided into 2 sections:
- A section listing which Users have been assigned which Roles.
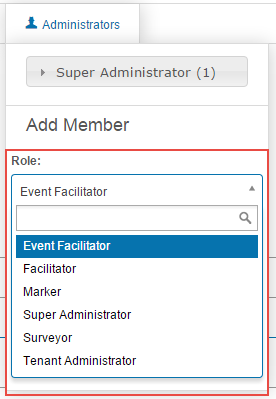
- A section to add Extra Roles.

The Administrators widget is similar to the User extra roles widget in what it achieves but it does it within the scope of the Entity it is configured from. For example, in the screenshot above a User has been assigned a Role of Marker from within a Discipline. That user can therefore only be assigned tests to mark that were created in that particular discipline.
Why can’t I edit someone?
The Janison CLS enforces a business rule where one user can never edit another user that has more rights. For example, a Content Administrator would not be able to edit the profile for a Tenant Administrator. This ensures that it is never possible for any user to hi-jack system access by, for example, changing another user’s email address, or resetting their password.
Note that there is an email validation process whereby users are not able to change an email address without validating through their own email address.
Explicit Roles vs Implicit Roles
Explicit Roles
An Explicit Roles is explicitly allocated to Users. Most of the Roles in the system are Explicit.
Implicit Roles
An Implicit Role is a Role that is automatically assigned to Users when they have staff reporting to them. There is one Implicit Role in the system, User Manager. See the document on Position Management for further information on User reporting.
