User Settings
Introduction
In user settings it is possible make configurations related to your users. These setting manage the way users are viewed, added and edited in Manage People > Users. In addition, self registration forms and portfolio functionality can be activated and data sets added.
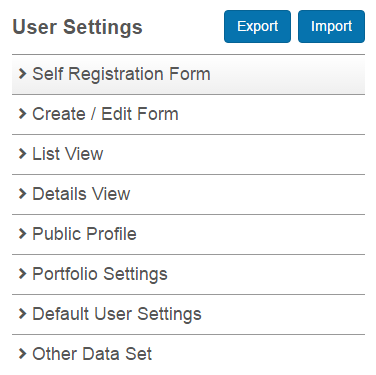
Navigate to Settings > User Settings to access these features.

Setting Form and View Fields
There is a common section in several of the forms and views. This section provides options for administrators to configure the way fields are presented to users. Each form and view can be customised individually. For example, you can have date of birth visible on the create / edit form but hidden on the details view. Below are the forms and views containing the section. There are slight variations to the columns available per form and view.
- Self registration form
- Create / edit form
- List view
- Details view
- Public profile
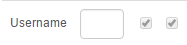
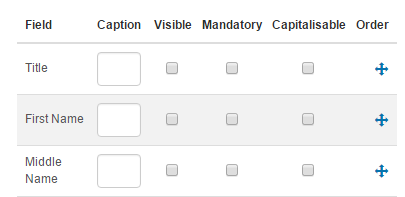
Certain fields are mandatory by default. You will recognise these fields as they are greyed out and are not editable. Username is a common mandatory field.
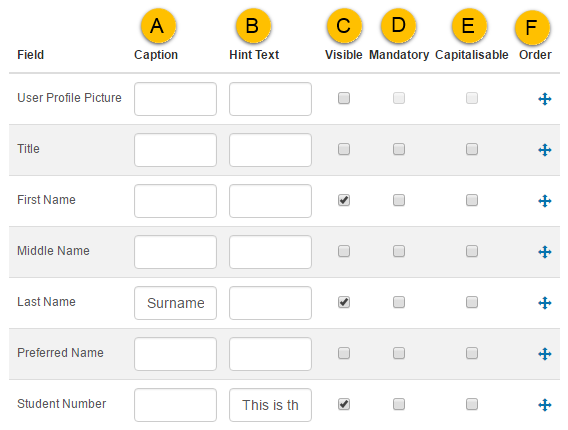
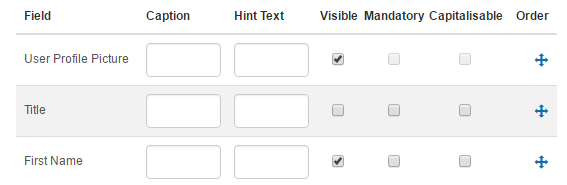
- A – You can add a Caption to the field if you wish to use a different term to the system. For example you can use Surname instead of Last Name.
- B – Hint Text will place an
 icon next to the field. On hover, the text you entered into this field will be displayed.

- C – You can make fields relevant to your site visible by selecting the box in the Visible column. This provides you with the flexibility to hide the fields you will not use.
- D – If you require a field to be Mandatory, select this box. The field will be represented by an
 icon on the form.
 - E – Data entered into the Capitalise field will automatically be capitalised.
- F – You can Order the items by dragging them up or down using the
 icon.
icon.
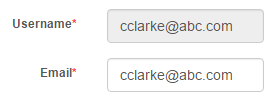
The above selections on the create / edit form will make creating a new user in Manage People > Users display like this. The fields marked with an are default mandatory fields set by the system.

Self-Registration Form
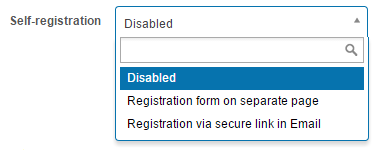
There are several methods to add users to the system such as loading them via a spreadsheet or synchronising them from your HR system. This method allow users to self-register on your site. By default this option is disabled. This section also provides options to customise the way users register.

The fields of the self registration form can be customised in many ways. Fields can be make visible or hidden and set to mandatory where required. They can be capitalised and the order in which they appear changed. Captions can be set to change the default system wording. You can read more about this topic in our document on configuring fields.

Self-Registration
Two methods are available for self-registration and are covered in more detail below:
- Registration form on a separate page.
- Registration via secure link in an email
Registration form on separate page
Selecting this option will add a Register link to the login screen.
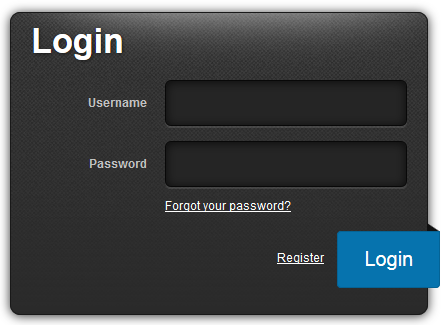
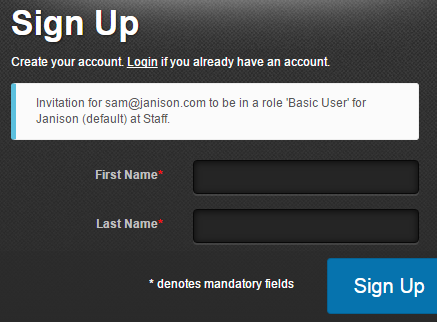
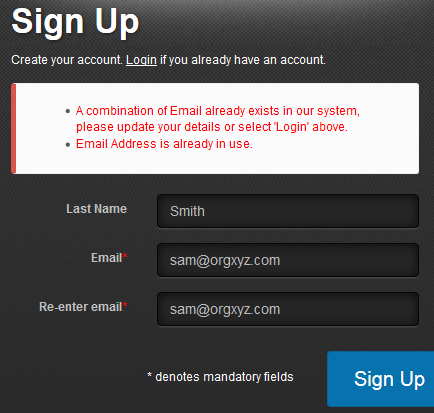
When a user selects this link, they will be directed to a Sign Up screen.

Registration via secure link in an email
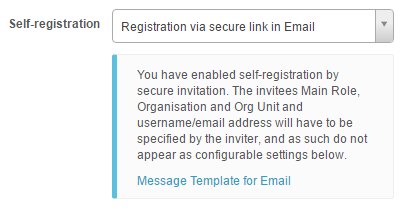
You can invite up to 30 users at a time to self-register by emailing them a secure link.
To send the secure link navigate to Manage People > Users.
- From the Actions menu, select Invite users via a secure link.
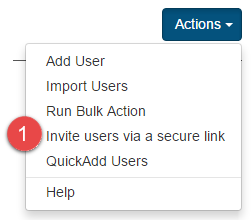
You will be directed to the Invite users via a secure link screen.
- Select an Organisation Unit.
- Select a Role.
- Set the Scope of the Role.
- Enter one or more Email Addresses.
- Optionally change the Email Subject.
- Optionally change the Email Body.
- Select Send Invitations.

When a user selects the link in the email, they will be directed to a Sign Up screen.
Skip email validation on self-registration

Email validation ensures that only users with a valid email addresses can register. On sign-up, the user will receive a registration confirmation email with a link to activate their account and to set a password. Selecting the option to skip validation will bypass the email validation and sign the user directly into the site.
Auto-generate password on registration

The system can generated passwords for users but you would only set this option under special circumstances such as in assessment events. This option is only valid if password generation has been enabled. You can read more about this topic in our document on password generation.
Allowed email masks
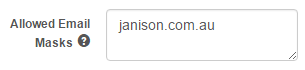
It will only be possible for users to register if their email belongs to domains entered into this field. In the example below, janison.com.au has been set as an allowed email mask. jira.com.au therefore does not meet the requirement. Wildcards * are permitted, for example, *.com.au restricts email addresses to those that end in .com.au.

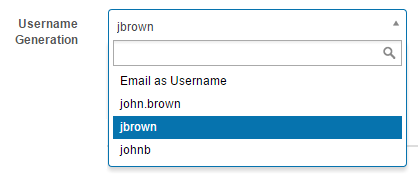
Username generation
You can specify the format in which the system will generated usernames. You can set it to use email addresses or combinations of the first and last name.
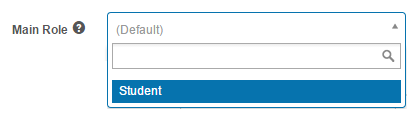
Main Role
By default, users will be assigned the role of basic user. You can customise this to another role if required. Note that for security reasons, in-built system administrator roles are not available for selection.
Setting fields and their properties
The fields of the registration form can be customised in many ways. Fields can be make visible or hidden and set to mandatory where required. They can be capitalised and the order in which they appear changed. Captions can be set to change the default system wording. You can read more about this topic in our document on configuring fields.
Validation check
The system can check to ensure that either emails or last names are unique or that a combination of the two is unique.

If the email and or last name exists in the system, feedback will be provided to the user.
Using groups to auto-enrol users into catalogue items
It is possible to add users to groups and then to enrol them into catalogue items, all automatically on self registration. For example, you can add an age range selector to your registration page. You can then set the system to enrol users into courses, depending on the age range they selected on registration.

There are a number of steps involved in setting up this process.
Step one
Set up a group type and add your groups. You can read more about the steps to undertake this task in our document on group types.

Step two
Set the group type to appear on the self-registration form.
- Select the Group Type.
It will appear at the bottom of the field list. - Optionally enter a Caption. This is the text that will be displayed on your registration form.
- Optionally set the field to be mandatory.
- Select Save Settings.
When users select an age range, they will be added to the related group.

Navigate to your site login page and select the Register link to view your registration form. The group type will appear as a dropdown with the age ranges as selectable items.

Step 3
Set up a user enrolment rule which will trigger automatic enrolments into the catalogue Items. You can read about this topic and the steps in out document on user enrolment rules.
Your user enrolment rule will look something like this. You will need one rule for each age range as each age range will be enrolled into a different course relevant to their age.

Create / Edit Form
This section provides options to customise the screens in Manage People > Users where new users are created and existing users are edited.
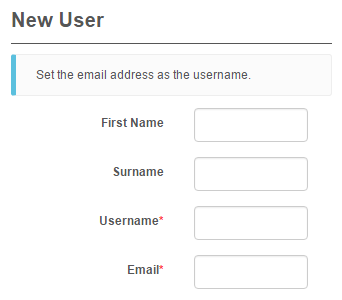
This is the new user screen with just a few fields set to visible.

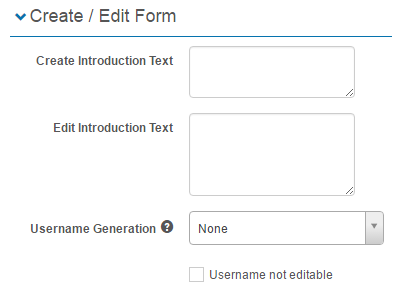
Create introduction text
The introduction text provides the facility to add custom text which will be displayed to administrators when they create new users.

The introduction text will be displayed in the snippet on the new user screen.
Edit Introduction Text
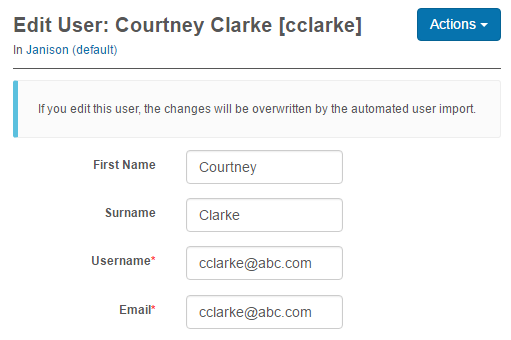
This field provides the facility to add custom text which will be displayed to administrators when they edit a user.
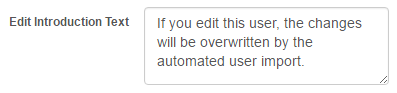
The introduction text will be displayed in the snippet on the edit user screen.
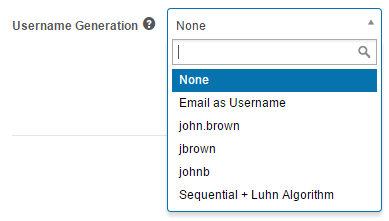
Username Generation
You can specify the format in which the system will generated usernames. You can set it to use email addresses or combinations of the first and last name.
Usernames will be generate when the new user save button is selected.
Username not editable
If selected, editing of usernames will not be possible.
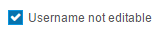
When in user edit mode, the username field will be locked.
Setting fields and their properties
The fields of the new user and edit form can be customised in many ways. Fields can be make visible or hidden and set to mandatory where required. They can be capitalised and the order in which they appear changed. Captions can be set to change the default system wording. You can read more about this topic in our document on configuring fields.
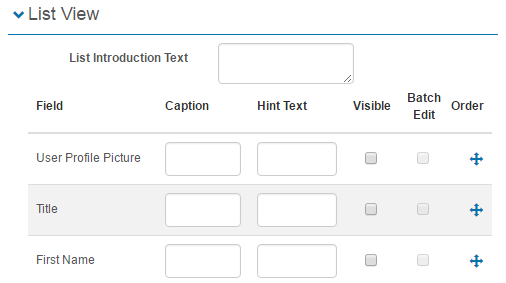
List View
This section provides options to customise the users list screen in Manage People > Users.
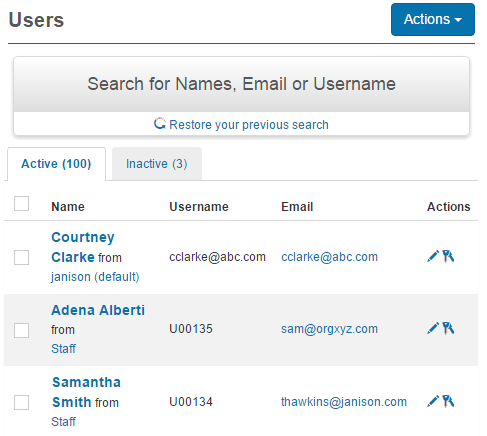
This is the users list view with only four columns set visible, Name, Username, Email & Actions.
List introduction text
This field provides the facility to add custom text which will be displayed to administrators when they view the user list.

The introduction text will be displayed in the snippet on the user list screen.
Setting fields and their properties
The fields of the list view can be customised in many ways. Fields can be make visible or hidden and the order in which they appear changed. Captions can be set to change the default system wording. You can read more about this topic in our document on configuring fields.
Batch Edit
An additional column is available in list view, batch edit.
This feature is only applicable to custom attribute fields. It provides functionality to update information for one or more users. There are a several steps involved to set this up.
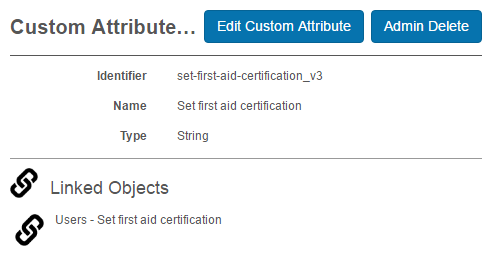
Step one: Create a custom attribute of a string type and linked objects of users. You can read more about this topic in our document on custom attributes.
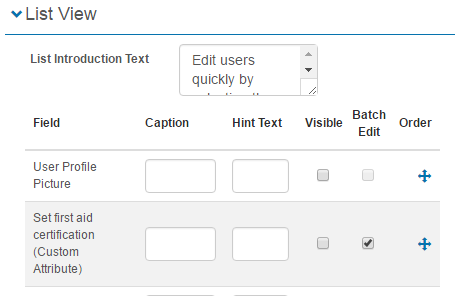
Step two: In the list view section, select Batch Edit for the new custom attribute. Save the section.
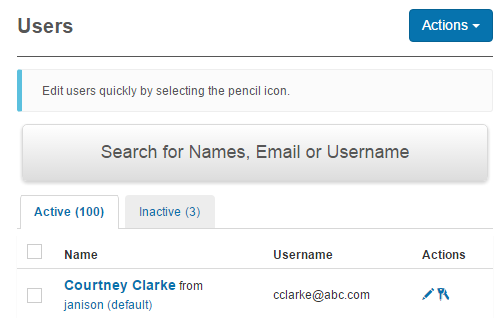
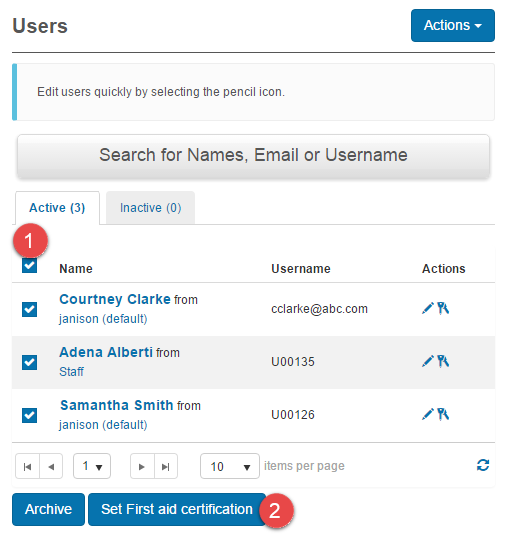
Step three: Action the batch edit on the users list screen.
- Select one or more users you would like to set the attribute for.
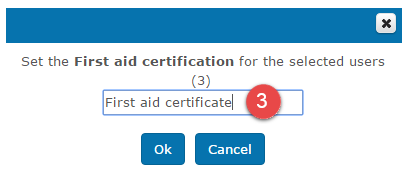
- Set the button that has become available on the screen, Set First aid certification.
- A popup will be displayed. In the editable field, enter the text you would like to appear for the users.
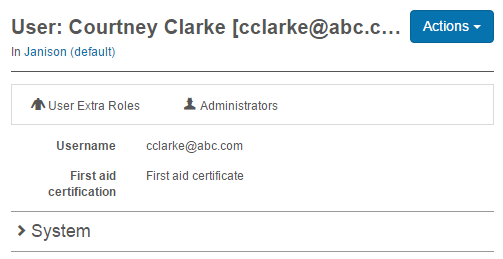
Step four: View the attribute you have just set. Remember that you can set this to visible on any of your views or forms as described in our document on configuring fields. In the example below it is visiable on the details view.
Details View
This section provides options to customise an individual users details screen in Manage People > Users.

This is the screen affected.

These settings control the visibility of sections on the user details screen.

To access a user details screen, browse to Manage People > Users and select a user from the list.
Show Section Completion
This setting makes a section visible that will list catalogue item enrolments, but only if the catalogue items have small thumbnails linked. If a catalogue item has a certificate attached, it can be access here by selecting the image icon.

Show Section Purchases
This setting makes a section visible that lists all purchases made by the user. If purchases have been made, a link will be displayed and when selected will direct you to the orders.

Show Section Activities
This setting makes two sections visible detailing activities performed by the user and on the user record.


Show Section User Roles
This setting makes a section visible listing the roles of the user.

Public Profile
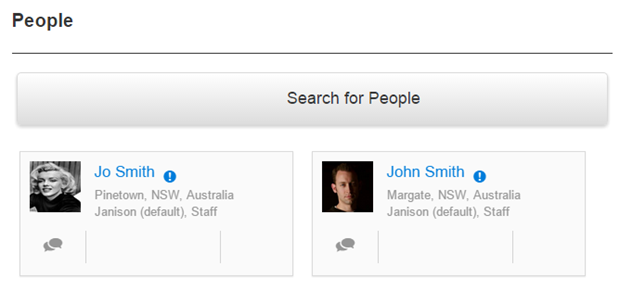
Each User in the system has a personal details tile which is can be found by navigating to Manage People > People. The information displayed on this tile can be configured in this setting menu.
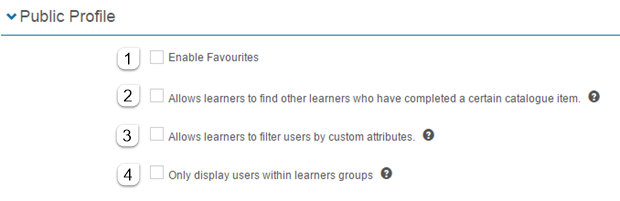
- Enable Favourites – if checked the ability to set People as favourites.
- Enable searching by catalogue item completion– If checked this will enable a field which will allow learners to find other learners who have completed a certain catalogue item.

- Enable Advanced Search– if checked enables an advanced search section with the option to set filters. Detailed instructions about how to set these up are found at Building Filters.

- Only display Users within the same Groups – If enabled, learners will only be able to see other users that are a member of the same group(s). If disabled learners will be able to see all users in the tenant.
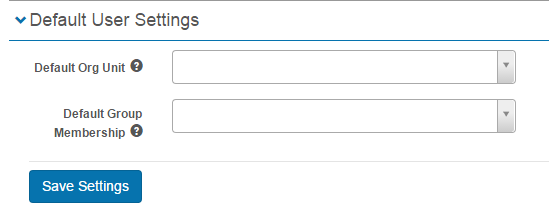
Default User Settings
The default user settings includes two drop-down menus.
- Default Org Unit – setting a default Org Unit means that if Users are imported via a spreadsheet then it is not mandatory to state the Org or Org Unit on the spreadsheet.
- Default Group Membership – Setting a default group means that whenever a User is registered, they are automatically given membership to the nominated group(s). This affects self-registration as well as registration via spreadsheet import.