Style and Images
You have significant control over the way your site looks. For example, you can use your own logo on the top of the screen and your own image for the welcome screen. You can customise the footer. And because the CLS is a web application, you can also change the ‘skin’, that is, the colours of text, accents and backgrounds in the CLS screens. You can also add custom CSS to override other aspects of the way content is displayed on the screen. These settings all modify the aesthetics of the CLS environment and can be used to customise it to suit your organisation and its brand.
To manage Style and Images select Settings > Style and Images

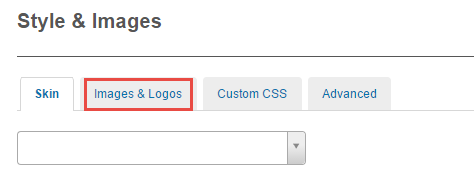
Images & Logos
To change Images and Logos select Settings > Style and Images and click the Images and Logos tab. Here you can upload logos and the welcome screen and customise the footer.
- Click the chevron to open the expandable windows for the Footer logo options
- Click the check box if you want to display a logo in the footer
- Enter a URL for the logo’s link destination
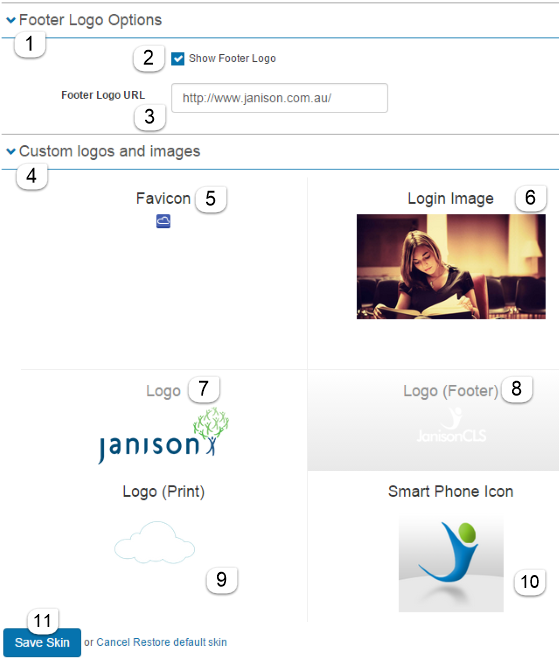
- Click the chevron to open the expandable windows for Custom logos and images. For each of the six regions inside the same thing happens: when you move your cursor over the region, Select a file… displays.
- Click Select a file… to select a file for your Favicon, that is, the icon that appears on a browser tab or when you store a page as a favourite.

The file must be in X-ICON format.
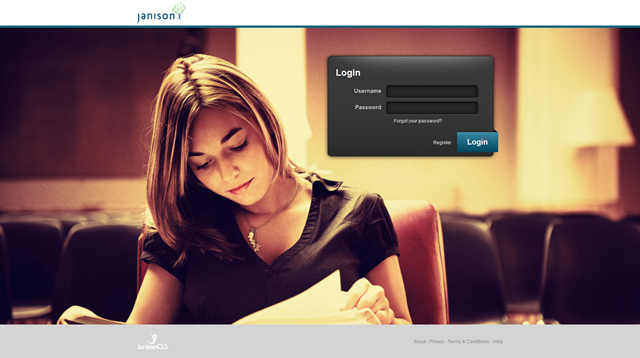
- Click Select a file… to select a file for your login image. This is the first image a User will see when they log on, see below.
There is no limit on the size of the image but we would recommend a minimum of 1100px x 600px and 65kB to a maximum of 1440px x 900px and 150kB. The bigger the image the longer it will take to load but the crisper it will look so you will need to find a happy medium.
- Click Select a file… to select a file for your logo.
- Click Select a file… to select a file if you want a different logo at the bottom of the screen
- Click Select a file… to select a higher resolution file for your logo in printed documents.
- Click Select a file… to select a file for your icon on smart phones. Users touch this icon to launch the CLS.
- Click Save to save these changes.
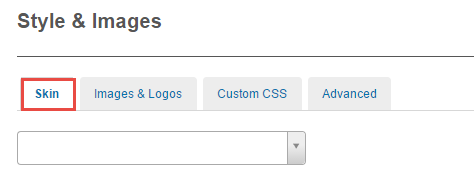
Skin
A Skin specifies the values for text, backgrounds and accents on the CLS screens. To change the skin select Settings > Style and Images and click the Skin tab.
You can select a pre-defined skin from the drop-down box:
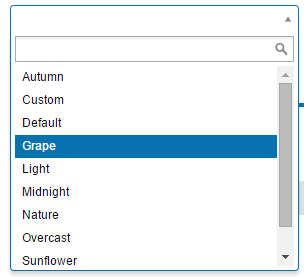
Each time you click a skin name, the screen display updates, so that you can get an idea of its palette.
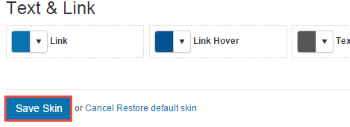
To create your own skin, change the colours for the options presented on the screen. The technique is the same for each option:
- Click the arrow next to the name of the option.
- Paste a new colour value (in hexadecimal notation), or
- Drag the circle in the colour picker to select the level of saturation and brightness of the colour.
- Drag the slider to change the hue of the colour, if desired.
- Click Apply

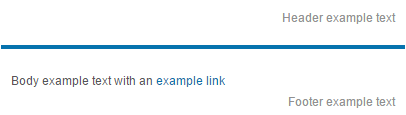
The screen will show the results of your choices for: Header and Footer text colours, ordinary text, links and the accent colour.
Click Save Skin to save your changes.
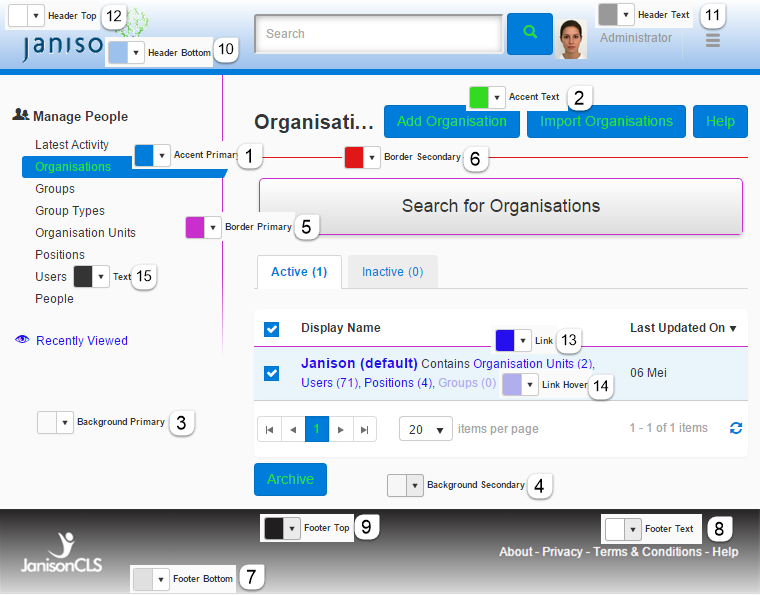
The following screenshot is numbered to relate to the screenshot below it. It highlights some of the places on the page affected by the colours.
When choosing colours the best way to identify all the places the colour changes take effect is to set them to a colour that stands out and click through a few pages. When you understand the change you can set them to the required colour.
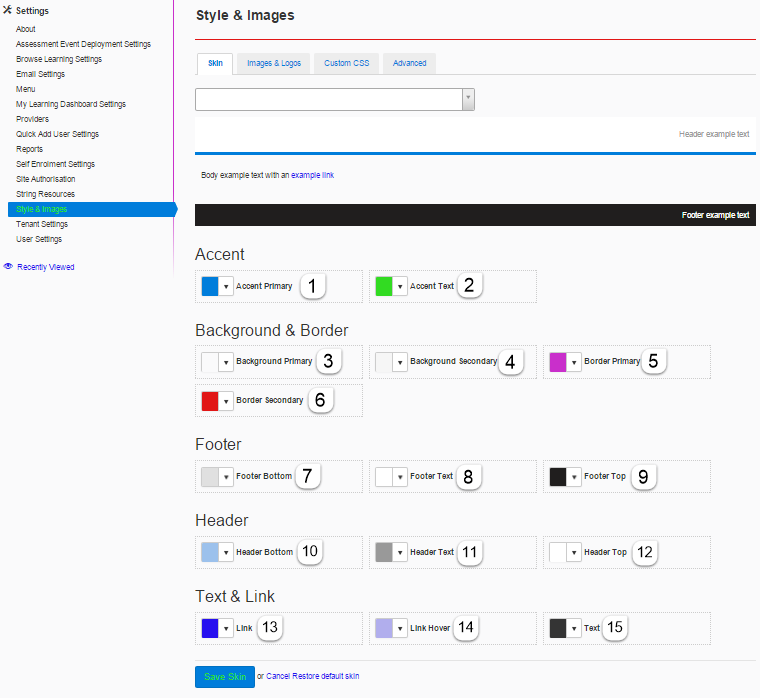
If the top and bottom of the header are different, the header will have a colour gradient. The same principle applies to the footer.
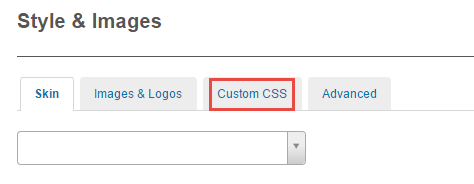
Custom CSS
It should be unnecessary to do this once the tenant has been set up, however is possible to enter custom CSS and override the style of the CLS in targeted areas. Note that you need to know what you are doing here and to be prepared to maintain it in future CLS updates when things may change.
To enter custom CSS select Settings > Style and Images and click the Custom CSS tab.
An example is:
- change the colour of links in the Footer to blue:
footer a {
colour: blue;
}
There are many free tutorials online that can help you learn about CSS, start by clicking here.
Advanced
To enter more advanced CSS select Settings > Style and Images and click the Advanced tab.

Here you can optionally override janison.web.ui.css with an alternative address. This is an extremely powerful action and should only be done after careful research and consideration.