Assessment packages
An assessment package lets one assessment event deliver several tests. The package holds test components in a set order. Each test component holds one or more test versions. It gives each test-taker one of them, at random when they log in or fixed at enrolment. A test-taker enrolled in the event sits each component as a separate test.
Use a package when one event has to cover more than one test. It also suits a set of equivalent tests where each test-taker should receive one version. For a single test, link the event to the test instead. See Assessment events.
Enable assessment packages
An administrator turns packages on at Settings > Assessment Event Settings. In the Event Settings expandable, set Link Session Based Assessment Events to to Assessment Packages, then select Save Assessment Event Settings.
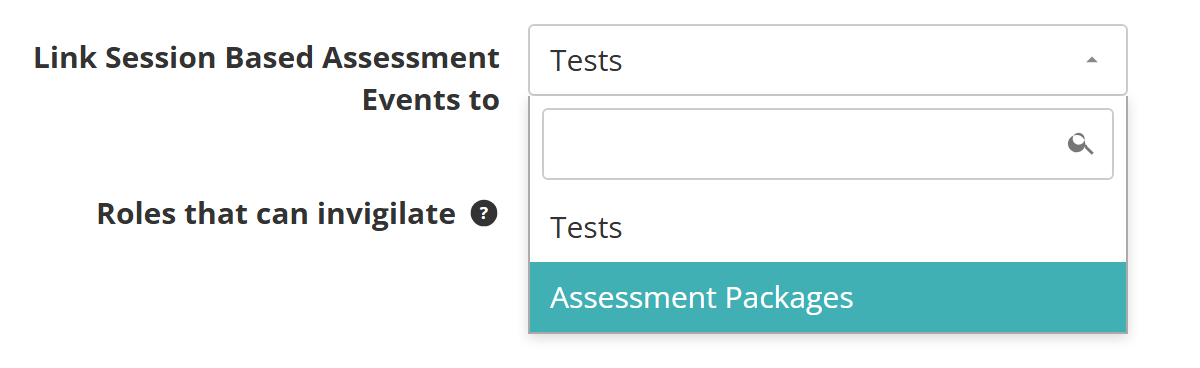
From then on, the new assessment event form asks for an Assessment Package instead of a Test. Events already linked to a test keep their test.
The order of work is:
- Create the tests.
- Create the assessment package.
- Add test components to the package, and add each test to a component as a test version.
- Create the assessment event and link it to the package.
Create an assessment package
Go to Deliver > Assessment Packages and select Add Assessment Package. Then:
- Enter a Name.
- The Identifier fills in as you type. Keep it or change it.
- Leave Active ticked, or the package can't be used.
- Select Save Assessment Package.
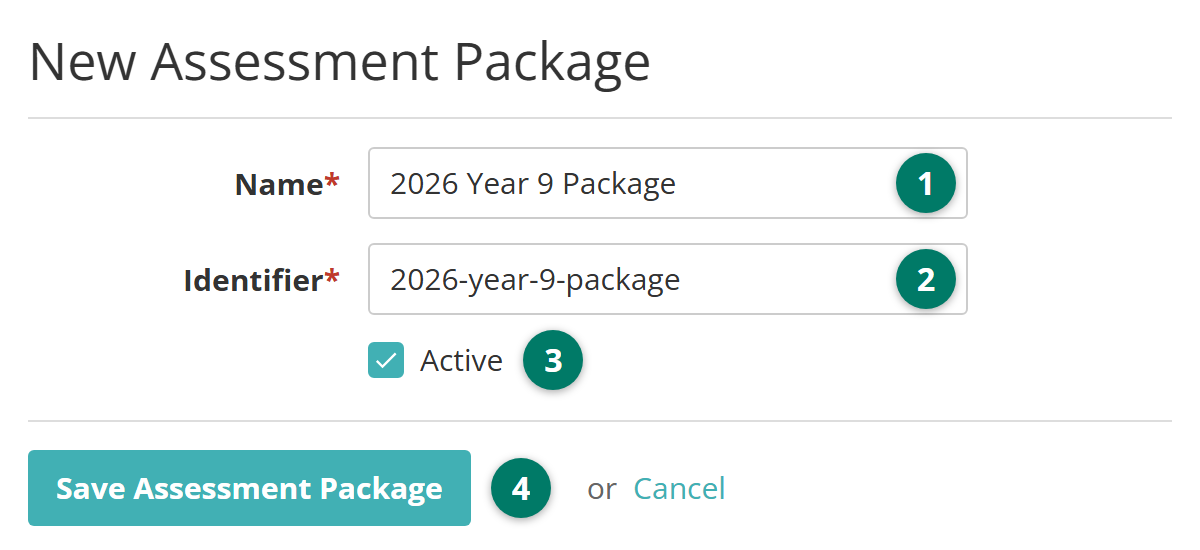
The package's details page opens.
The details page
The details page shows the package's Name, Identifier, Test Components Count, Tests Count and whether it is Active, then three sections. Each section has a pencil icon that opens it for editing, and each saves on its own.
- Edit Assessment Package changes the name, identifier and Active.
- Calculate Results runs the package's results for every enrolment. It appears only when test results are enabled for your site.
- Delivery Options sets the order the tests are taken in and how test-takers move between them.
- Components lists the test components. The plus icon creates a new one, the pencil adds existing ones.
- Results Determination sets how the component scores combine into a total score or grade. It appears only when test results are enabled.
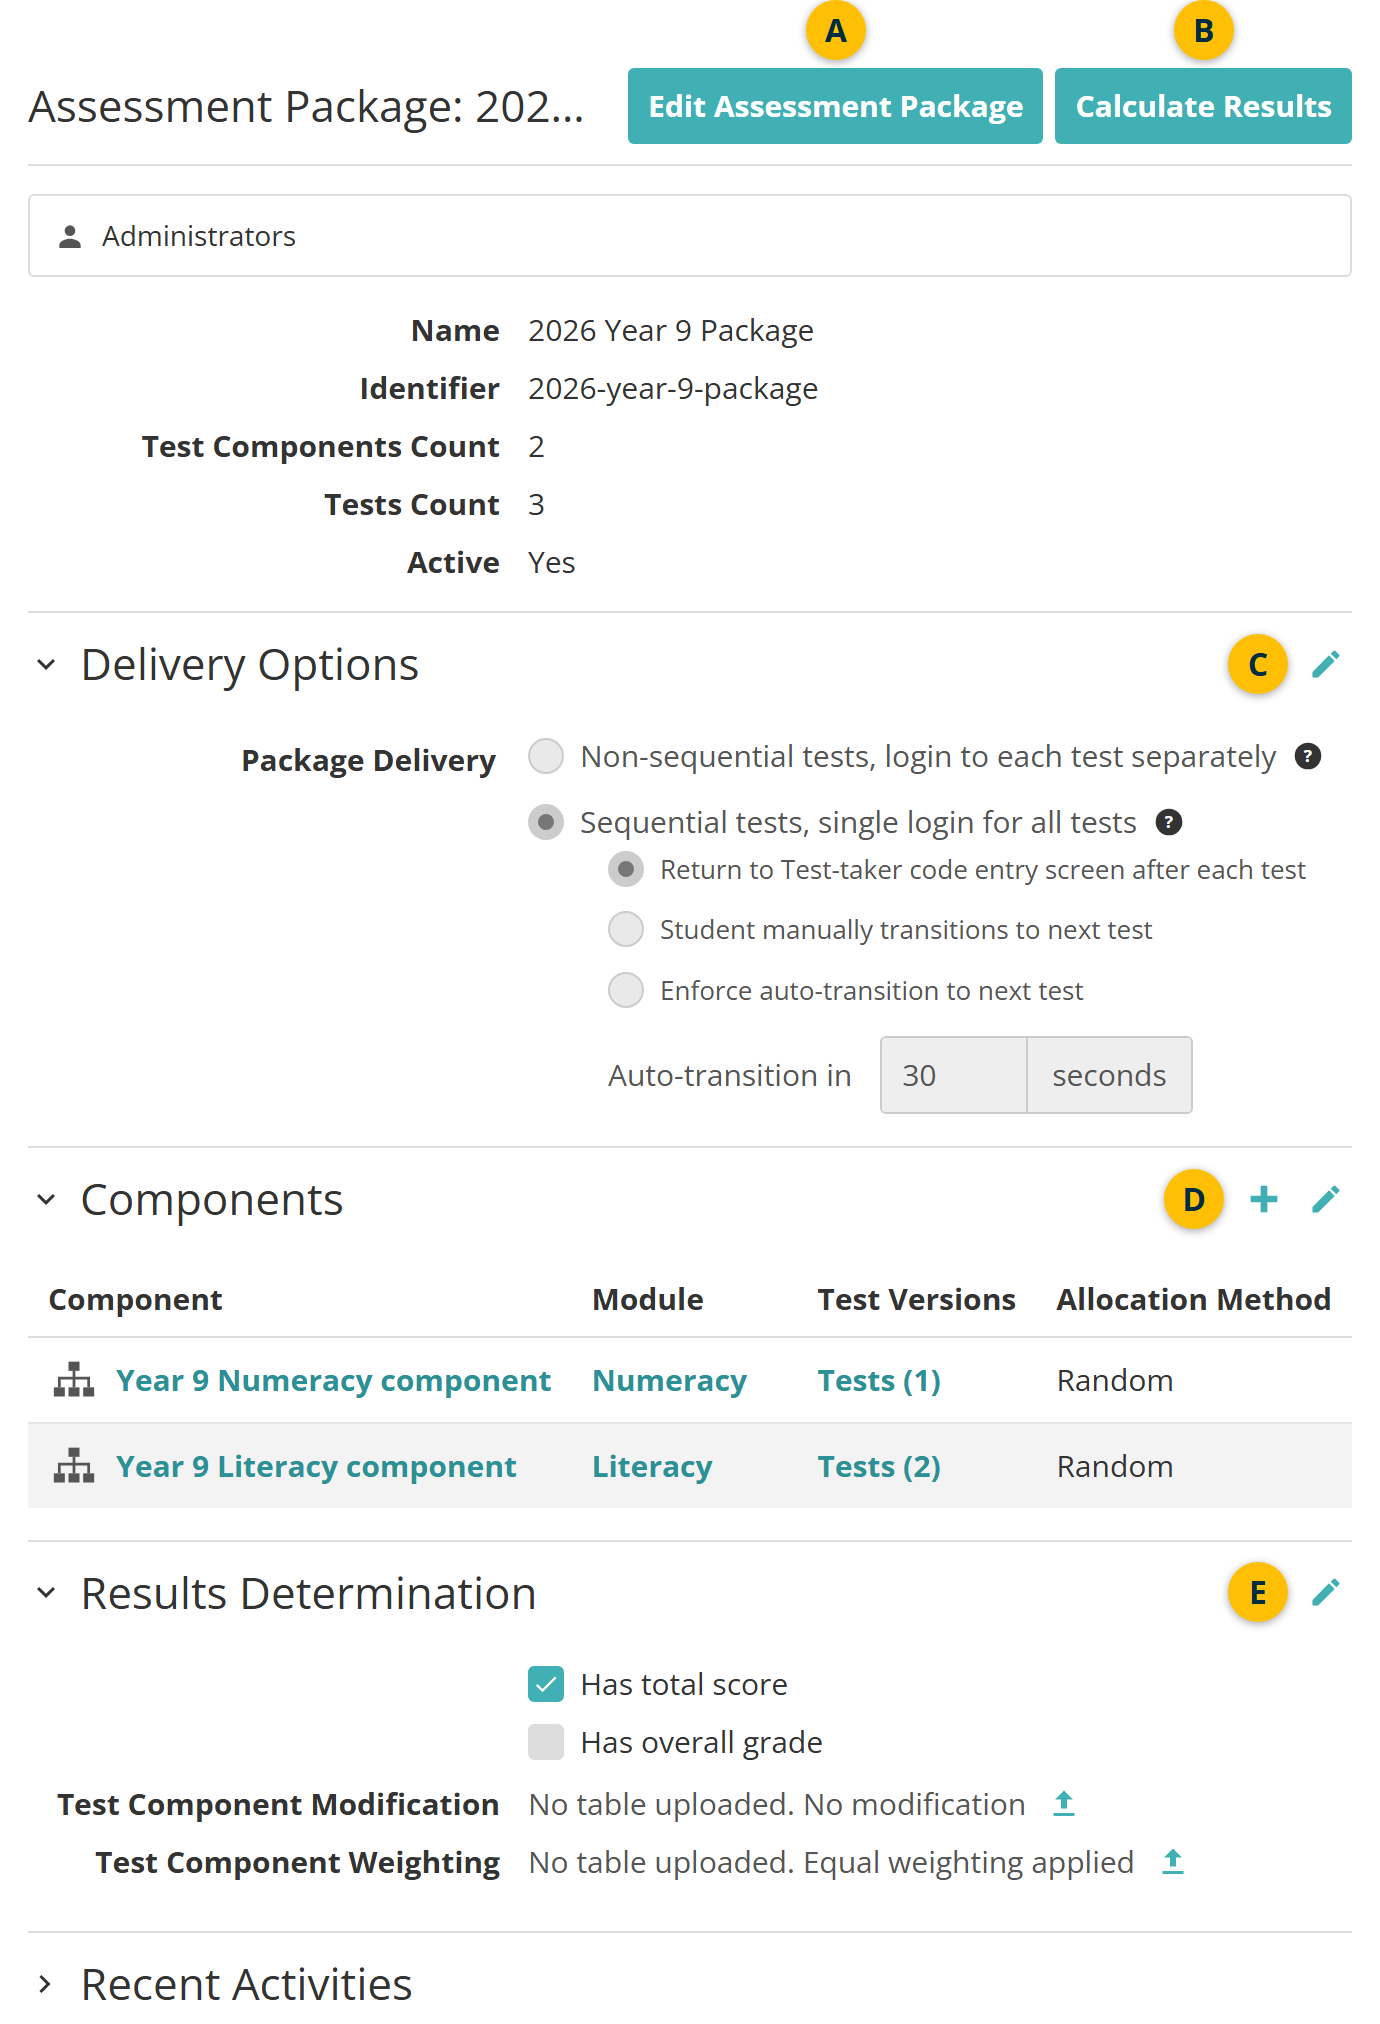
Once the package is linked to an assessment event that has left Draft, the three sections lock. The page shows a warning. If the components' Allowed Conditions differ, the page also warns you and lists which components match each other.
Delivery options
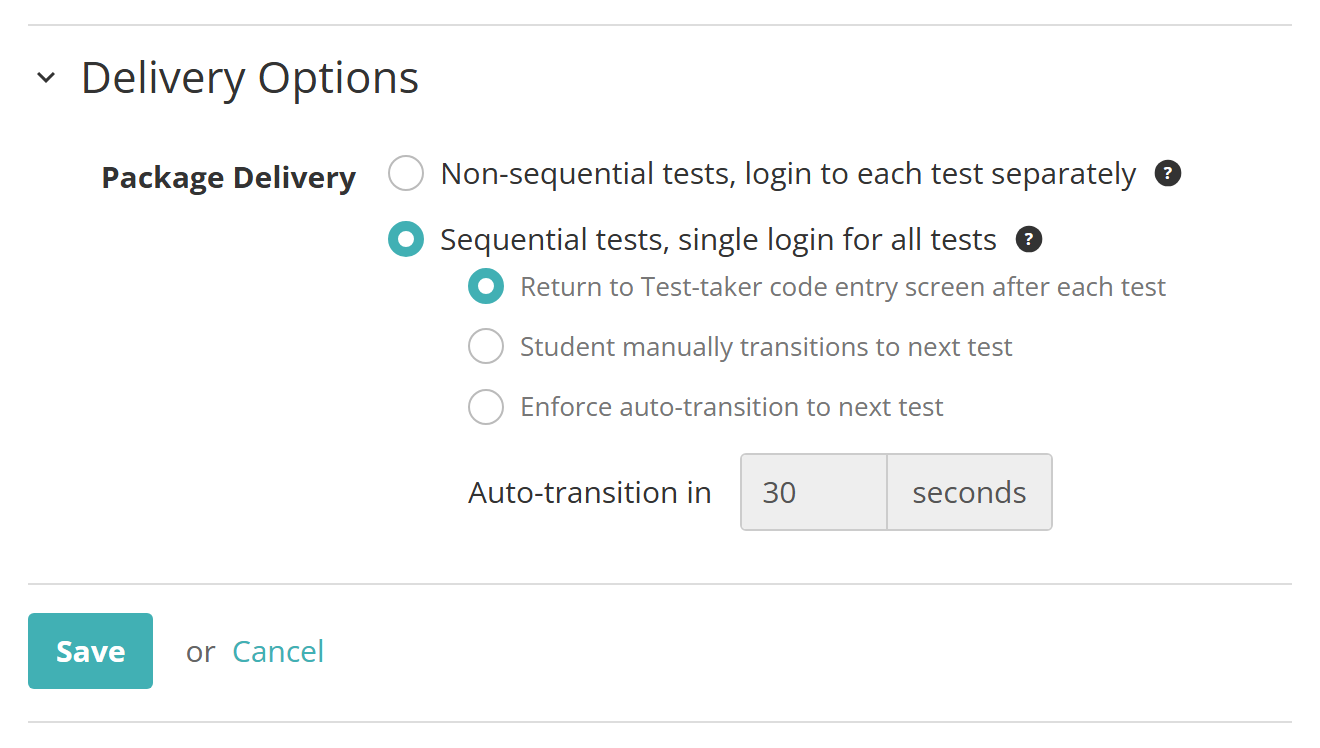
Select the pencil icon next to Delivery Options, choose the options, then select Save.
Package Delivery has two options:
- Non-sequential tests, login to each test separately — test-takers sit the tests in any order. They log in to each test with its own code.
- Sequential tests, single login for all tests — test-takers sit the tests in the order the components are listed. One login code takes them to the first test they haven't completed.
For sequential delivery, choose what happens when a test-taker finishes a test:
- Return to Test-taker code entry screen after each test — the test-taker is returned to the code entry screen.
- Student manually transitions to next test — the test-taker moves on when they're ready.
- Enforce auto-transition to next test — the next test opens on its own after the delay set in Auto-transition in, from 0 to 300 seconds.
The three choices apply only to sequential delivery and are greyed out otherwise.
Delivery Mode appears when test package delivery modes are enabled for your site. It offers Computer Based, Mixed or Paper, limited by the package's components. Computer-based components offer Computer Based and Mixed, paper components offer Mixed and Paper, and a mix of both offers Mixed only. See Settings.
Components
The Components section lists each component with its Module, a Tests link to its test versions, and its Allocation Method. Add at least one component with a test version before you enrol anyone: the event has nothing to deliver until then.
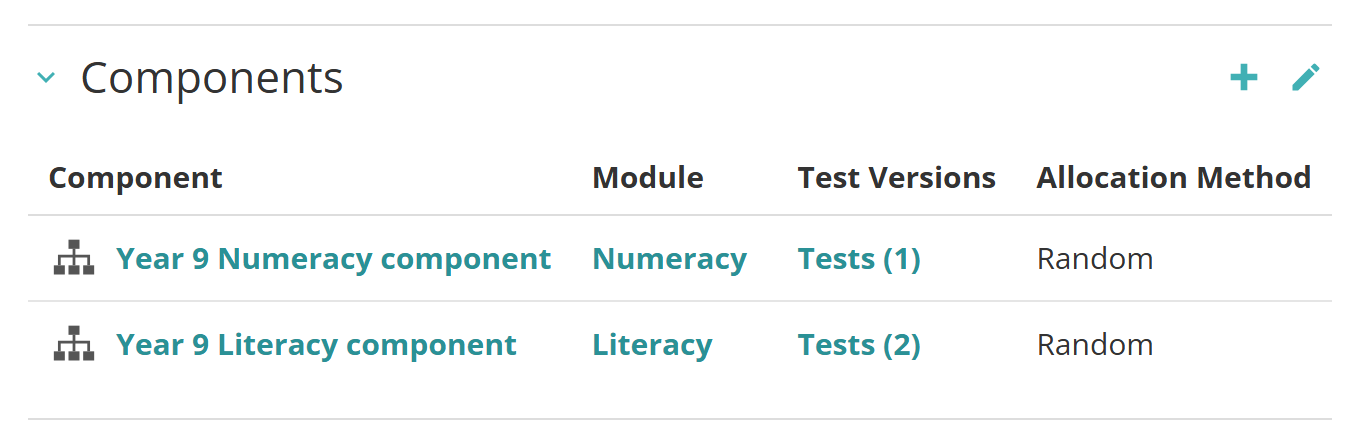
To add a new test component, select the plus icon next to Components. The New Test Component form opens with the package already linked, and saving it brings you back to the package. The form's fields, and how to add test versions to the component, are on the Test components page.
To add an existing test component, select the pencil icon next to Components. The section opens in edit mode with a Test Components search panel under the list.
- Actions on a listed component. The pencil opens the component, the cross removes it from the package, and the sort handle drags it to a new position. For sequential delivery, this order is the order the tests are taken in.
- Search for a component by name, or scroll the list below.
- The plus icon adds a component to the package. A component already in the package is greyed out and shows a cross instead, which removes it.
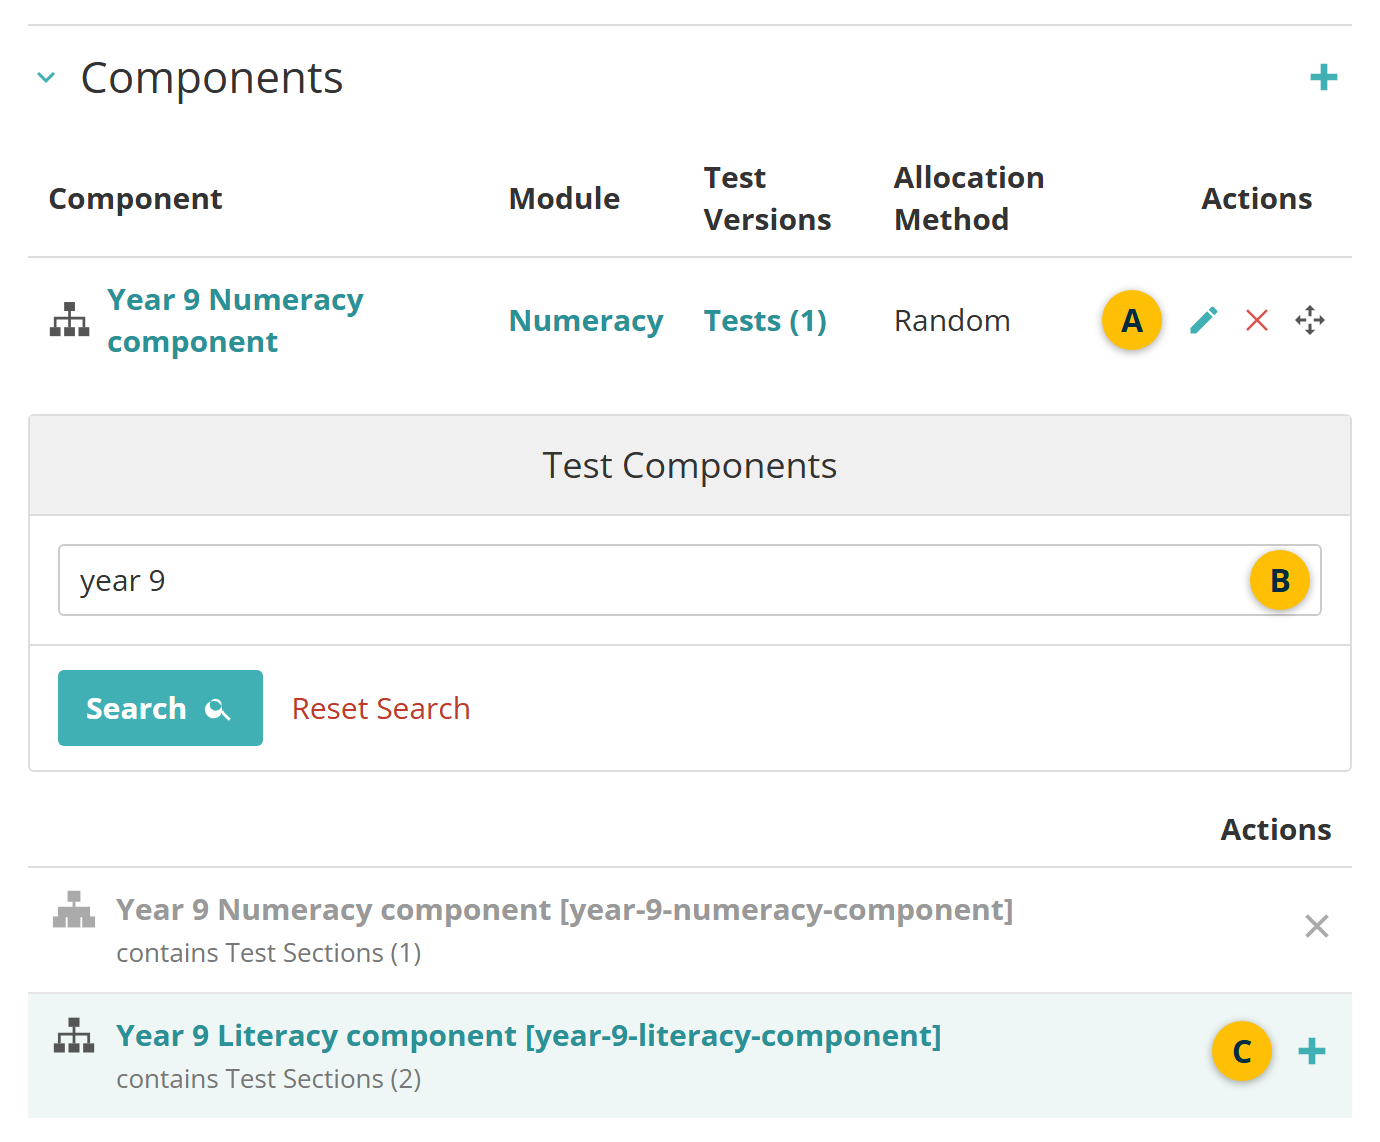
Select Save to keep the changes.
Results determination
This section sets how a test-taker's component scores combine. It appears only when test results are enabled for your site. See Settings.
Select the pencil icon next to Results Determination, tick the outcomes you want, then select Save.
- Has total score adds the component scores together. Has overall grade turns the total into a grade. Tick either or both.
- The upload icon opens the import page for that table. Download the template there, fill it in and import it, as described under results determination on the Test components page. Once a table is uploaded, a download icon appears beside it.
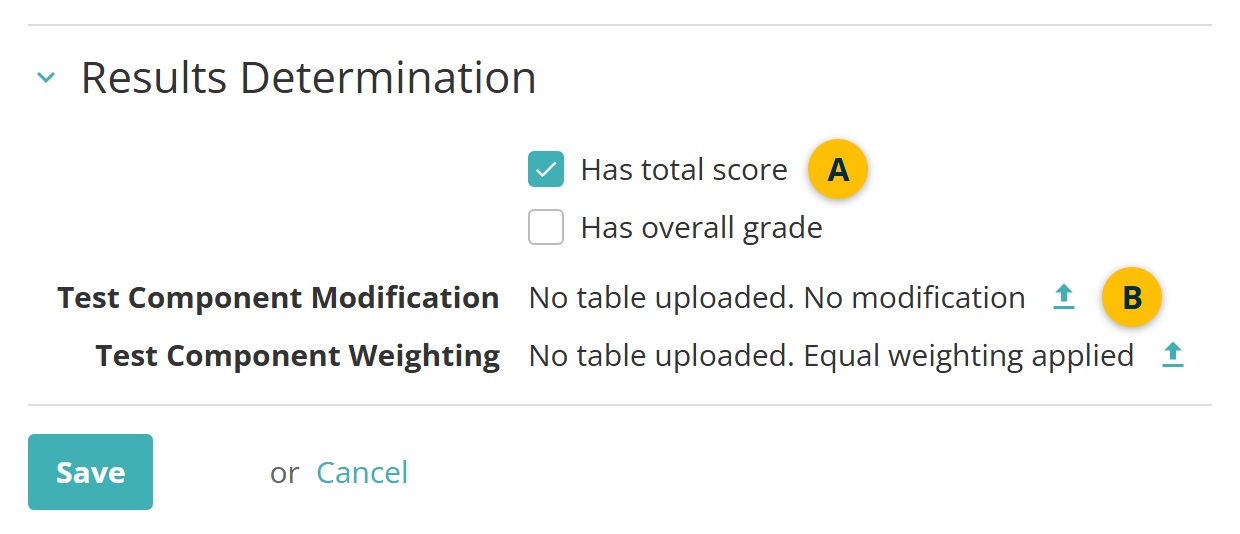
The tables are:
- Test Component Modification — always shown. Adjusts a component's score according to the score on another component. Without a table, no modification is applied.
- Test Component Weighting — shown when either outcome is ticked. Sets each component's weight in the total. Without a table, the components are weighted equally.
- Assessment Package Grading — shown when Has overall grade is ticked. Maps total scores to grades. The row reads "Grade cannot be applied" until a table is uploaded, so an overall grade needs this table.
Calculate Results in the page header runs the results for the package's enrolments. It asks you to confirm and names how many enrolments it covers. If you change the determination after a run, the section warns that the results are out of date until you run it again.
Search for an assessment package
Go to Deliver > Assessment Packages. The list shows every package, with the number of tests it contains and the assessment events linked to it. To narrow the list, expand Search for Assessment Packages and type part of a name or identifier. Or pick a test under Tests to find the packages that deliver it. Then select Search.
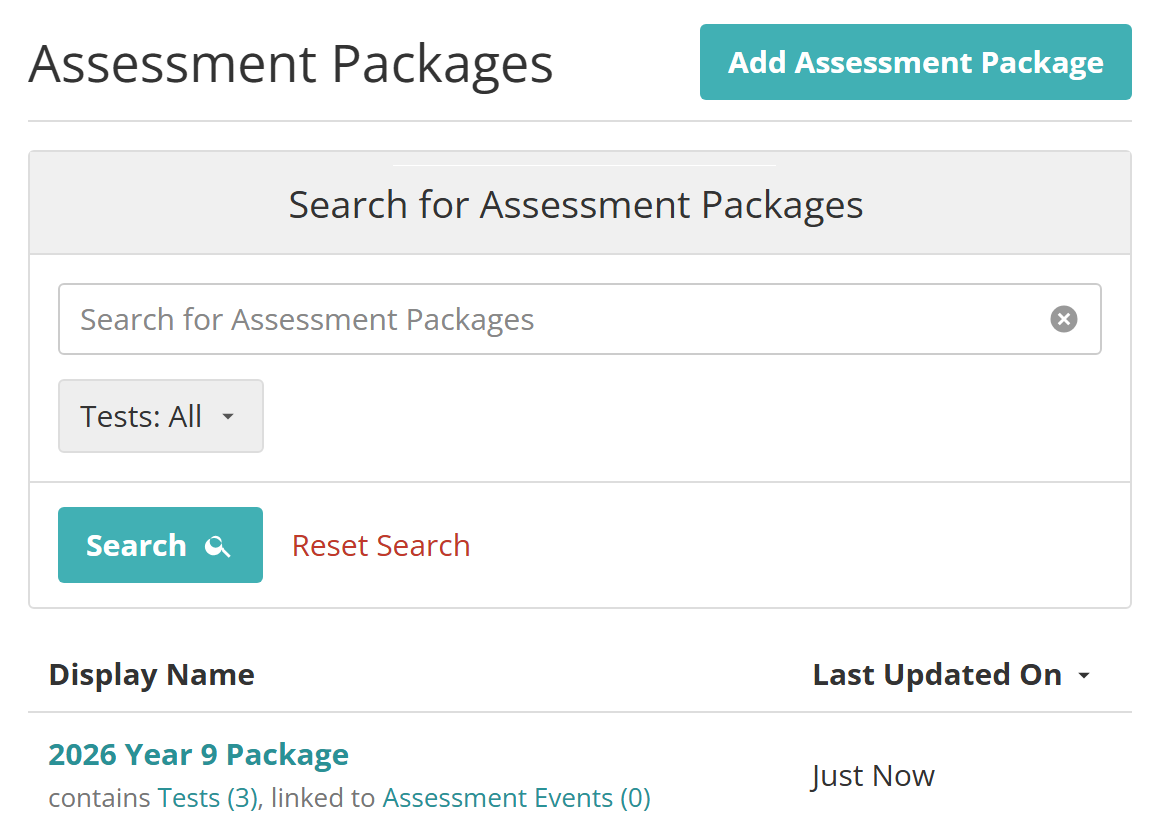
Edit an assessment package
Open the package from the list. Select Edit Assessment Package to change the Name, Identifier or Active, then select Save Assessment Package. To change the delivery options, the components or the results determination, use the pencil icon on that section. Each section saves on its own.
Link an assessment package to an assessment event
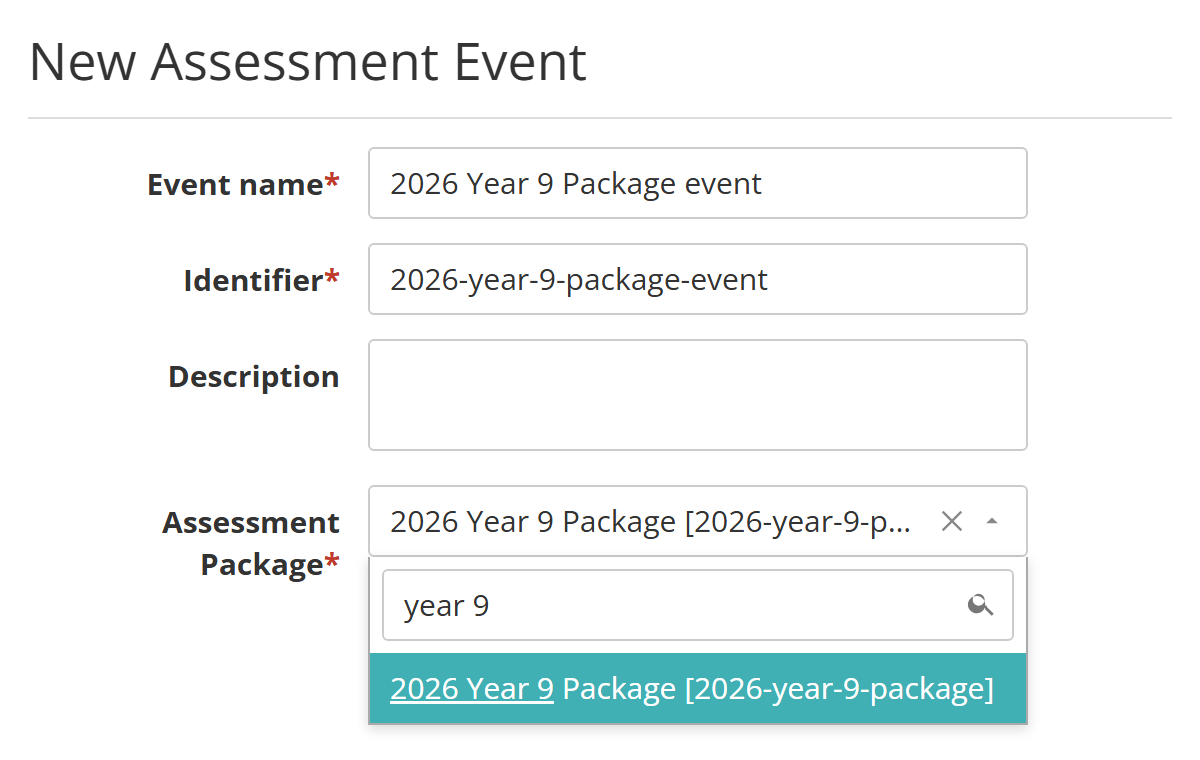
With packages enabled, the new assessment event form asks for an Assessment Package instead of a Test, and there is no New test button. Pick the package, then complete the event as described on the Assessment events page.
Settings
Administrators configure the following settings. They sit on three settings pages.
Link Session Based Assessment Events to — at Settings > Assessment Event Settings, in the Event Settings expandable. Tests links each new event to one test. Assessment Packages links it to a package instead. Existing events keep whichever they were created with.
Enable Test Results — at Settings > Marking Settings. Shows the Results Determination section and the Calculate Results button on packages and on test components.
Enable Test Package Delivery Modes — at Settings > QTI Settings. Adds Delivery Mode (Computer Based, Mixed or Paper) to a package's delivery options and to the test component form.