Short answer audit trail
The short answer audit trail keeps a time-stamped copy of a test-taker's response to an extended text item each time the response is saved. From the test attempt, you can compare the saved versions and promote an earlier one to replace the current answer.
The audit trail is off until an administrator turns it on for the assessment event.
Turn on the audit trail
Short answer audit trail appears on an assessment event whose test contains extended text items.
- Select Deliver > Assessment Events and open the event.
- Expand Test Player & Delivery Options and select the pencil.
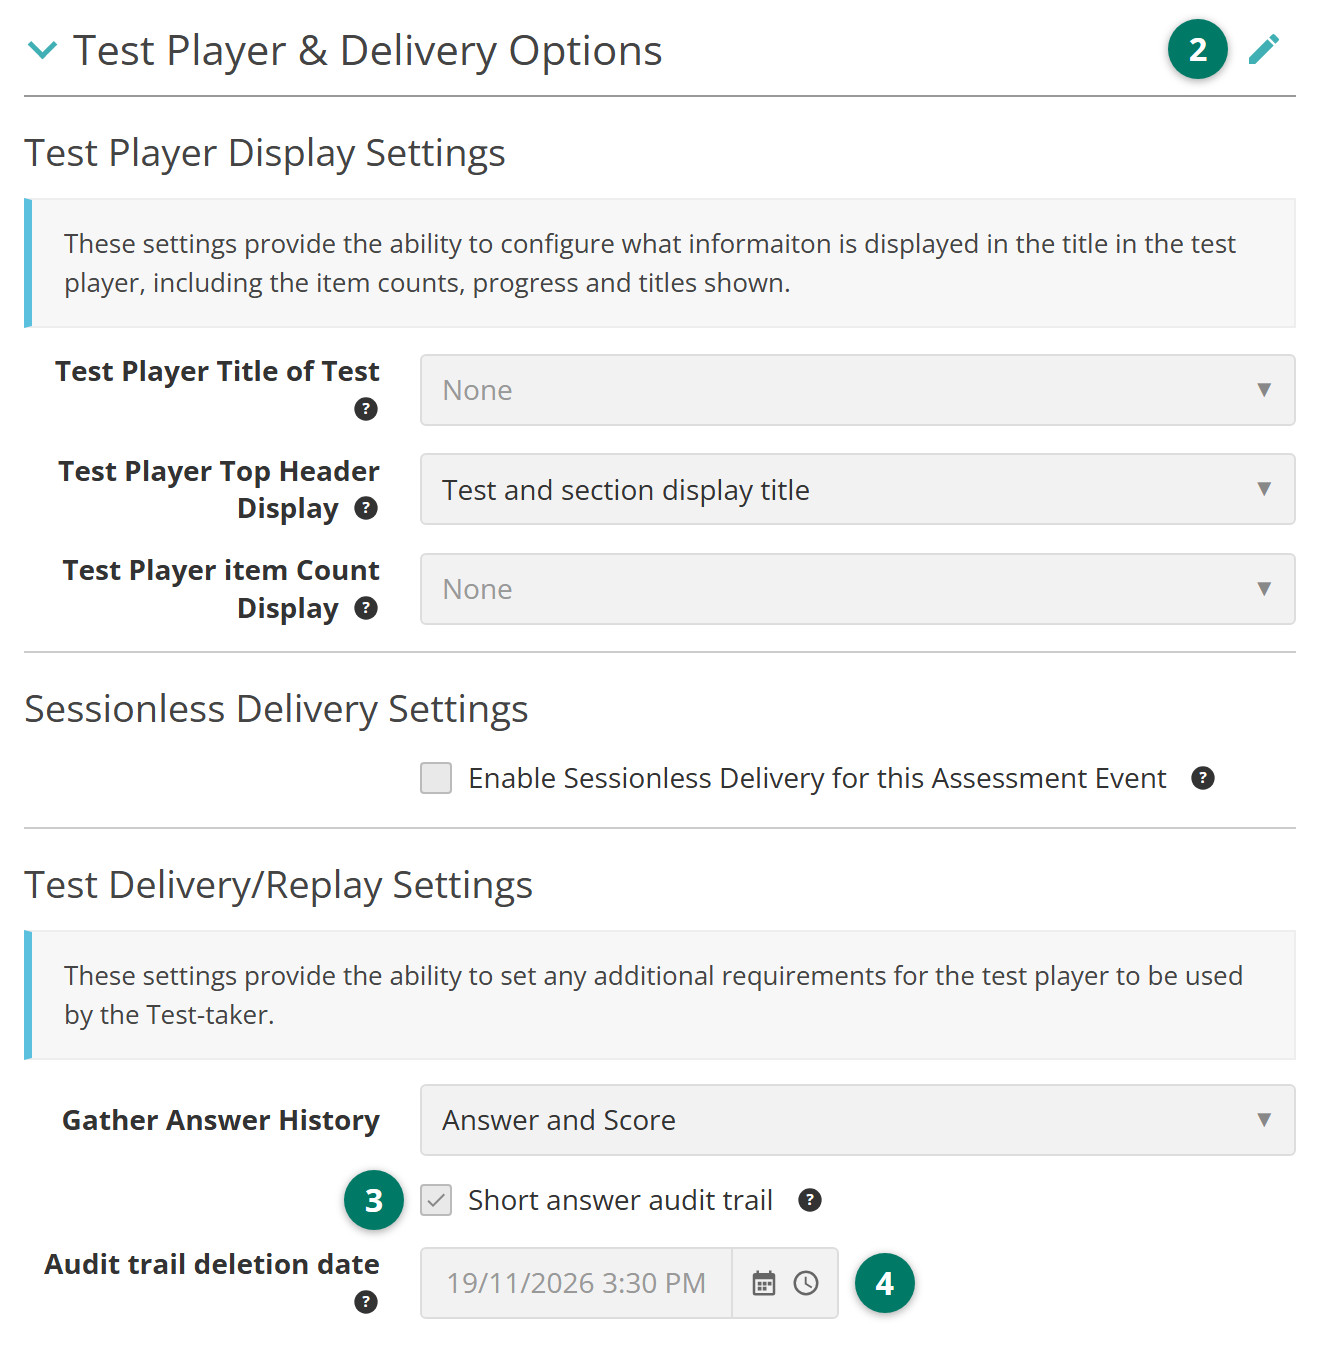
- Under Test Delivery/Replay Settings, tick Short answer audit trail.
- Check the Audit trail deletion date. It defaults to 30 days after the event ends, and can be up to 120 days after the event's closing date. On that date the saved versions are deleted and can't be recovered.
- Select Save.
Important
The audit trail works only on sites that use NoSQL delivery. Janison switches NoSQL delivery on for your site. If you're not sure whether yours has it, contact your Janison account manager.
When a version is saved
Each time the test player saves a response to an extended text item, the audit trail keeps a copy with a time stamp. The player saves when the test-taker moves to another item, for example by selecting Next or Back. If your site has an auto save interval, the player also saves at that interval while the test-taker is working. Each auto save adds a version too. The interval is set for the whole site; see Settings.
The audit trail records items in Item and Extended Response sections. It keeps the versions until the event's Audit trail deletion date.
Open the audit trail
You can open the audit trail from the test attempt page, the test session dashboard or the invigilator dashboard. Each shows a View link for an extended text item that has saved versions. After the event's Audit trail deletion date, the link no longer appears.
From the test attempt page
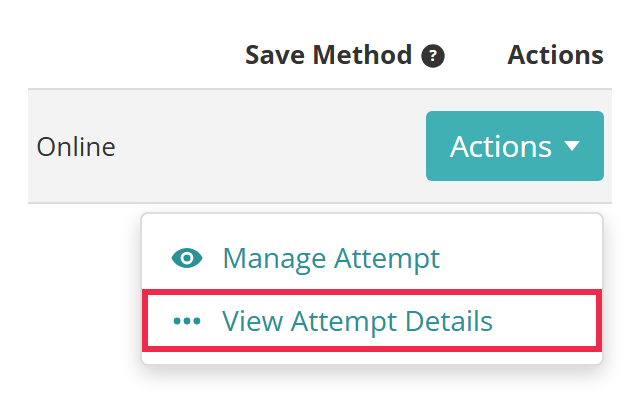
Select Deliver > Manage Attempts, find the attempt and select Actions > View Attempt Details. For other ways to open this page, see Open a test attempt.
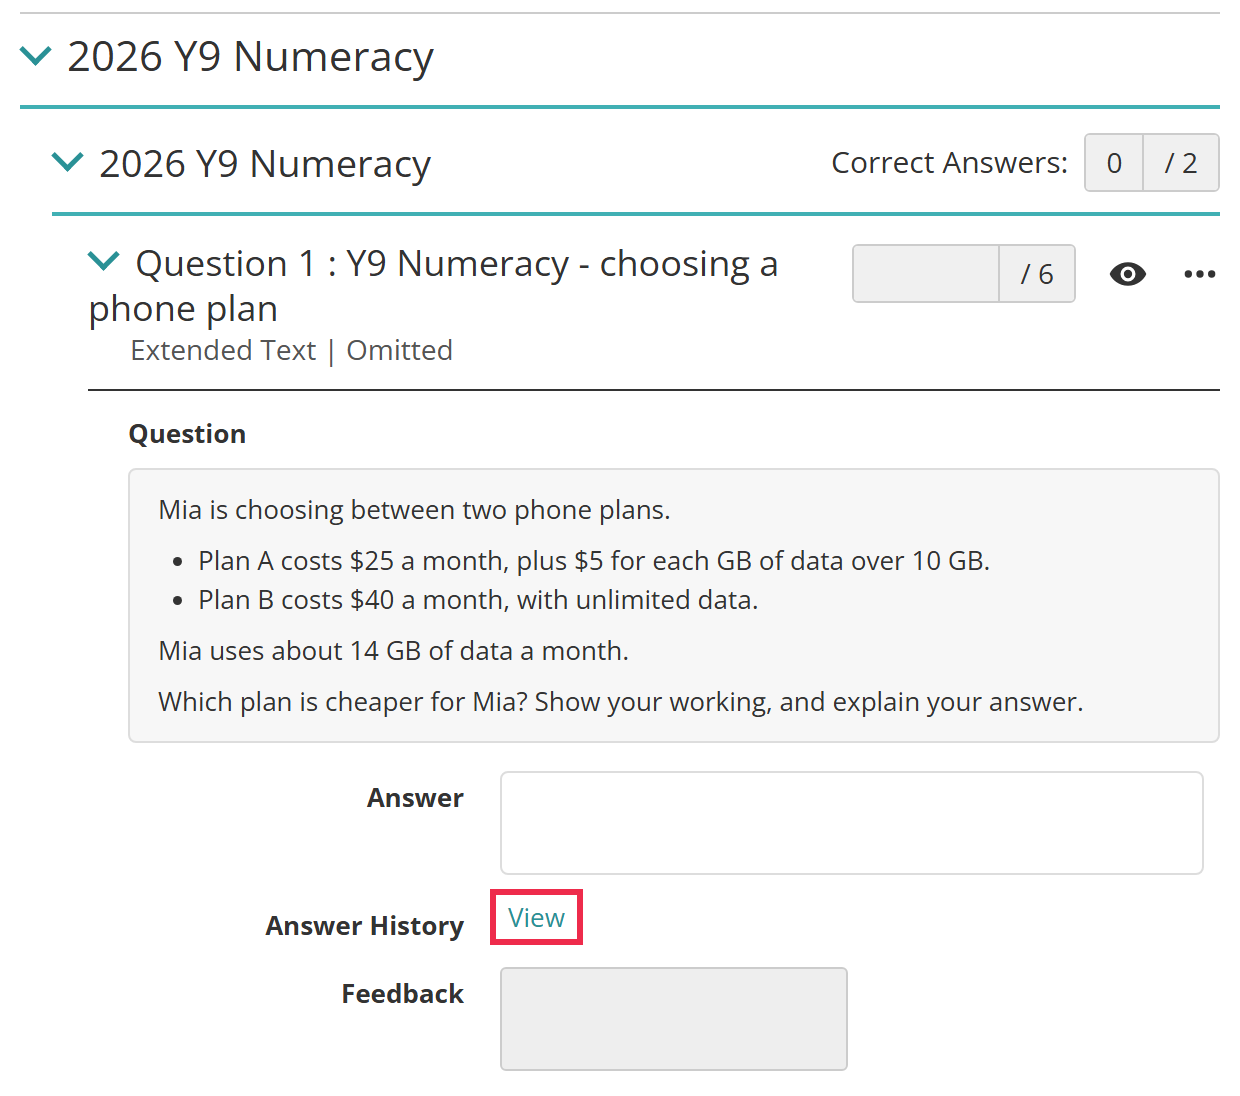
The test attempt page opens. In the responses section, expand the extended text item and select View beside Answer History.
From the test session dashboard
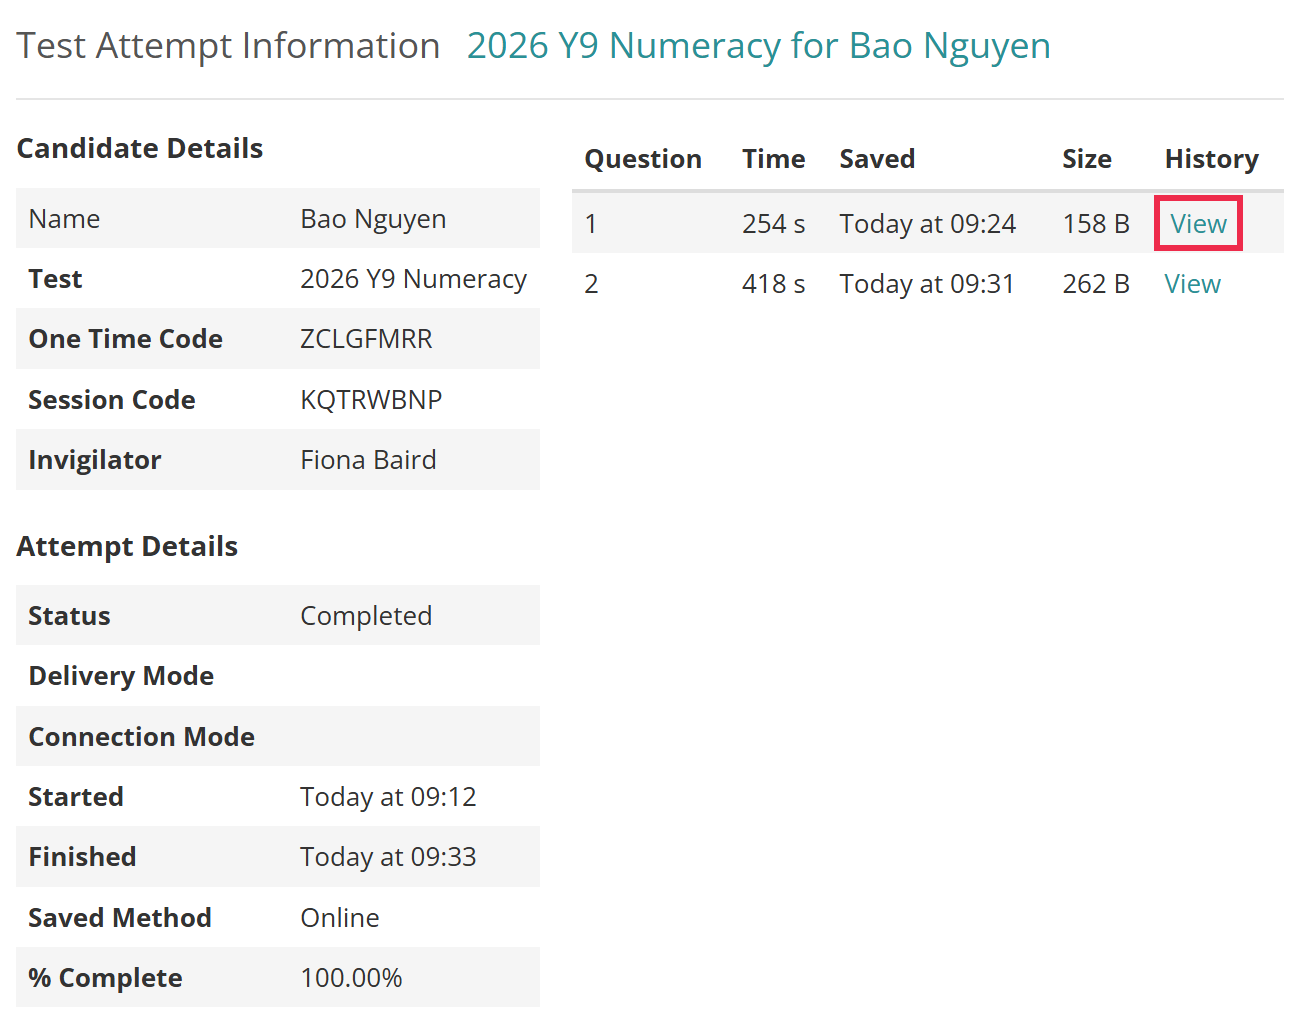
On the session's dashboard, select the test attempt information icon in the test-taker's Actions column. The Test Attempt Information window opens. Select View in the History column beside the item. To open the dashboard, see Test session administration.
From the invigilator dashboard
Select Deliver > Invigilator Dashboard. Under Test-takers, find the test-taker and select Actions > View Progress Details.
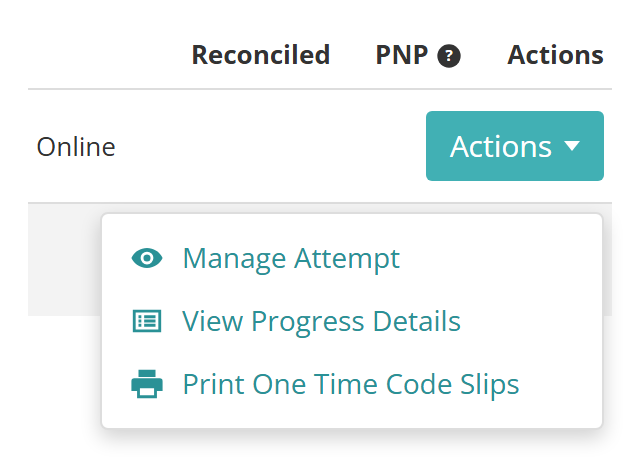
The same Test Attempt Information window opens. Select View in the History column.
Read the audit trail
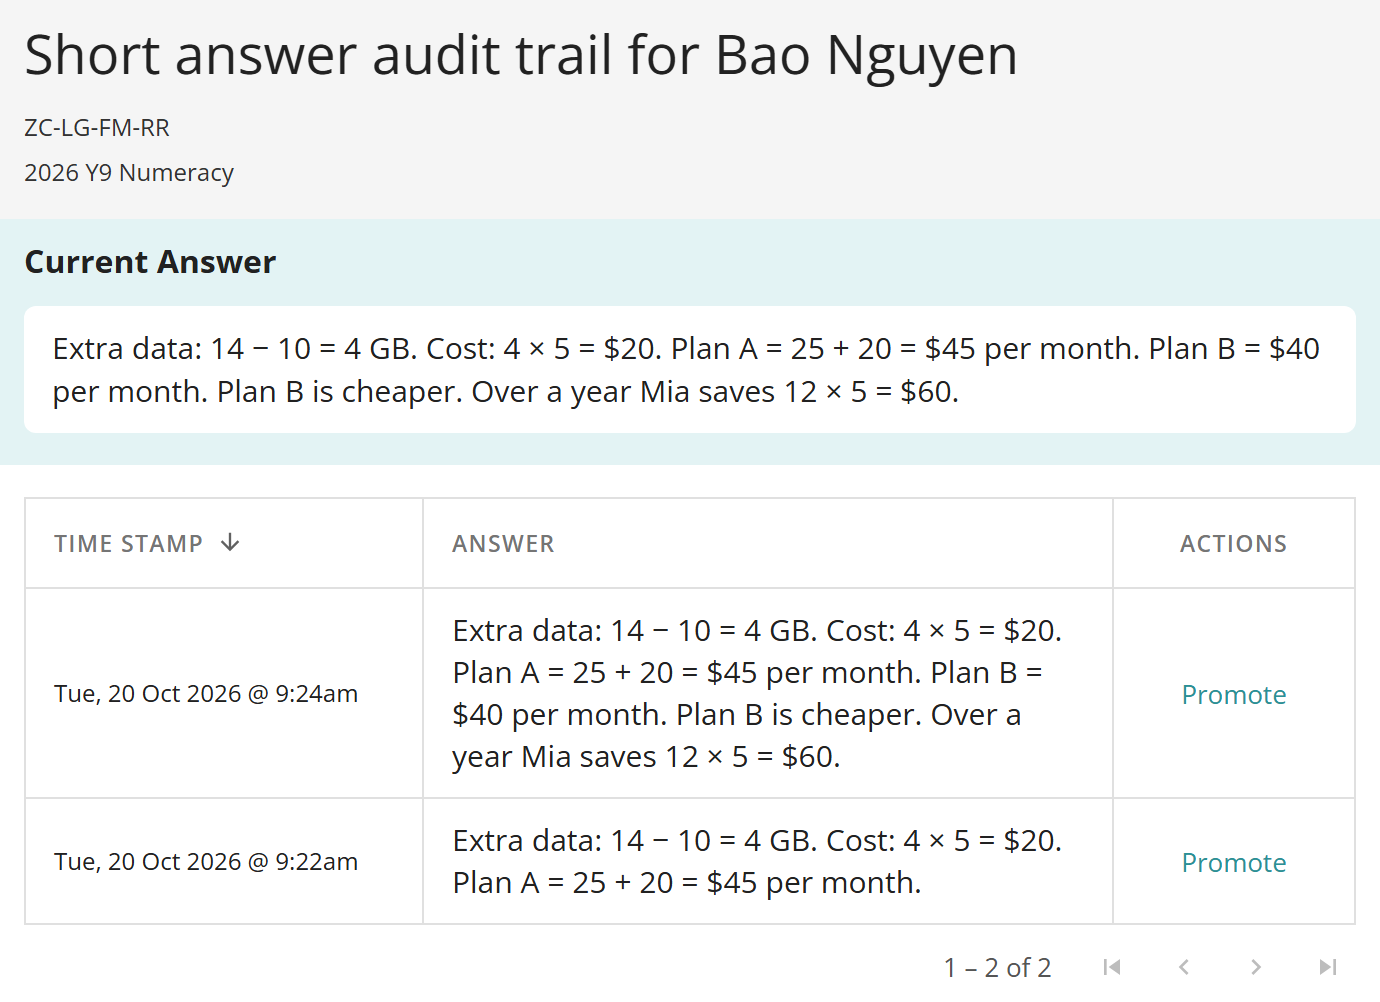
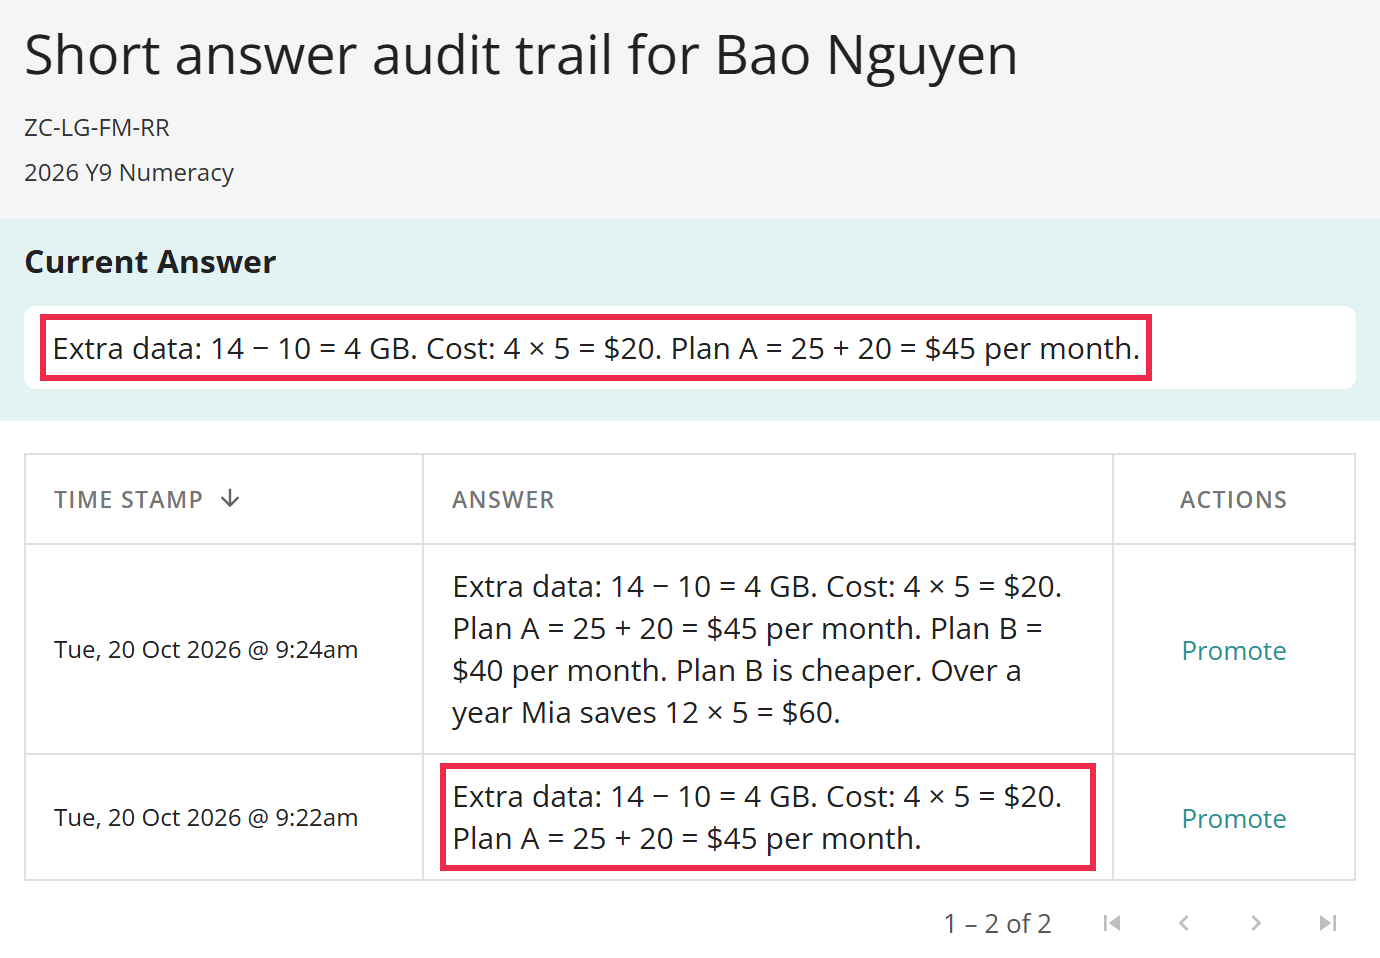
The heading names the test-taker, with their one time code and the test name underneath. Current Answer shows the response as it stands now. The table lists every saved version, newest first, with its Time Stamp, the Answer and a Promote link. Select the Time Stamp heading to reverse the order.
Promote an earlier version
Promoting a version makes it the current answer. You can promote only while the attempt is Completed or Postponed, and only if your role allows it; see Settings. For an attempt in any other status, see When an answer can't be promoted.
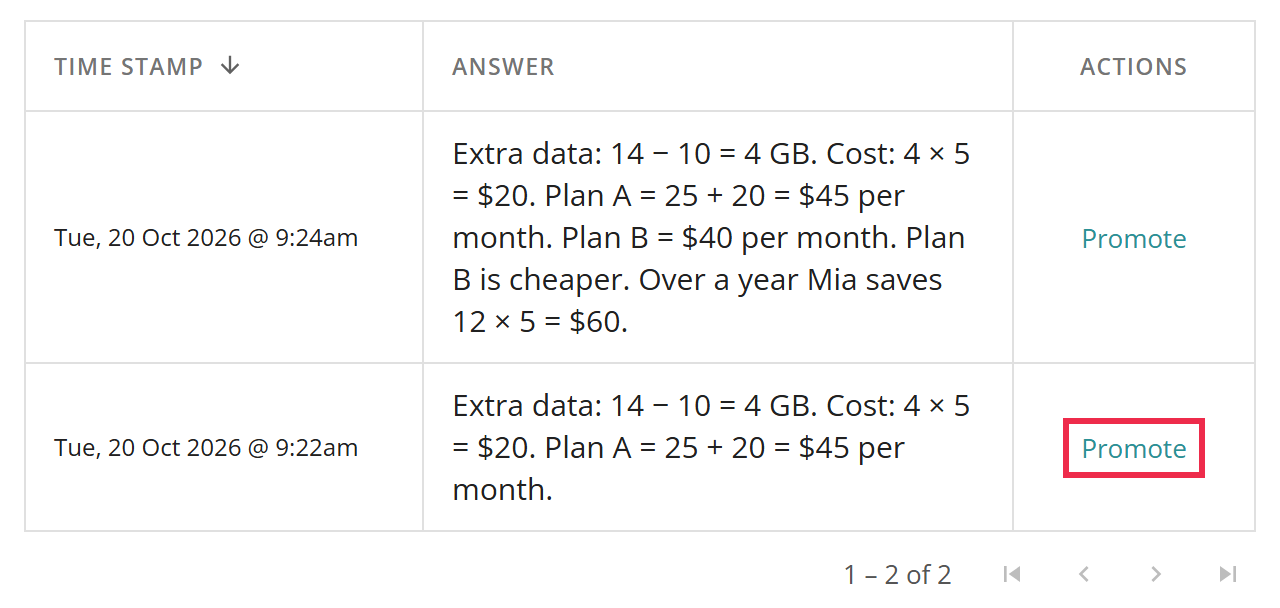
Select Promote beside the version you want.
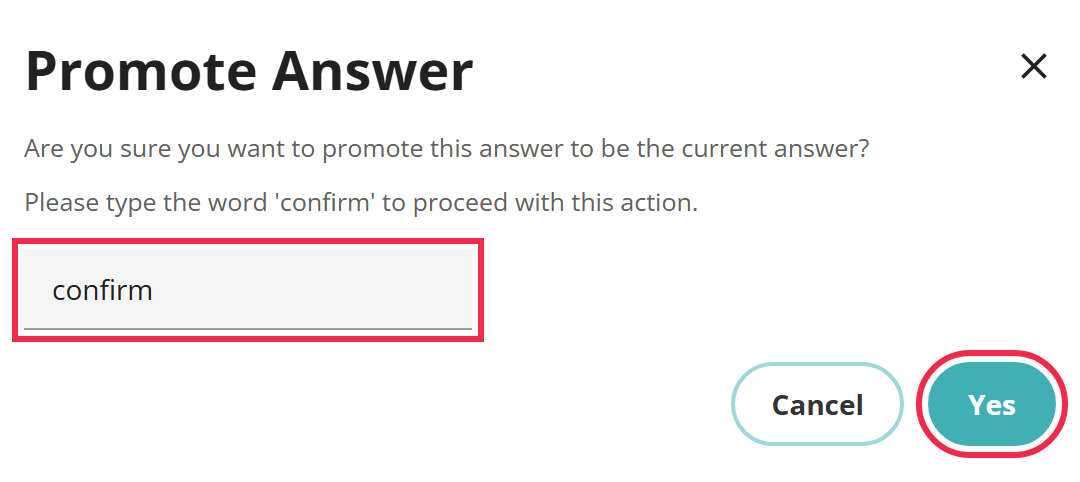
In Promote Answer, type confirm and select Yes.
Current Answer now shows the version you promoted. The change is recorded in the attempt's Recent Activities, with the answer before and after; see Recent activities.
When an answer can't be promoted
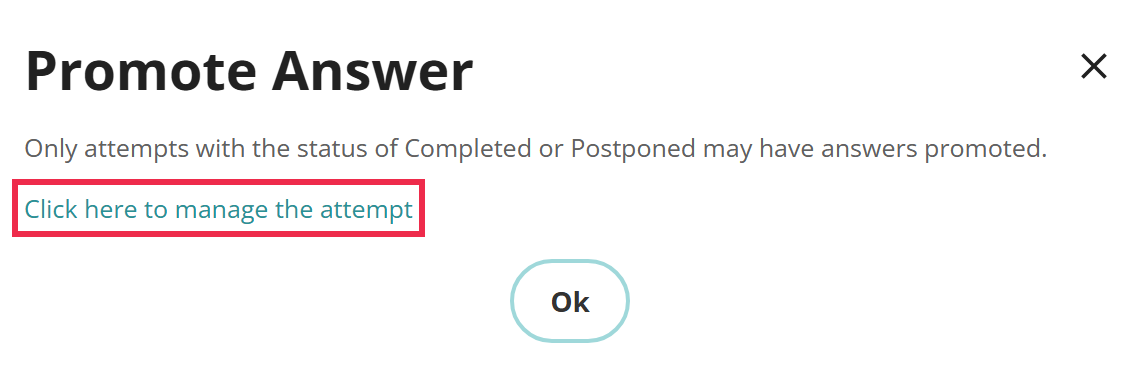
If the attempt isn't Completed or Postponed, selecting Promote shows a message that only attempts with those statuses may have answers promoted. Select Click here to manage the attempt to change the status, or Ok to close the message.
What to do depends on the attempt's status:
- Marking — revert it to Completed; see Revert an attempt in marking.
- Open or Paused in a running test session — postpone it from the session dashboard; see Postpone an attempt in a running session.
- Marked, Passed or Failed — the attempt can't go back to Completed, so its answers can't be promoted.
For every status and the changes it allows, see Allowed changes from each status.
Revert an attempt in marking
On the test attempt page, under Attempt details, select Change > Revert to Completed.
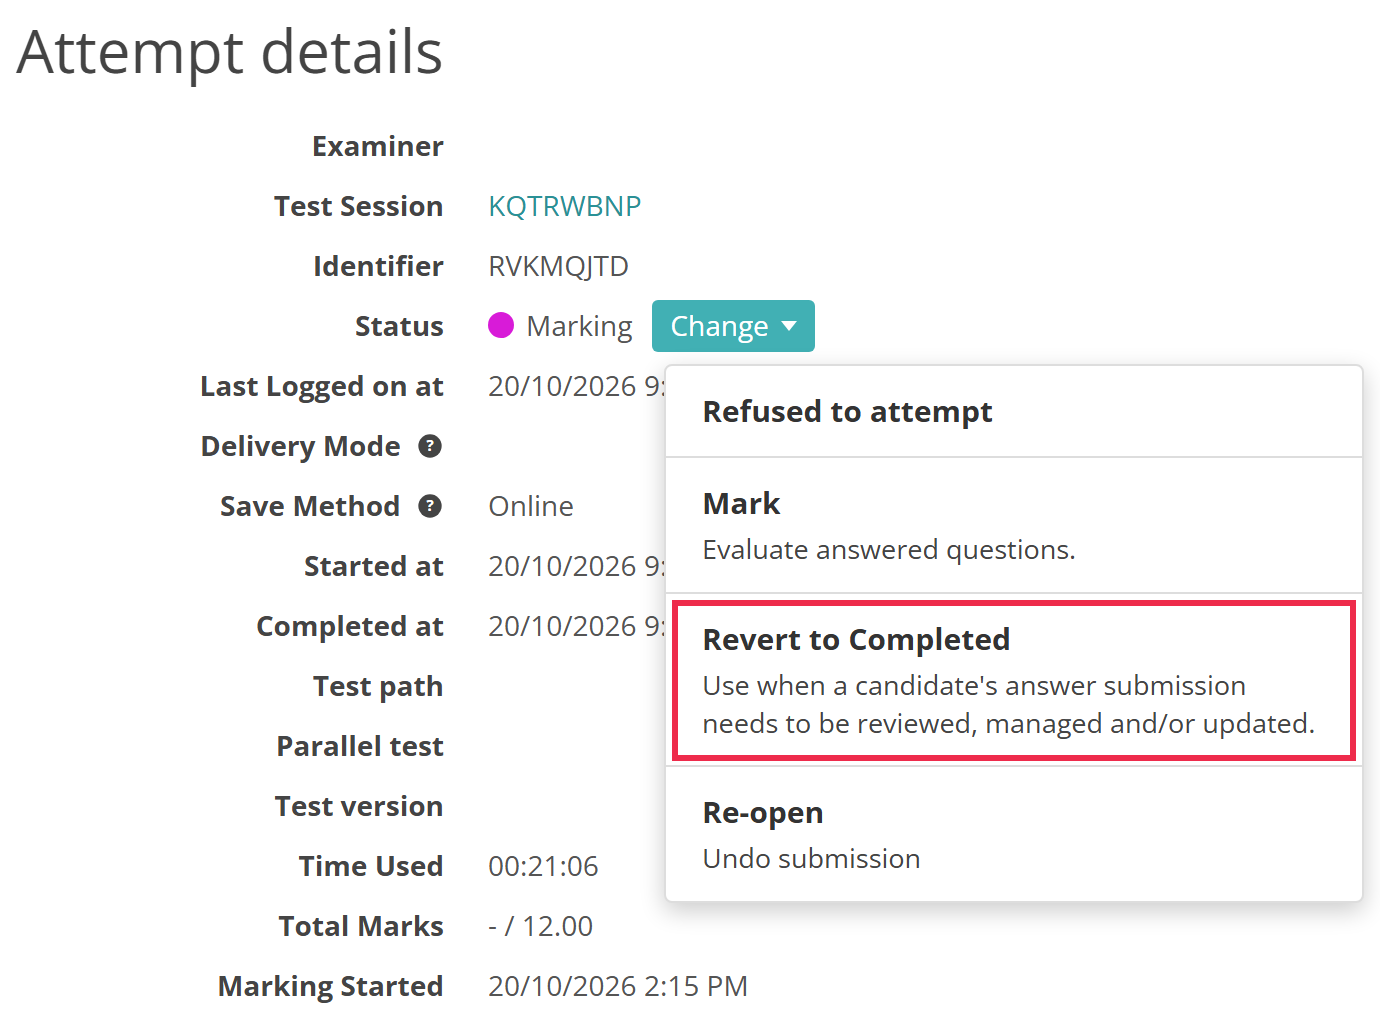
The attempt returns to Completed, and you can promote the answer. Revert to Completed is refused once a linked marking project has started or a marker has opened the attempt.
Postpone an attempt in a running session
- On the session dashboard, tick the test-taker.
- Select Postpone candidate.
- Enter any details and select Confirm.
The attempt becomes Postponed, and you can promote the answer. Postponing takes the attempt out of the session; see Postpone or abandon a test-taker's attempt.
Settings
Administrators can configure these settings on each assessment event, in Test Player & Delivery Options under Test Delivery/Replay Settings. Open the event from Deliver > Assessment Events.
Short answer audit trail — keeps a time-stamped copy of each extended text response every time it's saved. It appears only when the event's test contains extended text items, and can be changed while the event is in Draft or Delivery.
Audit trail deletion date — appears once Short answer audit trail is ticked. It defaults to 30 days after the event ends, and must fall between the event's closing date and 120 days after it. On this date the saved versions are deleted and can't be recovered.
Gather Answer History, in the same section, doesn't affect the audit trail. It collects answer history for other item types and skips extended text items. See Test delivery/Replay settings.
Administrators can set this site-wide setting at Settings > Test Designer Settings, under Test Authoring Settings.
Auto save interval — the number of seconds between auto saves, from 20 to 600. It's blank by default, so the test player saves only when the test-taker moves between items. It applies to every test on the site, and each auto save adds a version to the audit trail.
Administrators grant this permission per role at Settings > Roles, under Answer History.
Promote — shows the Promote link on the audit trail. Without it, a role can't promote a version.
The audit trail also needs NoSQL delivery, which Janison switches on for your site.