Test components
A test component is one part of an assessment package. It holds one or more versions of a test and gives each test-taker one of them. The version is picked at random when they log in, or fixed at enrolment. A package lists its components in order, and a test-taker enrolled in the package's event sits each component as a separate test. Test components live at Deliver > Test Components.
Important
Test components are only used by assessment packages, which an administrator turns on first. See Enable assessment packages.
Create a test component
Go to Deliver > Test Components and select Add Test Component. Then:
- Enter a Name.
- The Identifier fills in as you type. Keep it or change it.
- Select a Discipline.
- Select a Module from that discipline. The module decides which tests the component can hold.
- Select a Component Type: Linear Test for ordinary tests, or Item Adaptive Test for computer-adaptive tests. You can't change it after saving.
- Select Save.
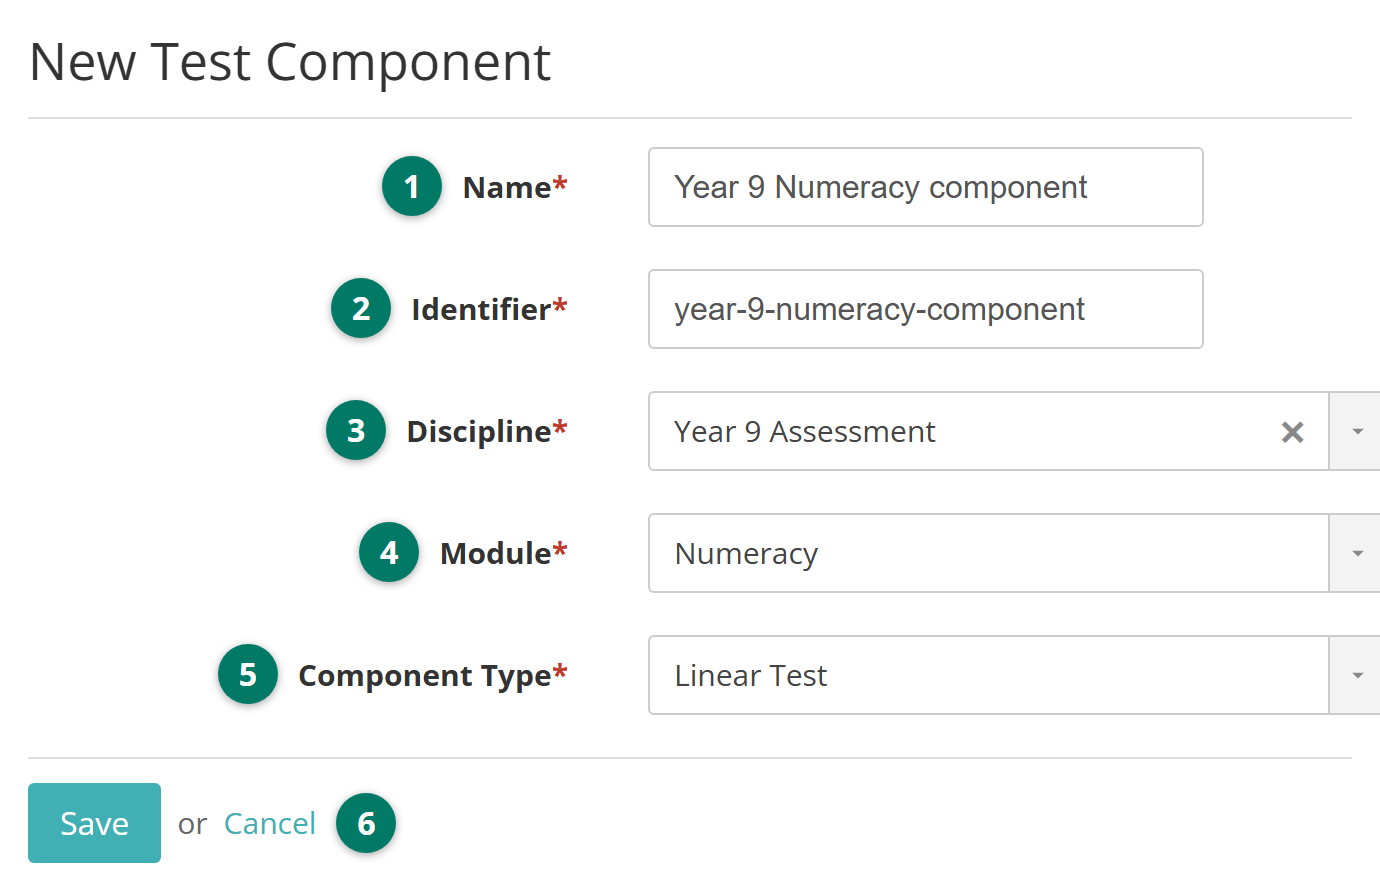
On sites with delivery modes enabled, a Delivery Mode dropdown sits above Component Type, offering Computer Based or Paper. See Settings.
The component's details page opens.
The details page
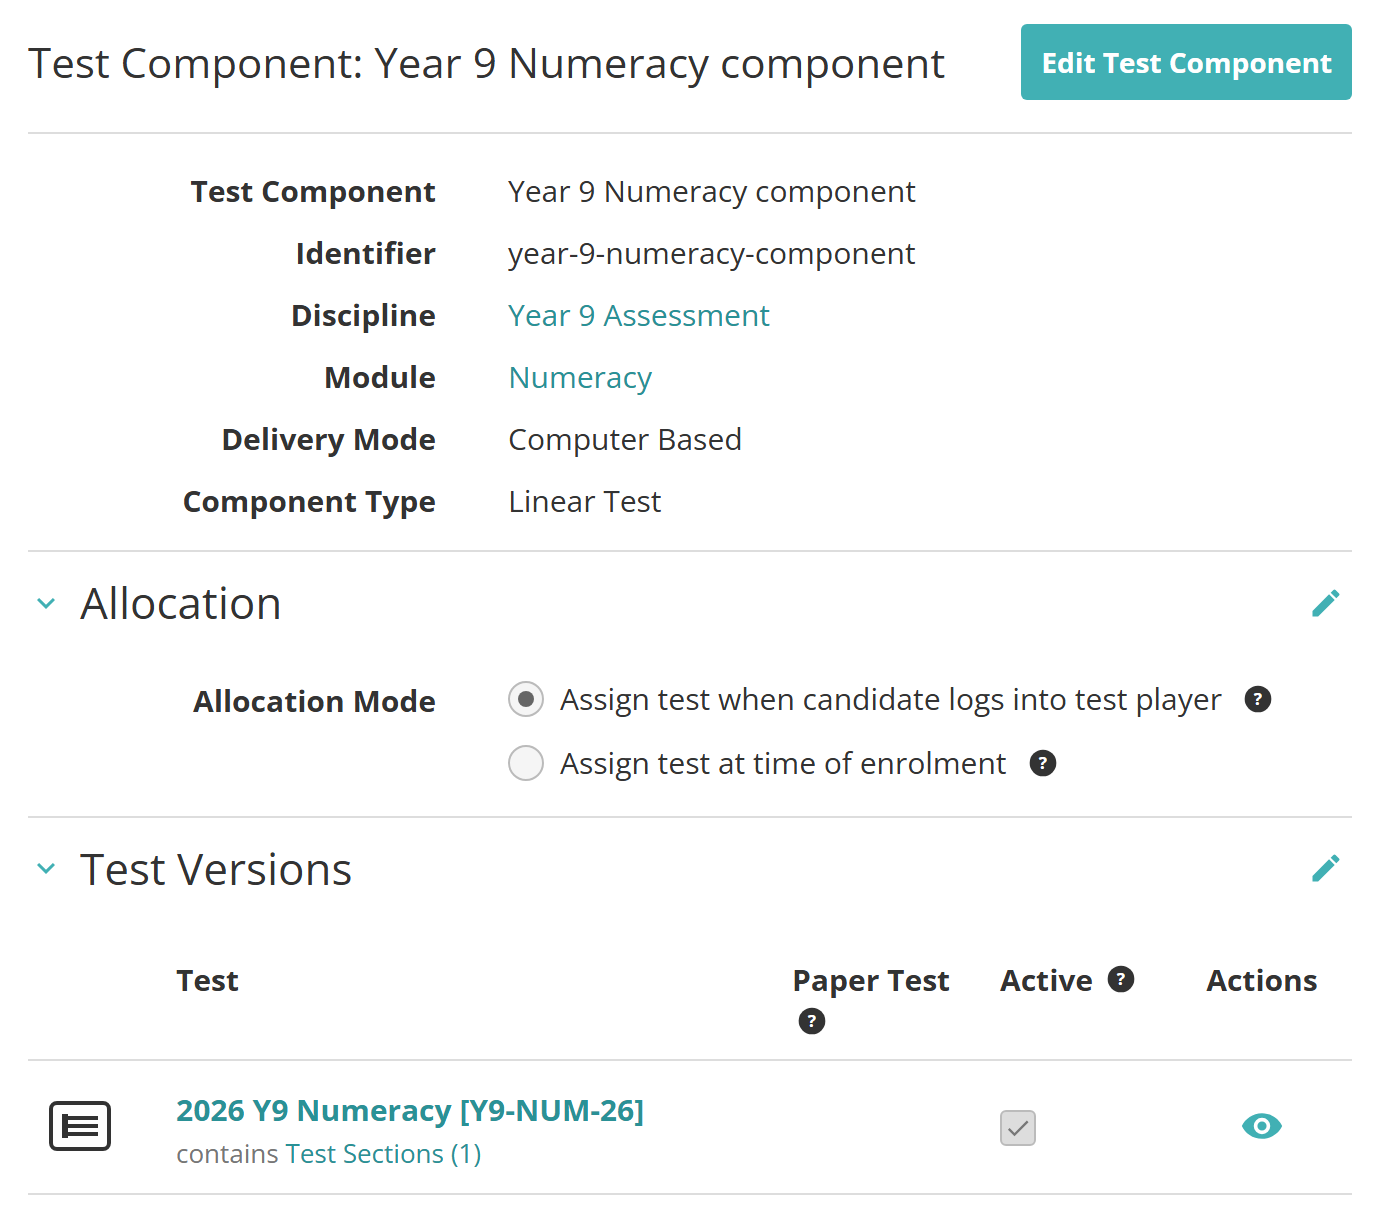
The details page shows the component's name, Identifier, Discipline, Module, Delivery Mode and Component Type, then three sections. Delivery Mode reads Computer Based unless your site has delivery modes enabled and chose otherwise. Allocation and Test Versions each have a pencil icon that opens them for editing, and each saves on its own. Results Determination appears only when test results are enabled for your site. Select Edit Test Component to change the rows at the top.
Once the component's package is linked to an assessment event that has left Draft, editing is limited. You can add test versions but not remove the ones already there, and the Test Versions section shows a warning while this applies.
Allocation
Allocation decides when each test-taker is given one of the component's test versions:
- Assign test when candidate logs into test player — a random active version is assigned at login.
- Assign test at time of enrolment — a version is assigned when the test-taker is enrolled and kept when they log in. If that version is later removed or made inactive, they get a random active version at login instead.
Select the pencil icon next to Allocation, choose an option, then select Save. New components start with the mode set for your site. See Settings.
Test versions
Test Versions lists the tests the component can deliver. Each row shows the Test, its Paper Test where one is paired, and its Conditions where your site uses them. An Active tick and a preview icon under Actions complete the row. Only active versions are delivered, and at least one must be active.
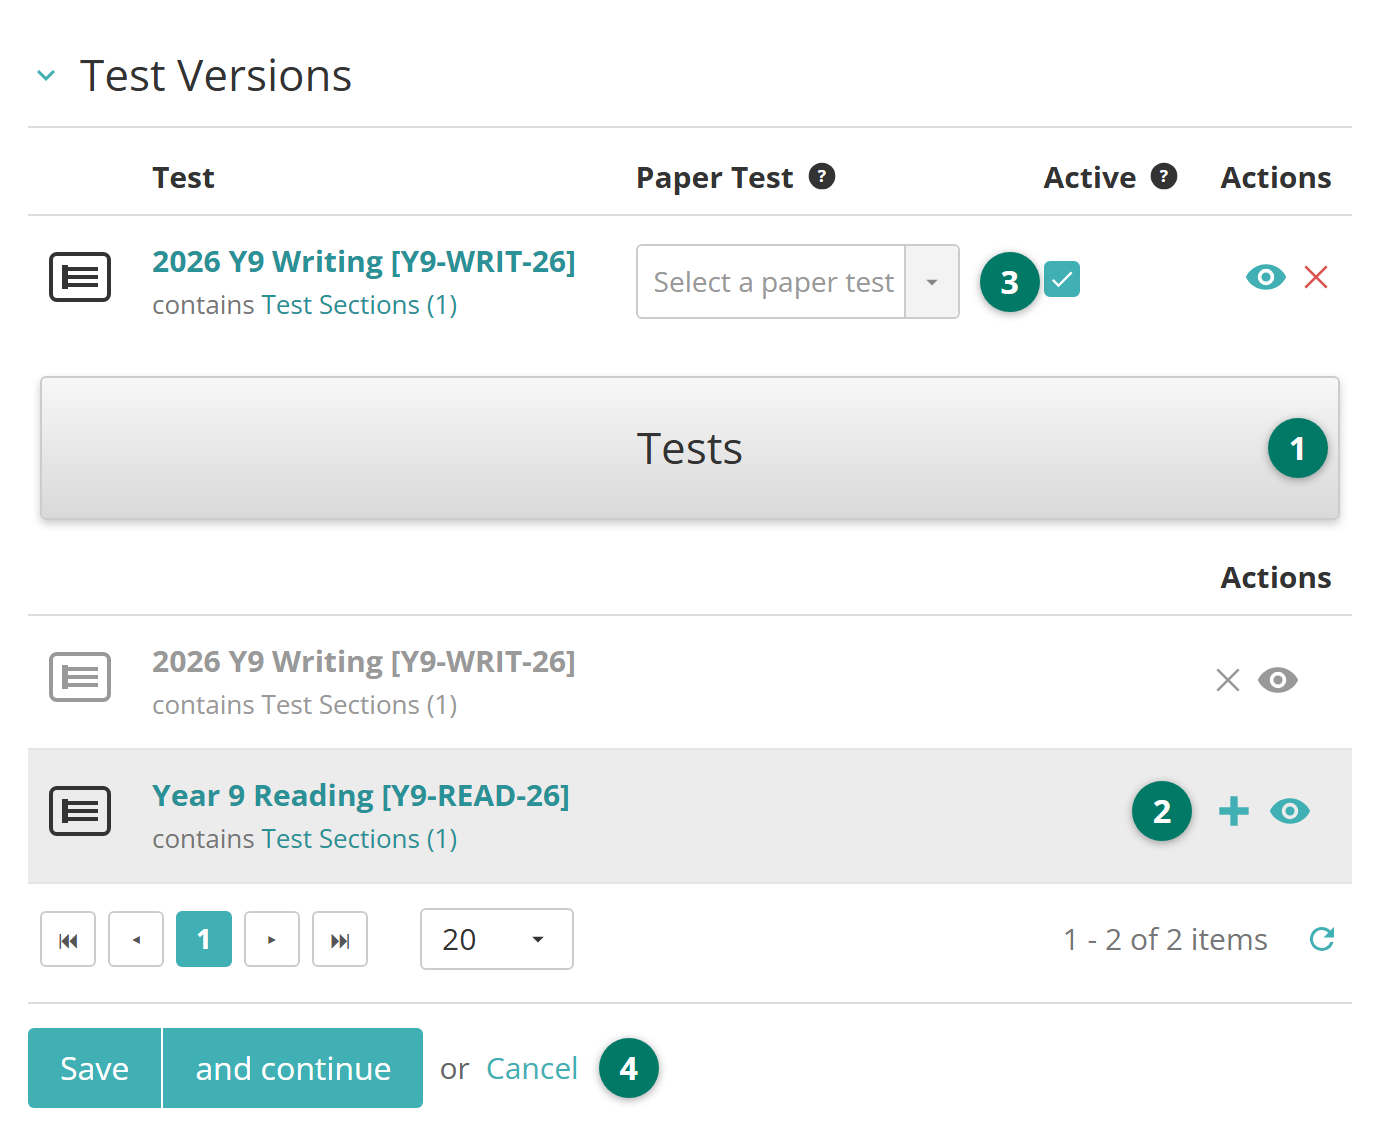
To add a version, select the pencil icon next to Test Versions. The section opens for editing, with a Tests panel under the versions. Then:
- Find the test in the list under Tests. It shows every test in the component's module that matches the Component Type. To narrow it, expand Tests and search by identifier or name, or filter by State or Tagged with.
- Select the plus icon on the test to add it. It appears in the versions above, ticked Active. The cross beside a version removes it.
- To pair a version with its paper equivalent for a package delivered in a mixed mode, choose the paper test under Paper Test. See Hybrid test preparation and delivery.
- Select Save. and continue saves and keeps the section open for more changes.
Note
An item adaptive test can't be added while the component's package is on an assessment event that allows reliable offline delivery. Adding one sets the question count display on any linked event to Question # (Per Section).
Conditions
On sites with advanced enrolment filtering, each test version can be limited to test-takers who match conditions such as year level or language. See Settings.
The Allowed Conditions block above the grid lists the matching user attributes set for your site. In edit mode, choose the values the component's versions may use for each attribute. An attribute with no values chosen isn't used.
Then, for each version, select the pencil icon in its Conditions column. The Conditions dialog offers only the allowed values. Choose the values for that version, select OK, then select Save on the section. The section warns you when a combination of allowed values has no active version, since test-takers with that combination would get no test. Allocation still follows the Allocation mode: a version is matched at enrolment or at first login.
An assessment package warns you when its components' allowed conditions differ. See Assessment packages.
Results determination
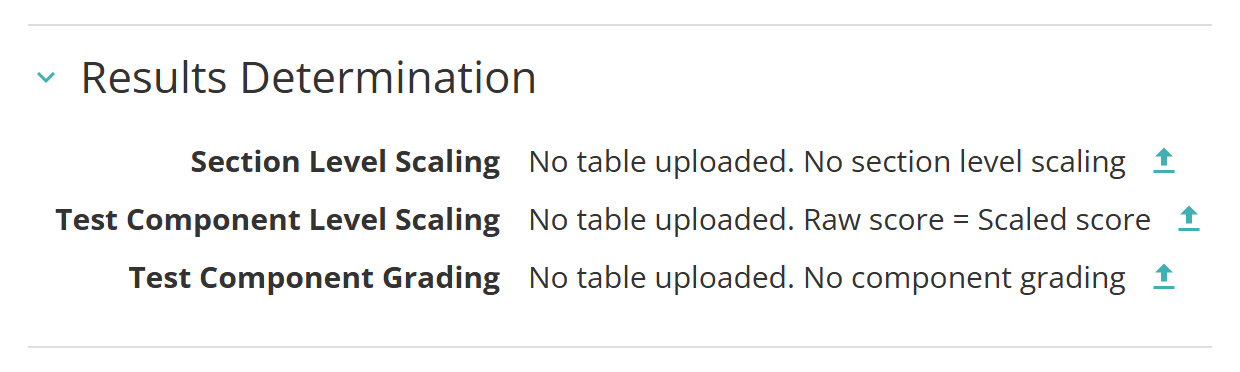
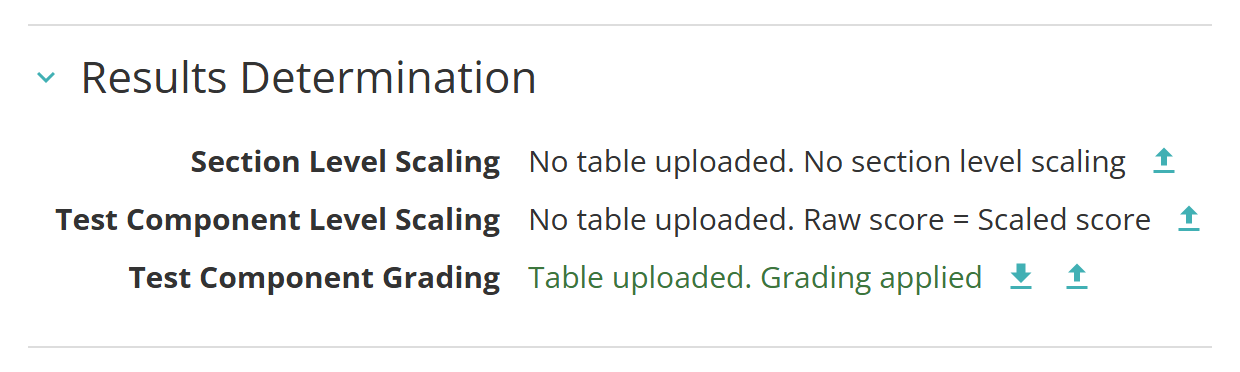
Results Determination sets how a test-taker's raw score on the component becomes a scaled score and a grade. It appears only when test results are enabled for your site. See Settings. Each row is a table you upload from a spreadsheet, and the row reads No table uploaded until you do:
- Section Level Scaling — scales each section's summed score to a scaled score before the sections are combined. Without a table there is no section-level scaling.
- Test Component Level Scaling — maps the raw score for each test version to a scaled score. Without a table the raw score is the scaled score.
- Test Component Grading — maps scaled scores to grades by setting an upper score limit for each grade. Without a table there is no component grading.
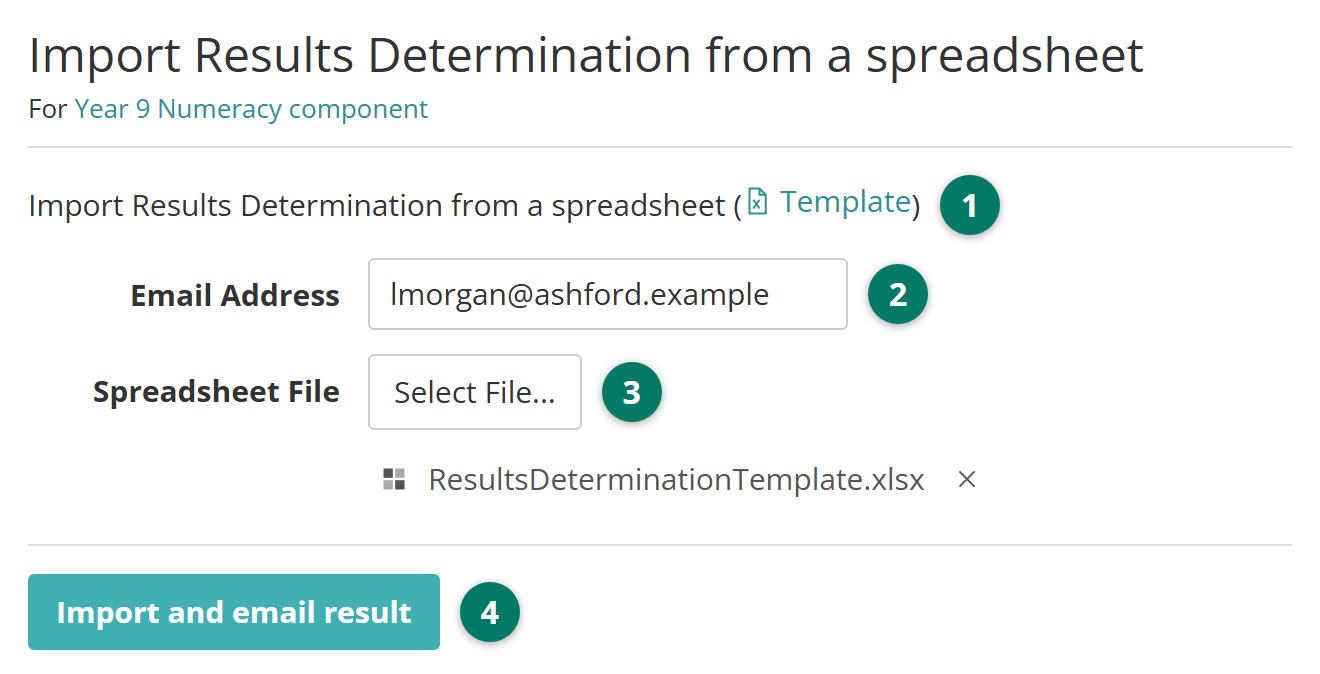
To upload a table, select the upload icon beside it. The import page opens. Then:
- Select Template to download a sample spreadsheet. Its Supported Attributes sheet describes each column and which are mandatory. Fill in your data on the first sheet and save the file.
- Enter the Email Address the import result should go to. It starts as your own.
- Select Select File... and choose the saved spreadsheet. Its name appears below the button.
- Select Import and email result.
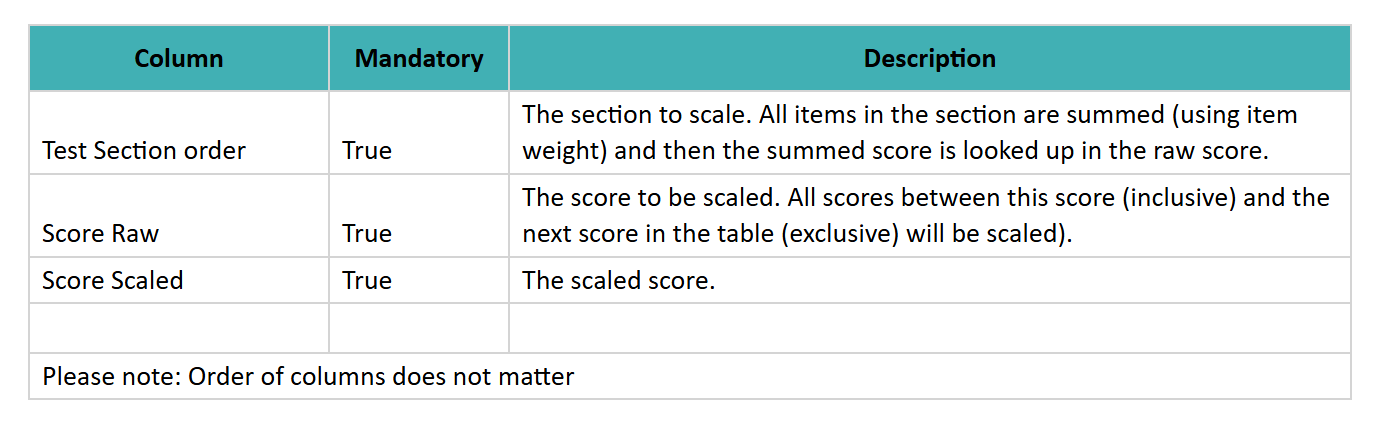
The Supported Attributes sheet of the Section Level Scaling template looks like this:
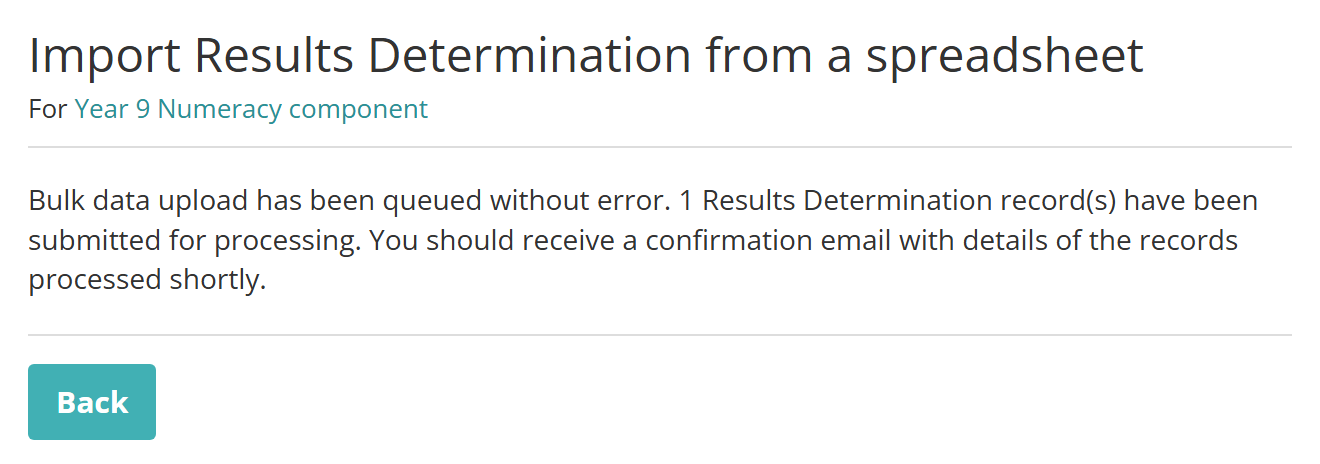
The page confirms the upload has been queued and that the result will be emailed to you. Back returns to the import page, and the For link under the title returns to the component.
If the spreadsheet has errors, the page lists them by row and column instead, and nothing is imported. Fix the file and import it again.
Once a table is processed, its row reads Table uploaded and a download icon appears beside it, which exports the table as a spreadsheet.
If results have already been calculated for a package that uses the component, the section warns that they are out of date. It names the packages, and you run Calculate Results on each of them again.
Search for a test component
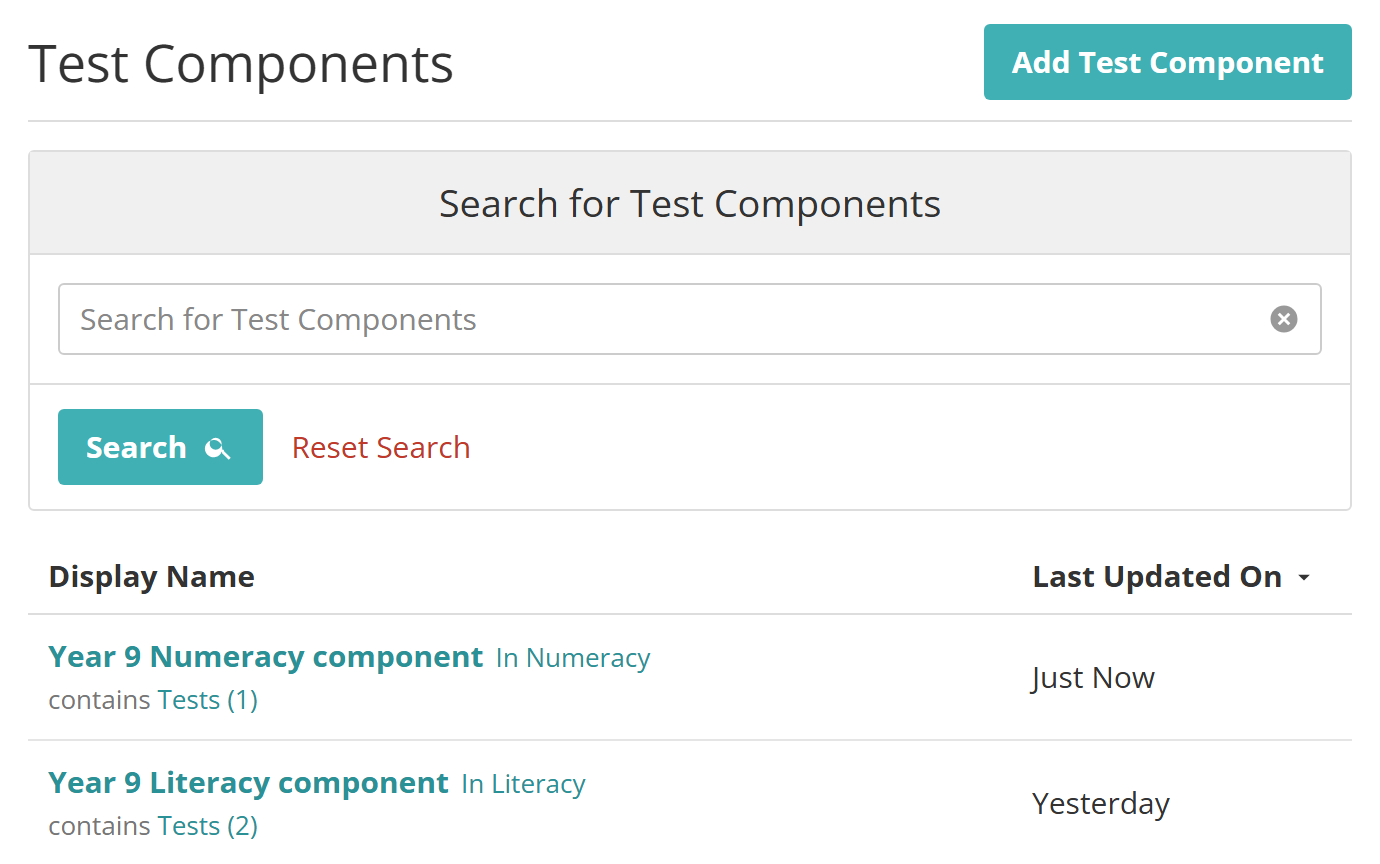
Go to Deliver > Test Components. The list shows every component with its module and how many tests it holds, most recently changed first. To narrow it, expand Search for Test Components, type part of a name or identifier and select Search. Select a component to open its details page.
Edit a test component
Open the component from the list. Select Edit Test Component to change its Name, Identifier, Discipline, Module or Delivery Mode, then select Save. Component Type is fixed once the component is saved, and Delivery Mode is limited to the mode of any package the component belongs to. To change the allocation, the test versions or the results tables, use that section on the details page.
To delete a component, select Delete on the edit form. A component that belongs to an assessment package can't be deleted; the message names the packages.
Settings
Administrators configure the following settings. They sit on three settings pages.
Link Session Based Assessment Events to — at Settings > Assessment Event Settings, in the Event Settings expandable. Set it to Assessment Packages so events can deliver packages of test components.
Default test component allocation mode — in the same expandable. The Allocation mode new components start with.
Enable advanced filtering for assessment event enrolments and Matching user attributes — in the same expandable. Turn on Allowed Conditions and the Conditions column in Test Versions, and set the user attributes they offer. The same attributes drive the Advanced Enrolment Filters block on an assessment event. See Assessment events.
Enable Test Results — at Settings > Marking Settings. Shows the Results Determination section on test components and packages.
Enable Test Package Delivery Modes — at Settings > QTI Settings. Adds Delivery Mode to the test component form and to packages.
Access to test components is granted per role at Settings > Roles.