Marking team
The marking team is everyone who marks responses in an enrolment-based marking project. In the project's Marking Team section, you add markers, give each one a role and seniority, and choose which items they mark.
Marking roles and seniority
A marking team has two default roles:
- Marker — marks test-taker responses.
- Chief Marker — oversees the marking for a test.
Your site can add other marking roles, such as Senior Marker.
Each marker also has a seniority level, from 0 to 8. Level 0 is the most senior. The level sets which markers someone can see in the project.
| Level | Can see |
|---|---|
| 0 | Everyone in the project |
| 1 and 2 | Markers at their level or less senior, in their marking centre or team |
| 3 and 4 | Markers at their level or less senior, in their marking team |
| 5 to 8 | Only themselves |
The project's page counts markers by level, whatever their role: levels 0 to 2 under Chief Markers, 3 and 4 under Senior Markers, and 5 to 8 under Markers.
The Centre and Team columns show each marker's marking centre and marking team. They're the marker's groups whose types match the project's Group Type for Marking Centre and Group Type for Marking Teams. To move a marker, change their groups in Manage People > Groups.
How you set role and seniority depends on your site's Role Seniority Mode (see Settings):
- Custom, the default, gives each marker a Role and a Seniority from Level 0 to Level 8.
- Automatic gives one Marking role/Seniority list of the pairs your administrator has set up, such as Chief Marker - 0. The screenshots on this page show this mode.
Add markers to the project
There are three ways to add markers:
- Add Existing Team — adds people from a group, all of them or a few.
- Select User — adds one person at a time.
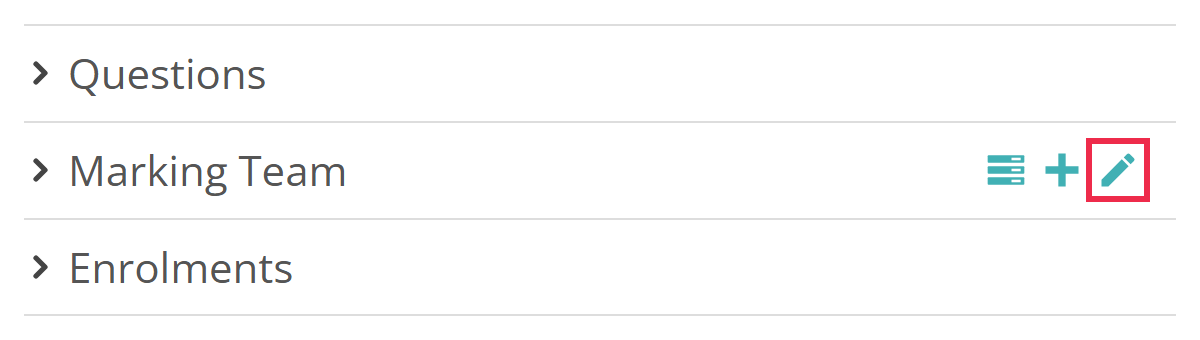
- QuickAdd Users — the plus icon on the Marking Team heading. It creates new user accounts and adds them to the team in one go. It appears only when your site has the QuickAdd plugin and your role lets you add users. See Quick-add users.
Add a marking team using groups
Before you begin, put the markers in a group in Manage People > Groups. Add Existing Team lists only groups of the type your site uses for marking teams (see Settings). It also leaves out any group with members you can't see. Unlike Select User, it offers every active member of the group, whatever their main role.
In the Marking Team section, select the pencil icon.
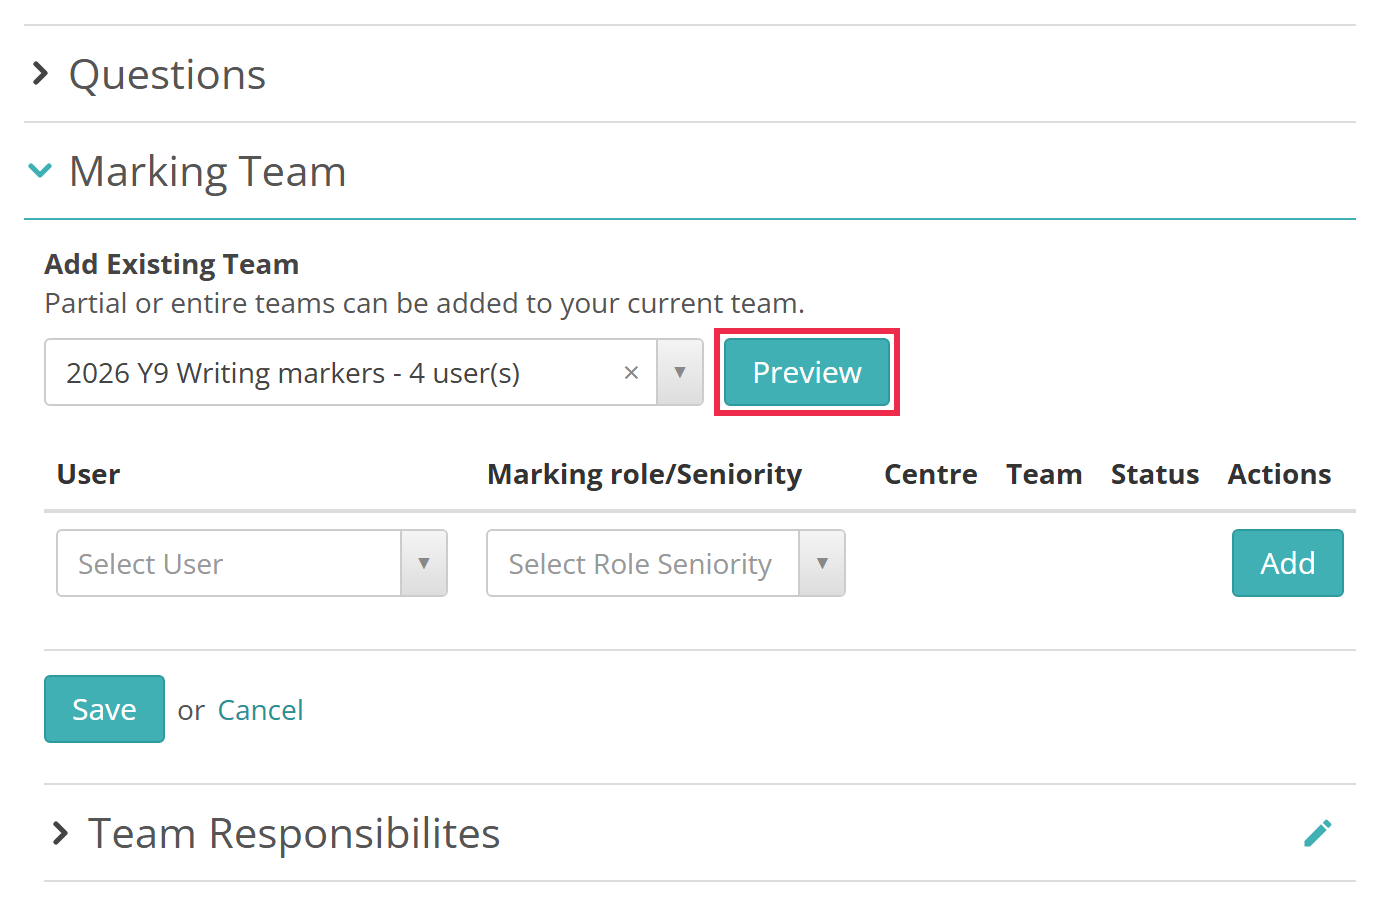
Under Add Existing Team, choose the group, then select Preview.
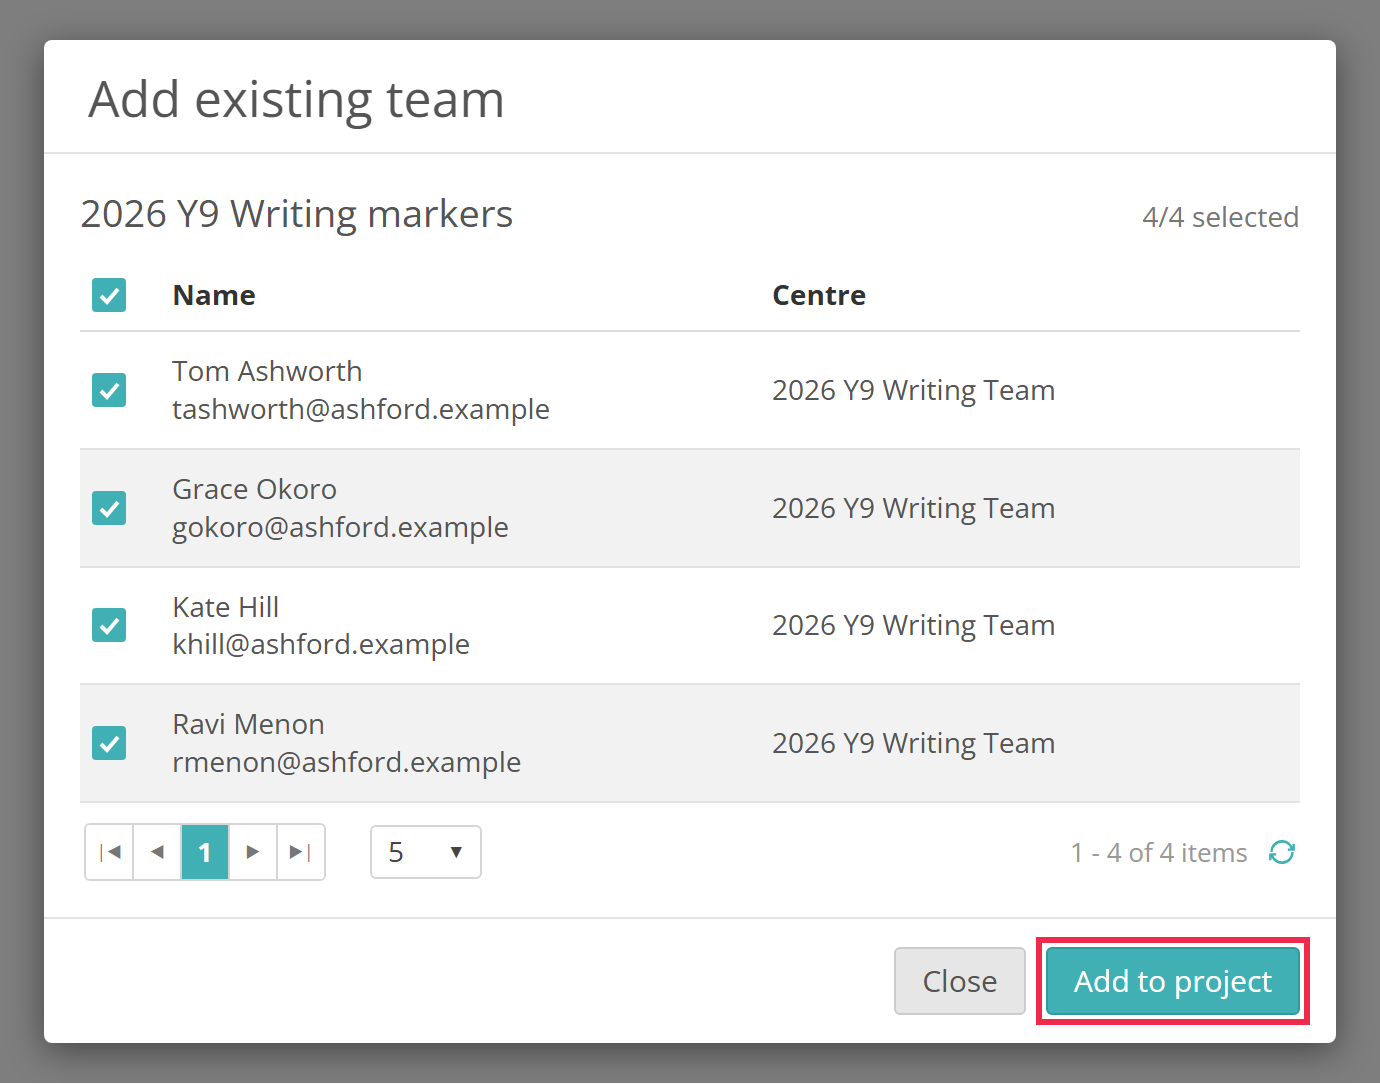
In the Add existing team window, tick the markers you want, then select Add to project.
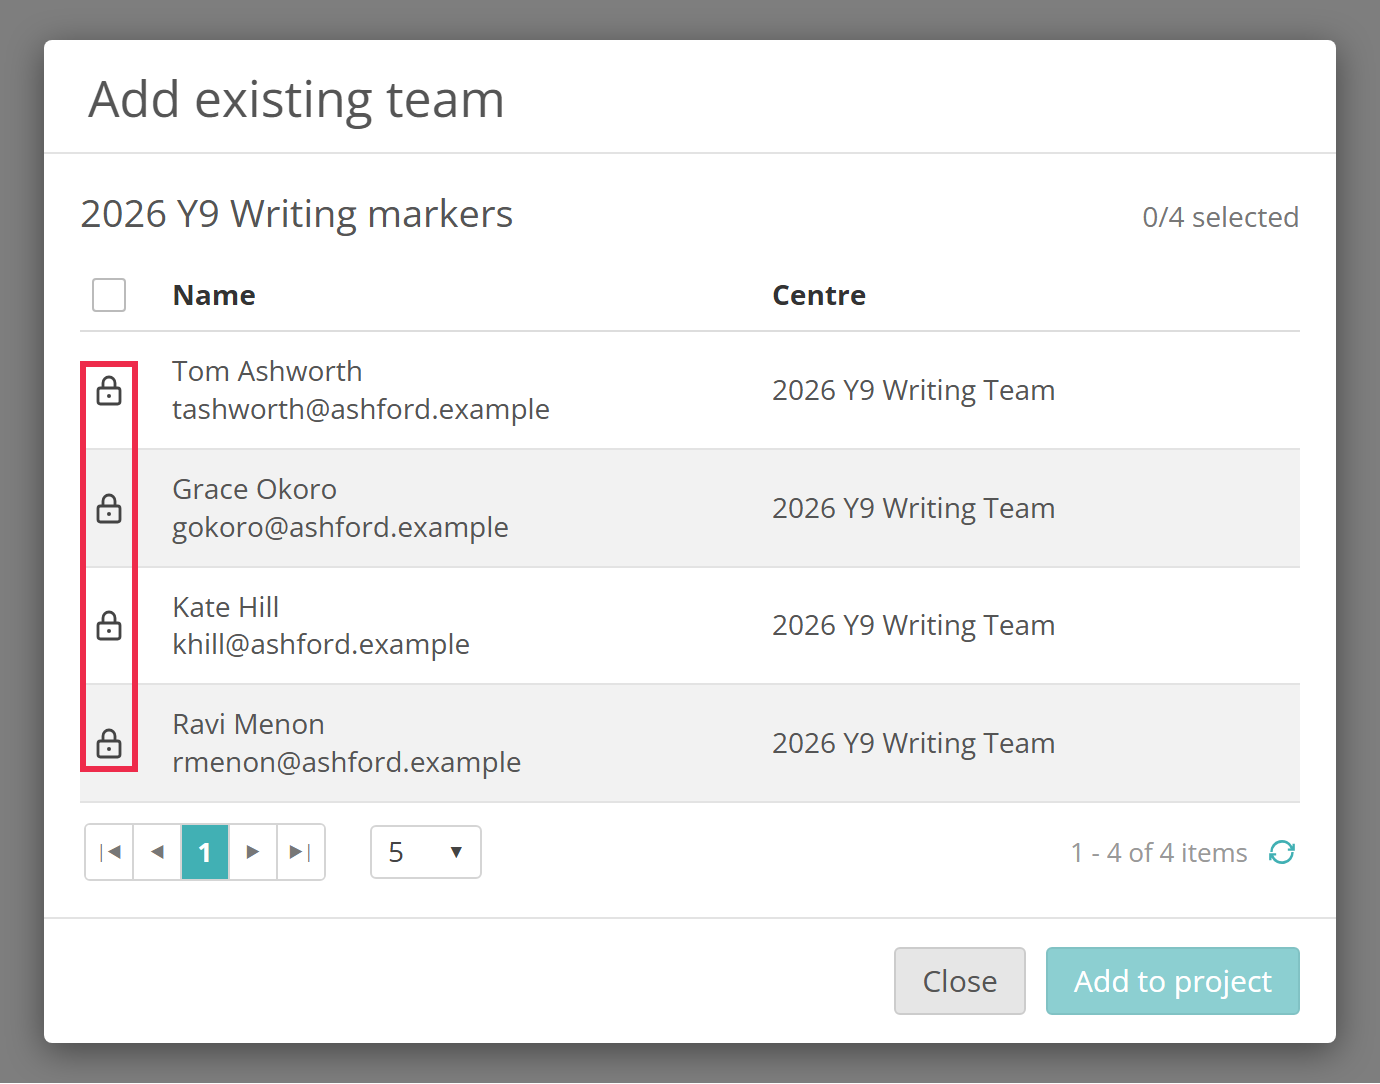
Anyone already in the project shows a lock and can't be selected again.
The markers appear in the list. Choose a role and seniority for each one.
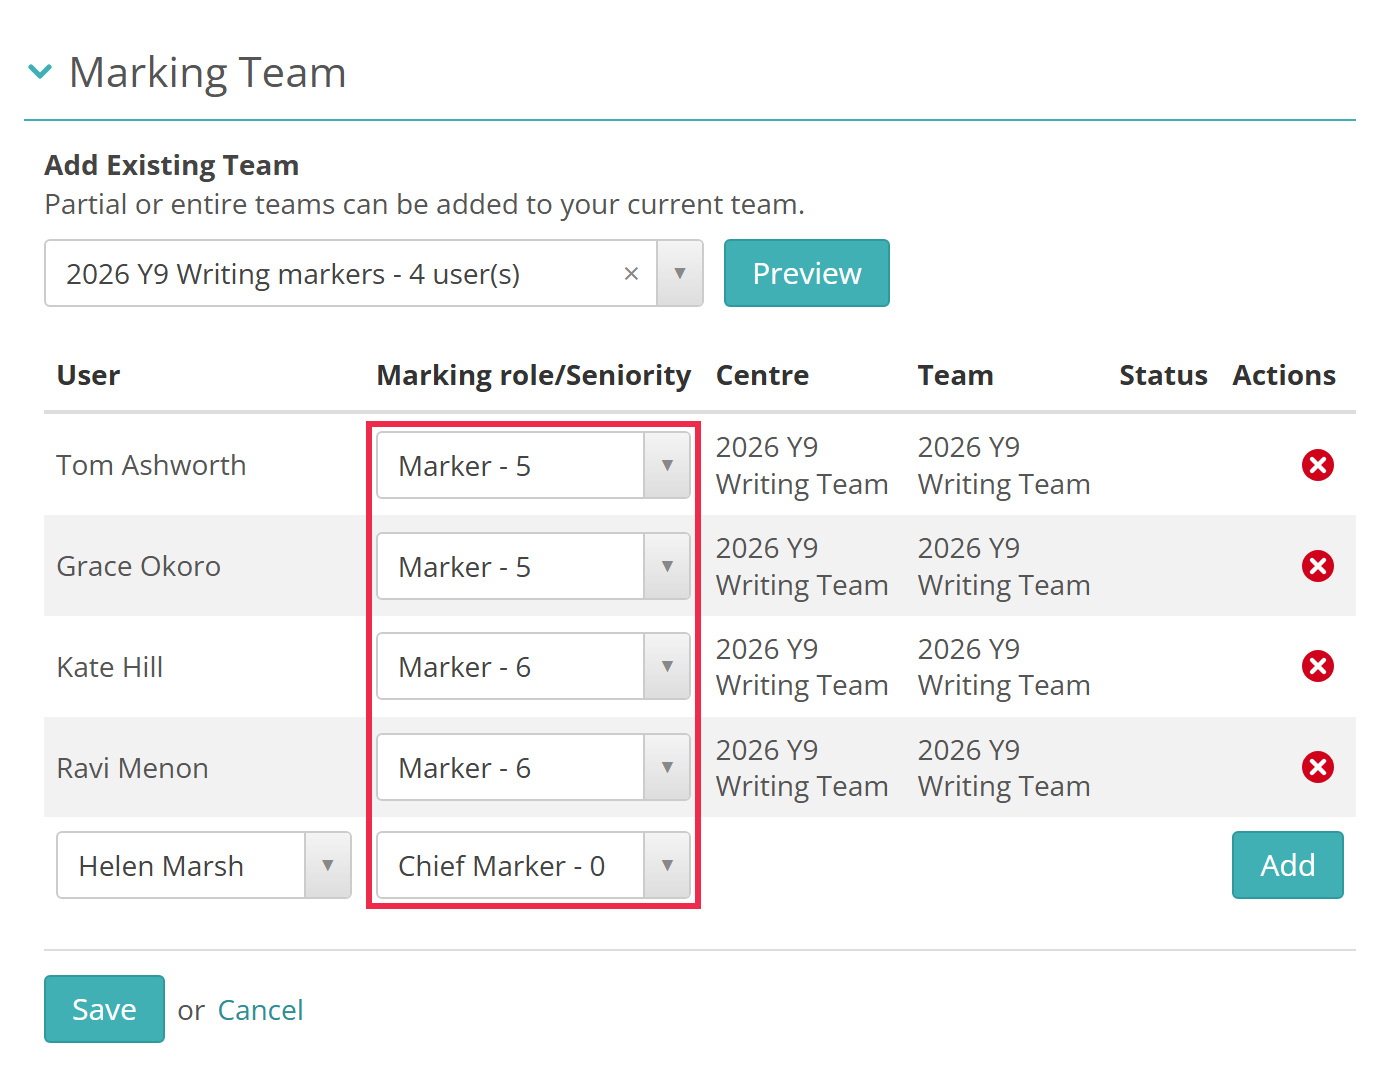
Select Save. Every marker needs a role and seniority before you can save the team.
Add individual markers
Select the pencil icon in the Marking Team section, then use the row at the bottom of the list.
- From Select User, choose the person. The list shows only people whose main role is allowed into marking projects (see Settings).
- Choose their role and seniority.
- Select Add.
- Select Save when finished.
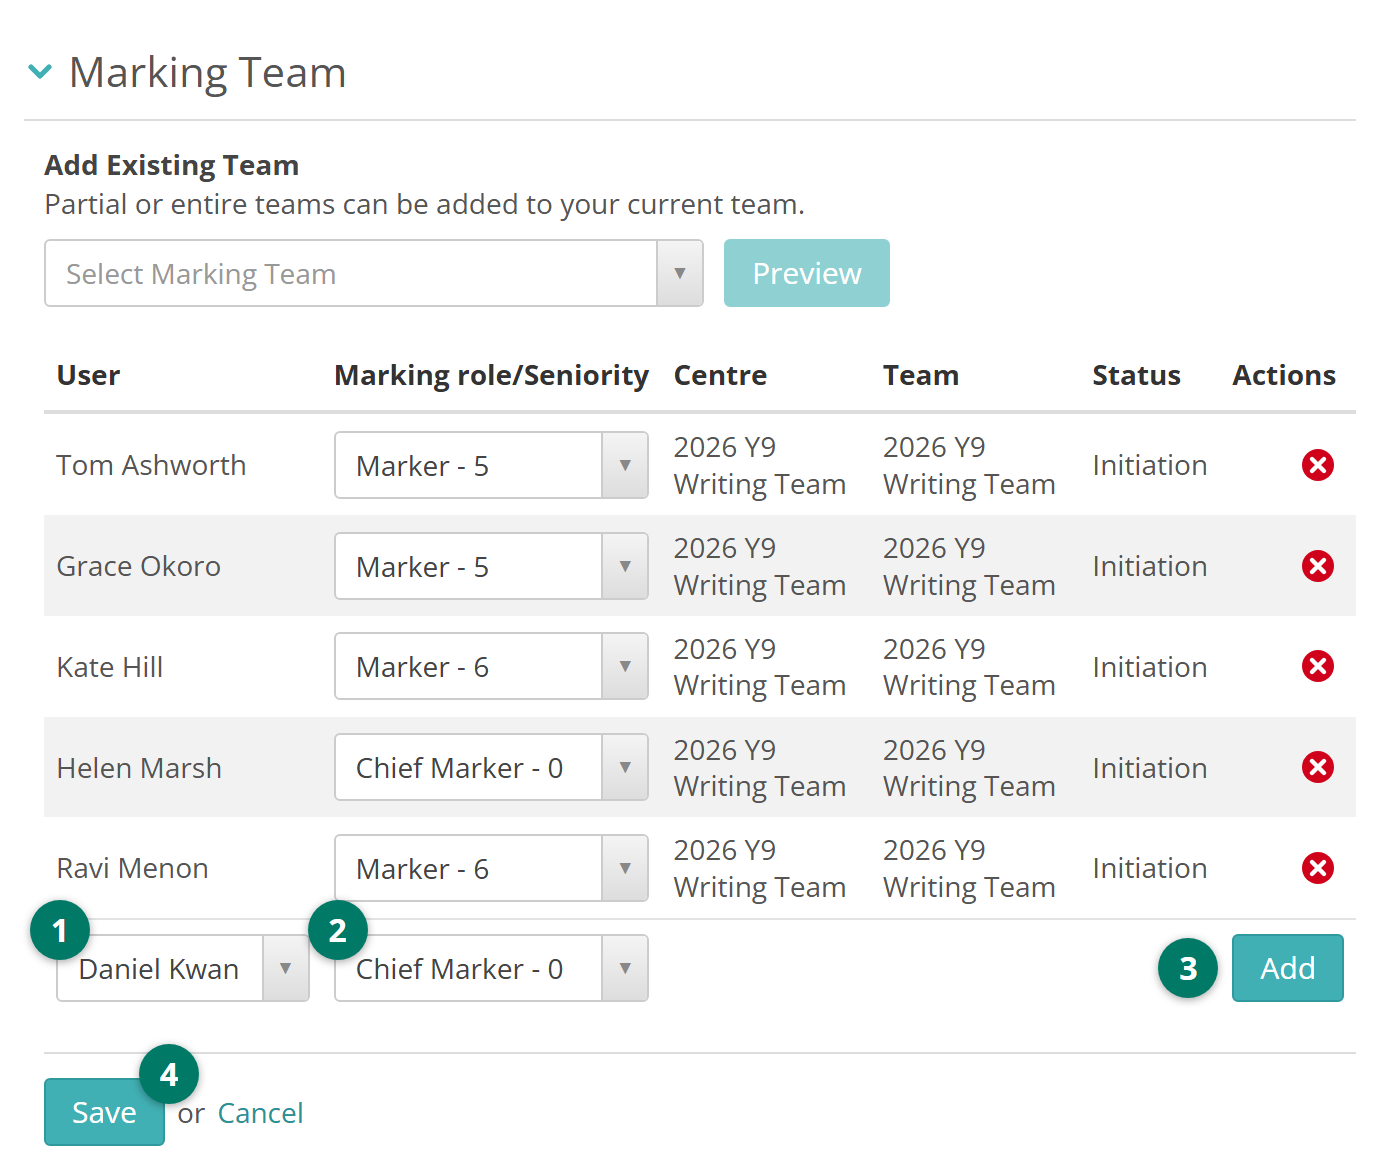
Anyone you choose without selecting Add isn't added to the team.
Remove a marker
Select the pencil icon, then select the red cross in the marker's row. Confirm, then select Save. A marker who has already marked responses shows a lock instead, and stays on the team.
Allocate items to markers
On an enrolment-based project, every marker you add can mark every item in the project's Questions section. To limit a marker to some items, change their work allocation. You can do this until the project is closed or cancelled.
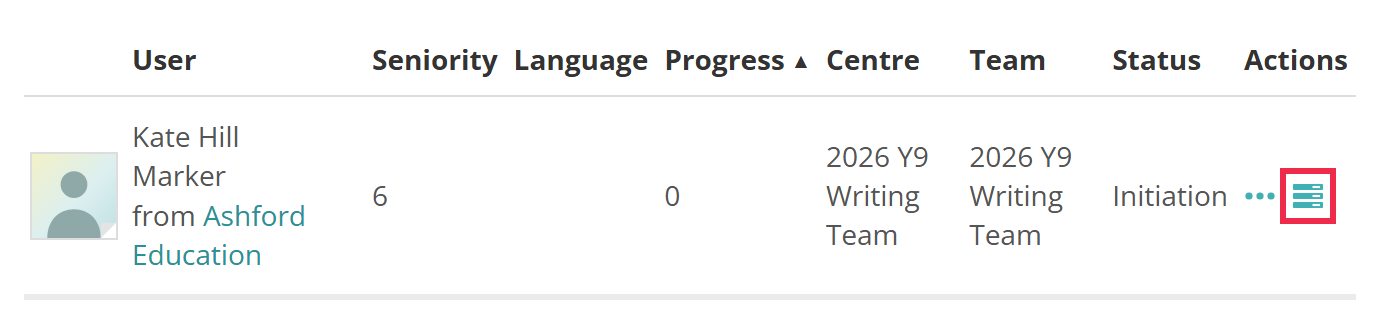
In the team list, select the work allocation icon  in the marker's row. Their work allocation opens, listing the items they can mark.
To remove an item, select the remove icon next to it, then select Really? to confirm.
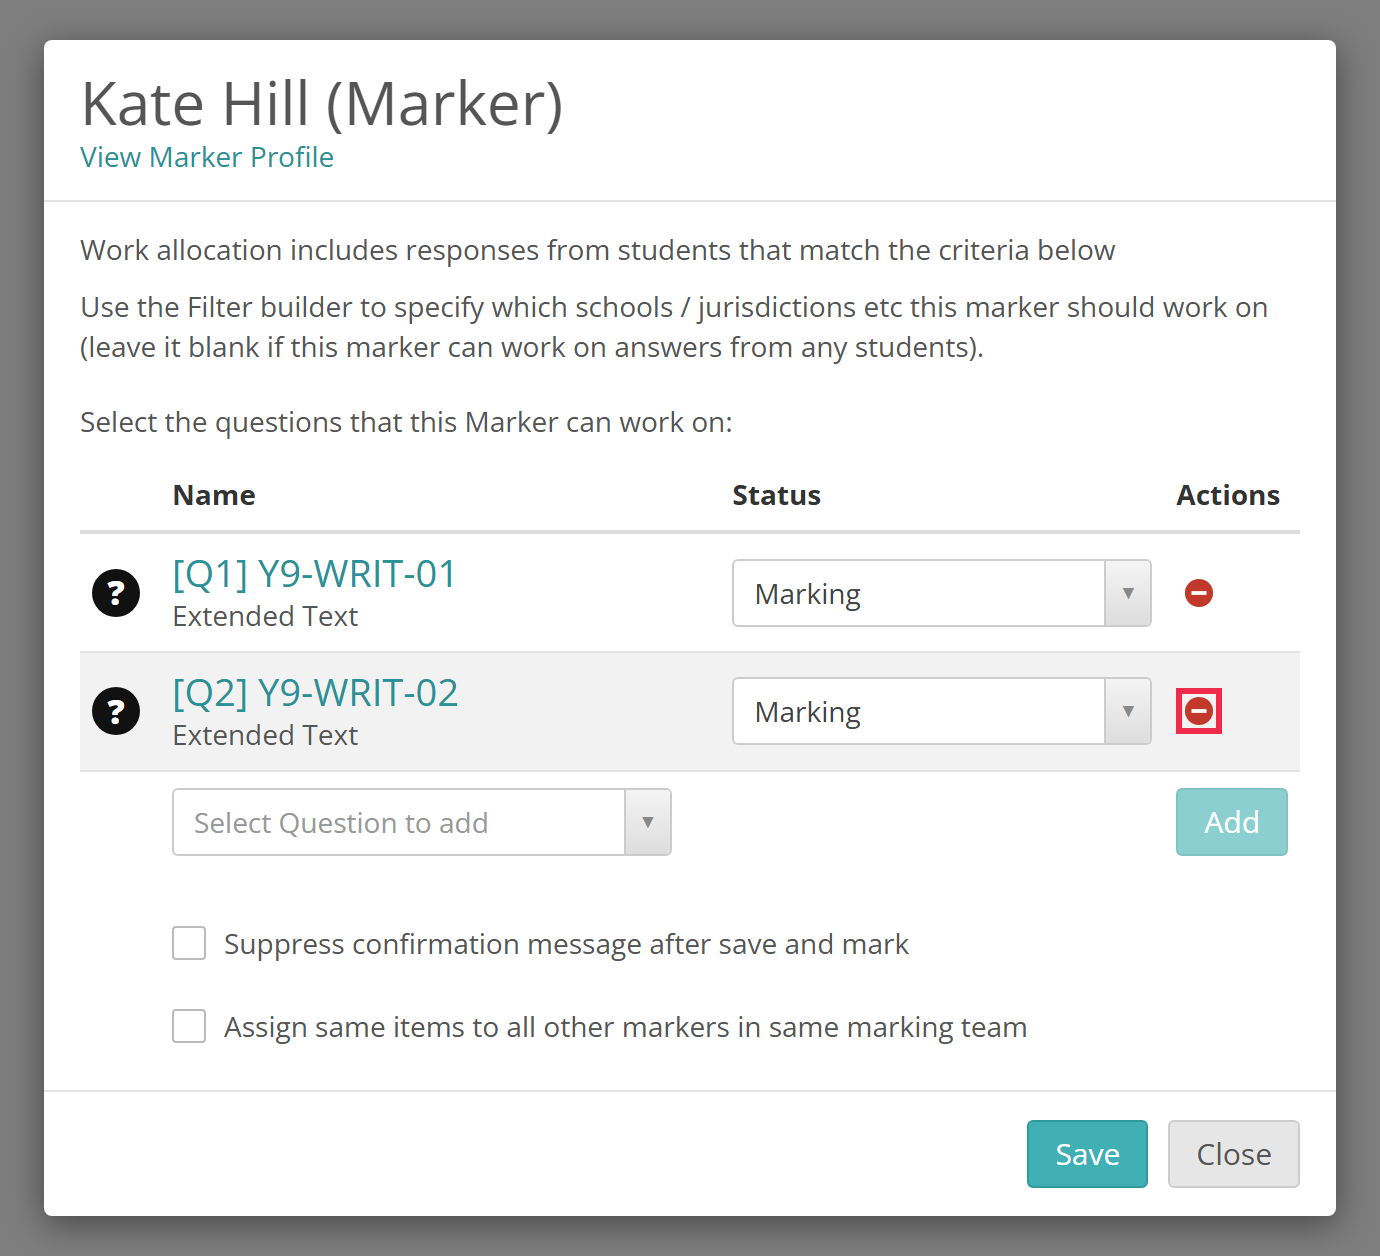
To add an item, choose it from Select Question to add, then select Add. Choosing an item the marker already has shows a message and adds nothing.
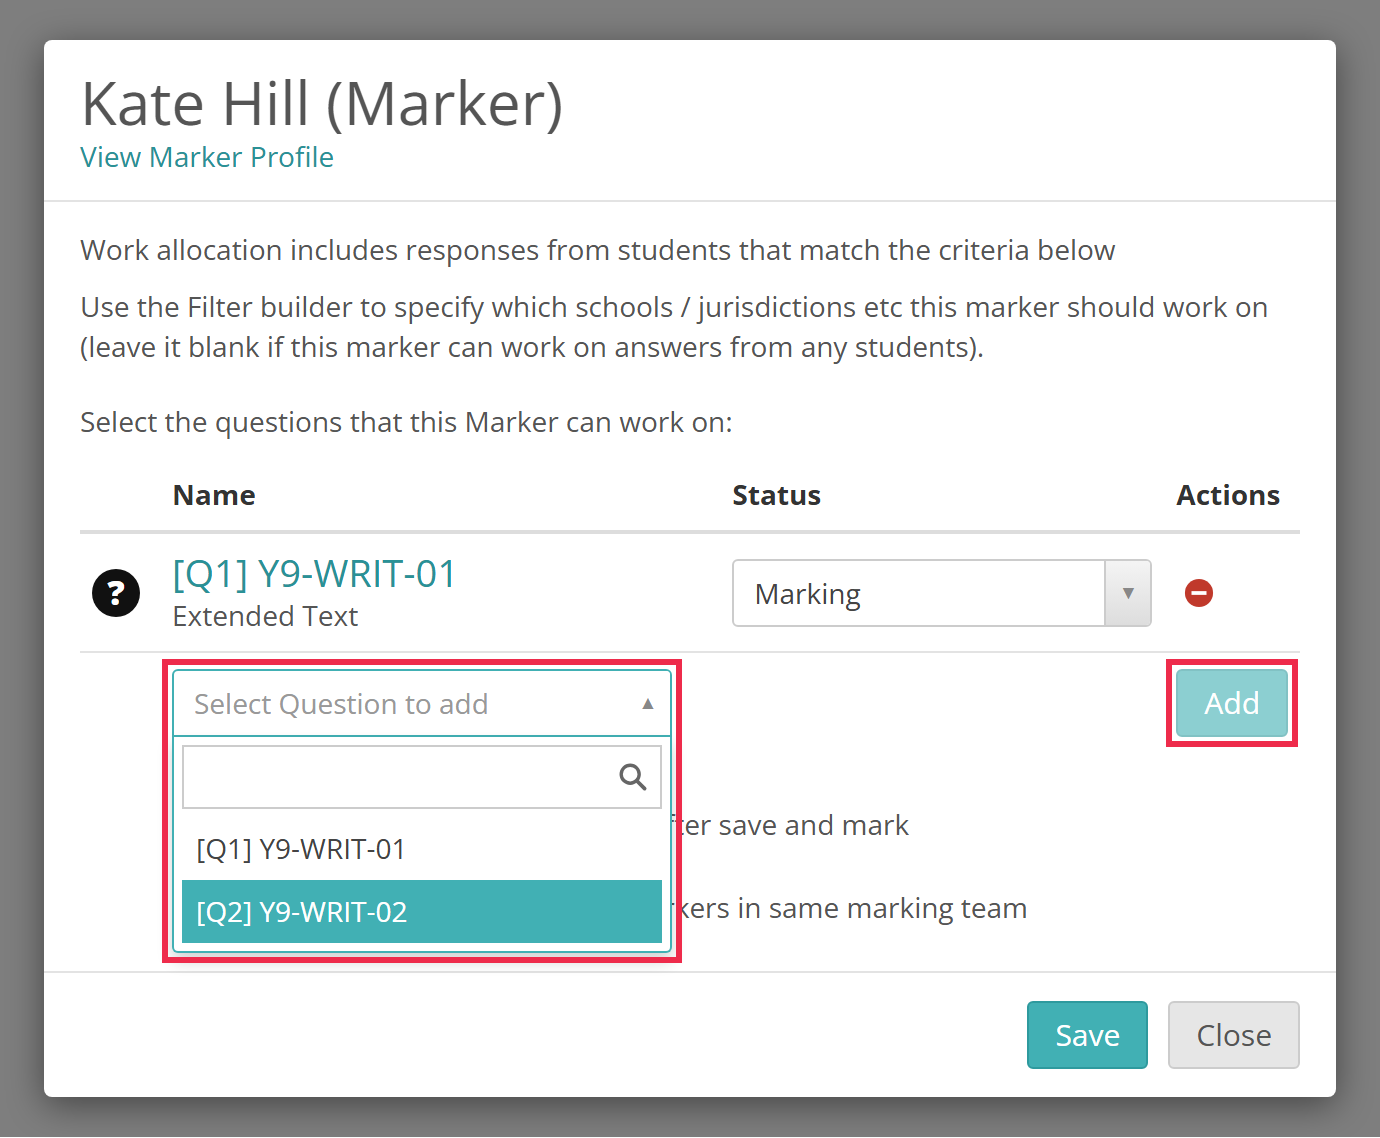
The window has two more options:
- Suppress confirmation message after save and mark — stops the prompts this marker sees when they save a score, such as the grace period reminder.
- Assign same items to all other markers in same marking team — when you save, also gives these items to everyone else in the marker's marking team. It doesn't take away items they already have.
Select Save when you're done.
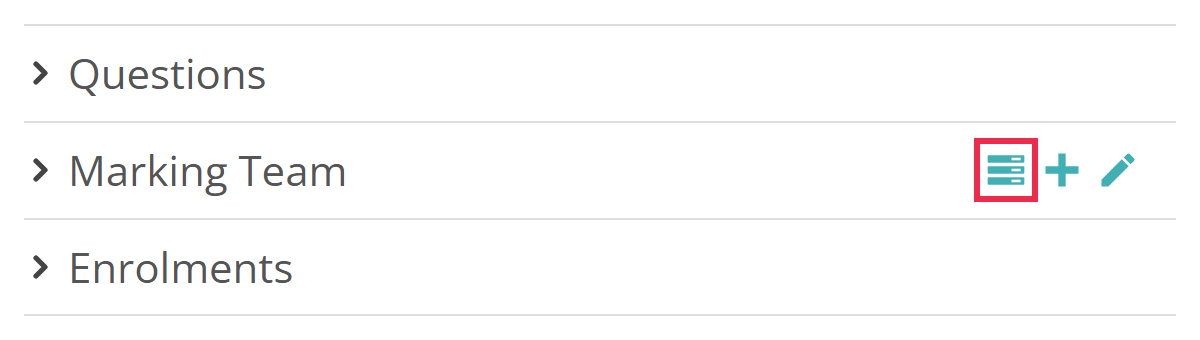
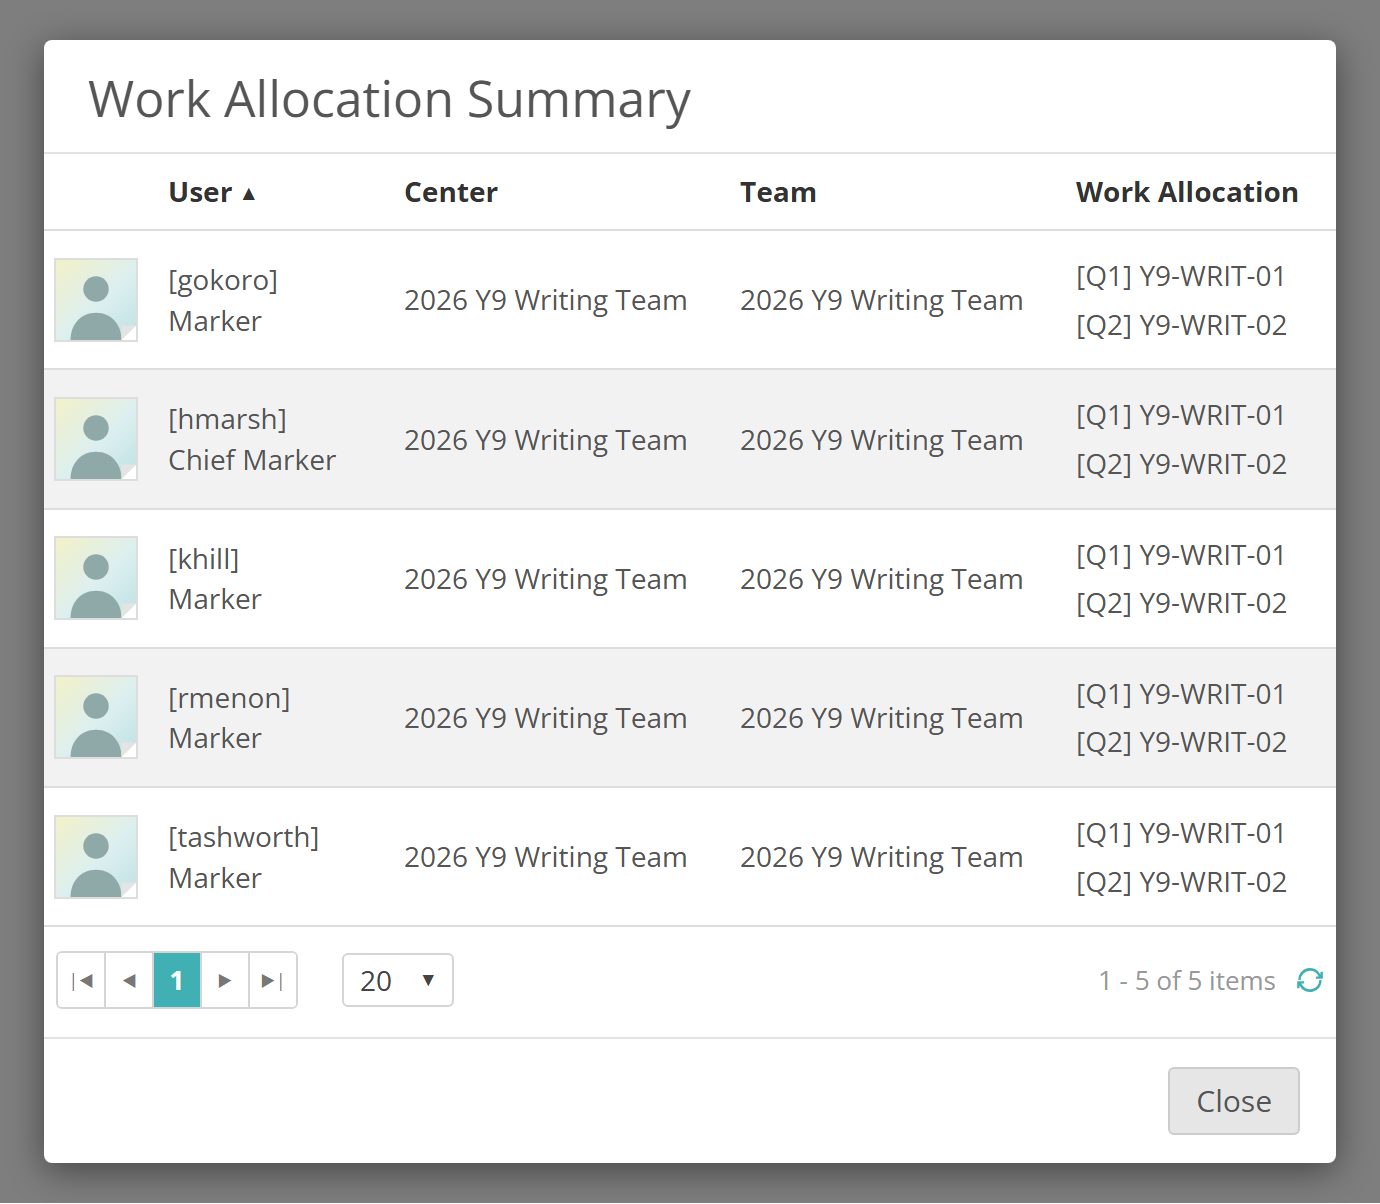
To see every marker's items at once, select the work allocation summary icon on the Marking Team heading.
The Work Allocation Summary window lists each marker's username and role, their centre and team, and their items.
Team responsibilities
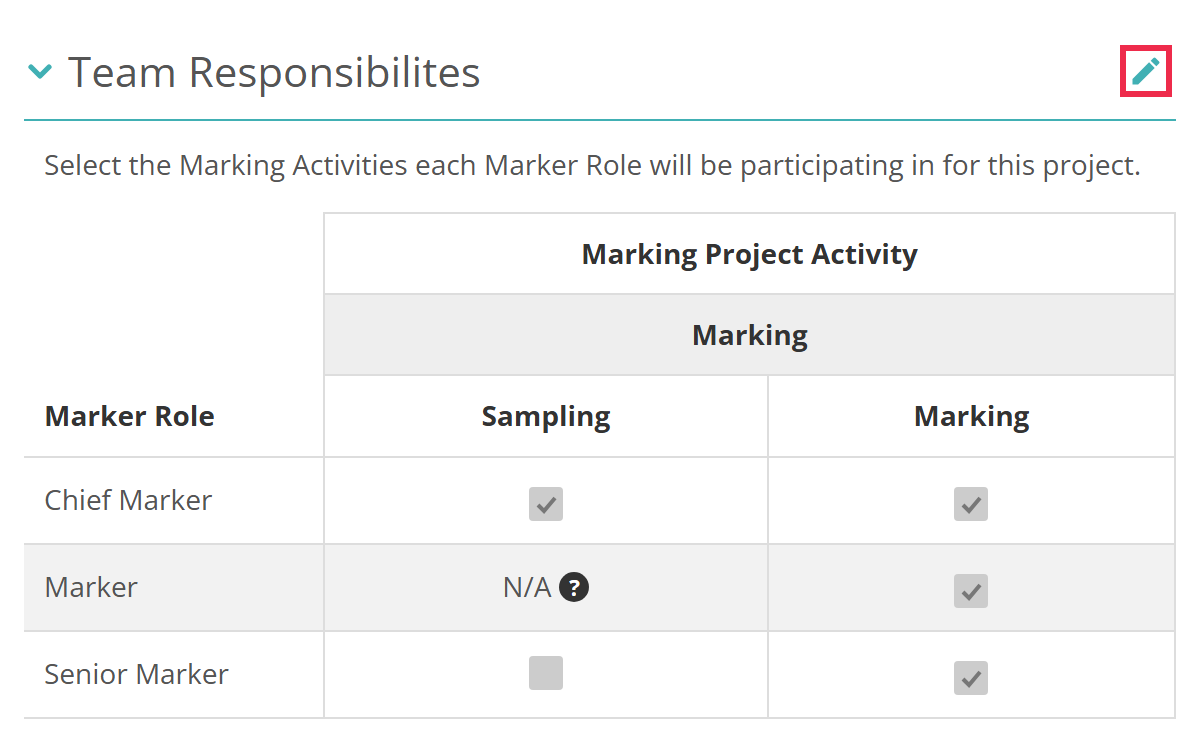
The team responsibilities grid sets which marking activities each marker role takes part in on this project. It sits in the Marking Team section, under the team list, and is spelt Team Responsibilites on screen. On enrolment-based projects it appears only when your site has Enable Marking Activity Settings Section turned on.
Each row is a marker role. Each column is an activity: Sampling and Marking under Marking, plus the standardisation phases and targeted back marking when the project uses them. N/A means the role doesn't have permission for that activity. Role permissions are set at Settings > Roles.
To change it, select the pencil icon on Team Responsibilites, tick or clear the boxes, then select Save.
Settings
Administrators can configure these settings at Marking > Marking Extended Settings.
Enable Marking Team Settings Section, in Marking Project Settings > Enrolment Based Marking Project Section Settings — shows the Marking Team section on enrolment-based projects. On by default.
Enable Marking Activity Settings Section, in the same group — shows Team Responsibilites inside the Marking Team section on enrolment-based projects. Off by default.
In Team Roles:
- The Seniority and Role table — the roles you can choose in a project. A role that isn't in the table doesn't appear in a project's role list.
- Role Seniority Mode — Custom lets you choose role and seniority separately in each project. Automatic offers only the pairs in that table, in one Marking role/Seniority list.
- Group Type for Marking Team — the group type Add Existing Team lists groups from.
- Roles allowed into Marking Project — the main roles a person needs before they can be added to a marking team.
Team Responsibilites > Enrolment Based Projects — the team responsibilities new enrolment-based projects start with.
Permission to edit the marking team and to change a marker's work allocation is set per role at Settings > Roles.